I will mention about installing Primary Domain Controller (PDC) in Windows Server 2019, the latest version server operating system of Microsoft in this essay. I would like to mention about what a Domain Controller is briefly before starting my essay.
The Domain Controller (DC) is the center of your computer networks and computer systems in your company. In order to establish this center, we install an operating system from the Windows Server family on a machine (physical or virtual) that we call a server computer; After configuring this Server computer as a Domain Controller (DC), it forms the center of your computer systems, and you can manage all your computer systems (including other server computers) at a single point via this Domain Controller (DC).
We can list some of the benefits and advantages of managing the whole system from a single point with the Domain Controller as follows.
● The information of each Object in a domain is stored in Active Directory Database.
● The information of the entire Domain structure is contained within itself thanks to the Global Catalog.
● All user and computer accounts are managed from a single center with Active Directory Users and Computers and each Domain Controller in the Domain environment is replicated with each other and redundancy is provided.
● Responds to all requests from client computers, makes necessary routing and manages logon traffic.
● Logon operations with Active Directory Sites and Services are performed only on the relevant site, ensuring performance thanks to the Additional Domain Controller to be installed on each site,
● Security is ensured by creating security policies within the Domain thanks to Group Policy.
● Host Name-IP, IP-Hostname solutions are made in the domain environment and a more performance communication is provided thanks to DNS Server.
● IP Address management of all computers in the network environment is performed from the central location thanks to DHCP Server.
● You can expand your Forest environment by establishing a Trust Relationship (trust relationship) with other Domains with the help of Active Directory Domains and Trusts.
NOTE 1: We will not be able to provide all of these in a Work Group environment. For this reason, with the Domain Controller installation, you will centralize your management by collecting all your management operations under a single domain roof.
Warning!: Before starting the Primary Domain Controller (PDC) installation process in Windows Server 2019, make sure that your NIC-Network Interface Card is configured with static IP and your Host Name has been changed (although not mandatory).
I would like to show you how to do things like Host Name and static IP address configuration through Powershell before proceeding with Active Directory Domain installation in Windows Server 2019.
Configuration of Host Name and Static IP Address through Powershell
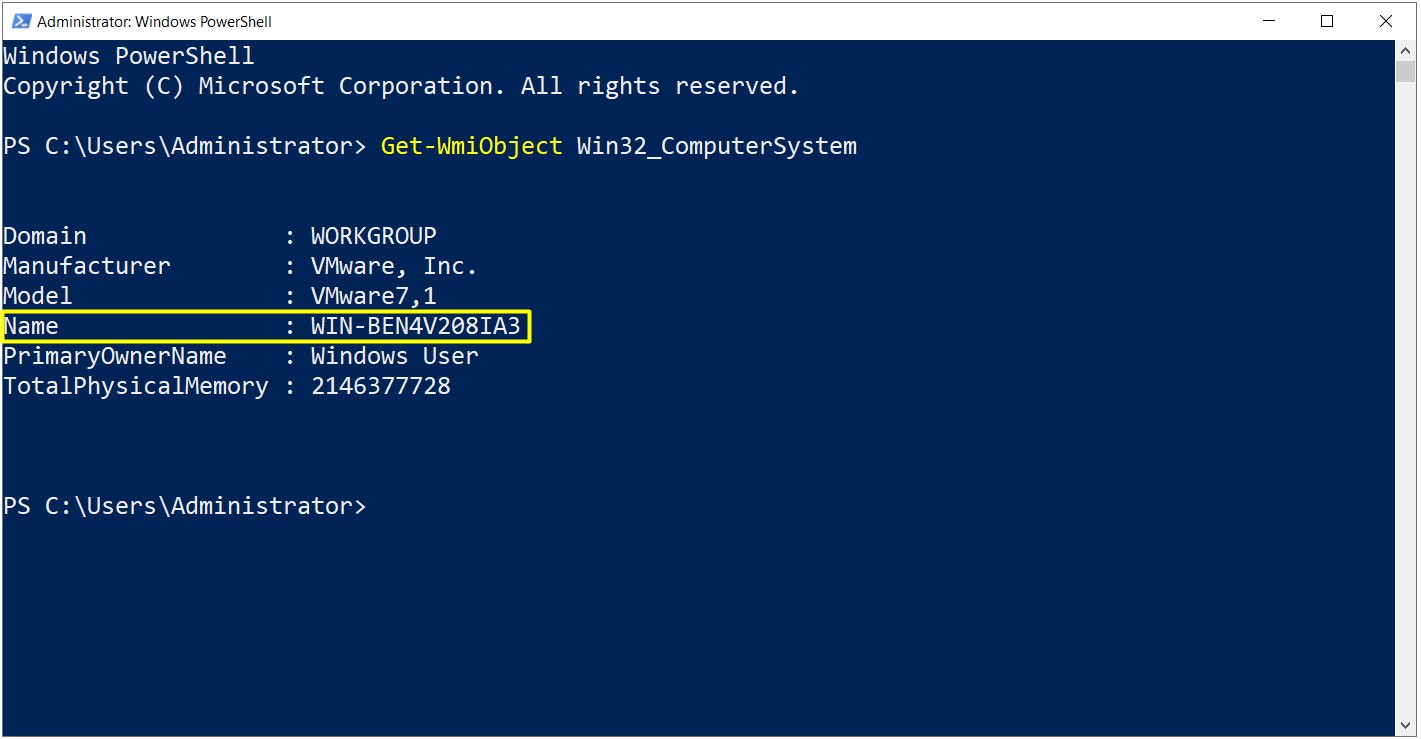
1- First, I am checking the Host Name of my Server with the command of Get-WmiObject Win32_ComputerSystem.
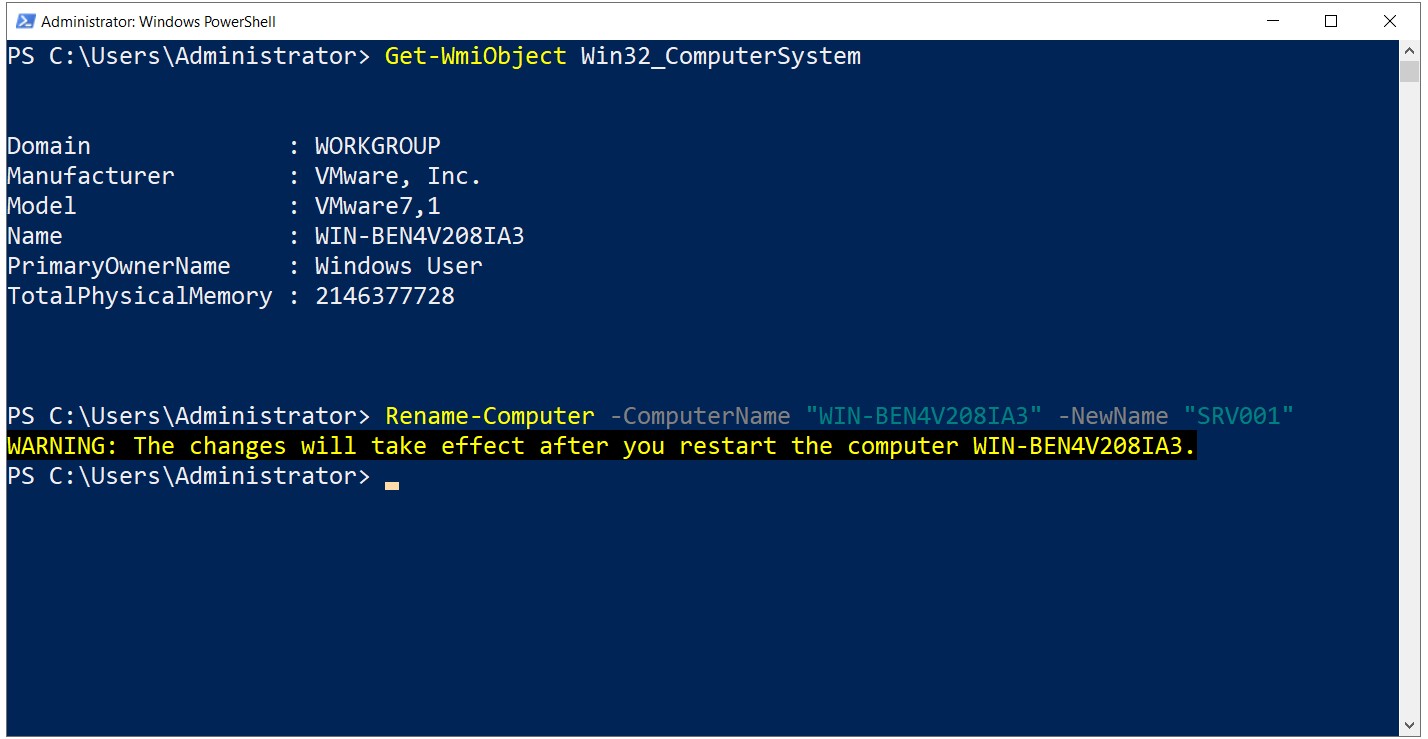
2- I am changing the current Host Name to SRV001 With the following command;
Rename-Computer -ComputerName "WIN-BEN4V208IA3" -NewName "SRV001".
While a Host Name change is not a mandatory action, changing it to a catchy and simpler one will be administratively easier. We are ensuring that the changes are applied by restarting our server once after performing the change process.
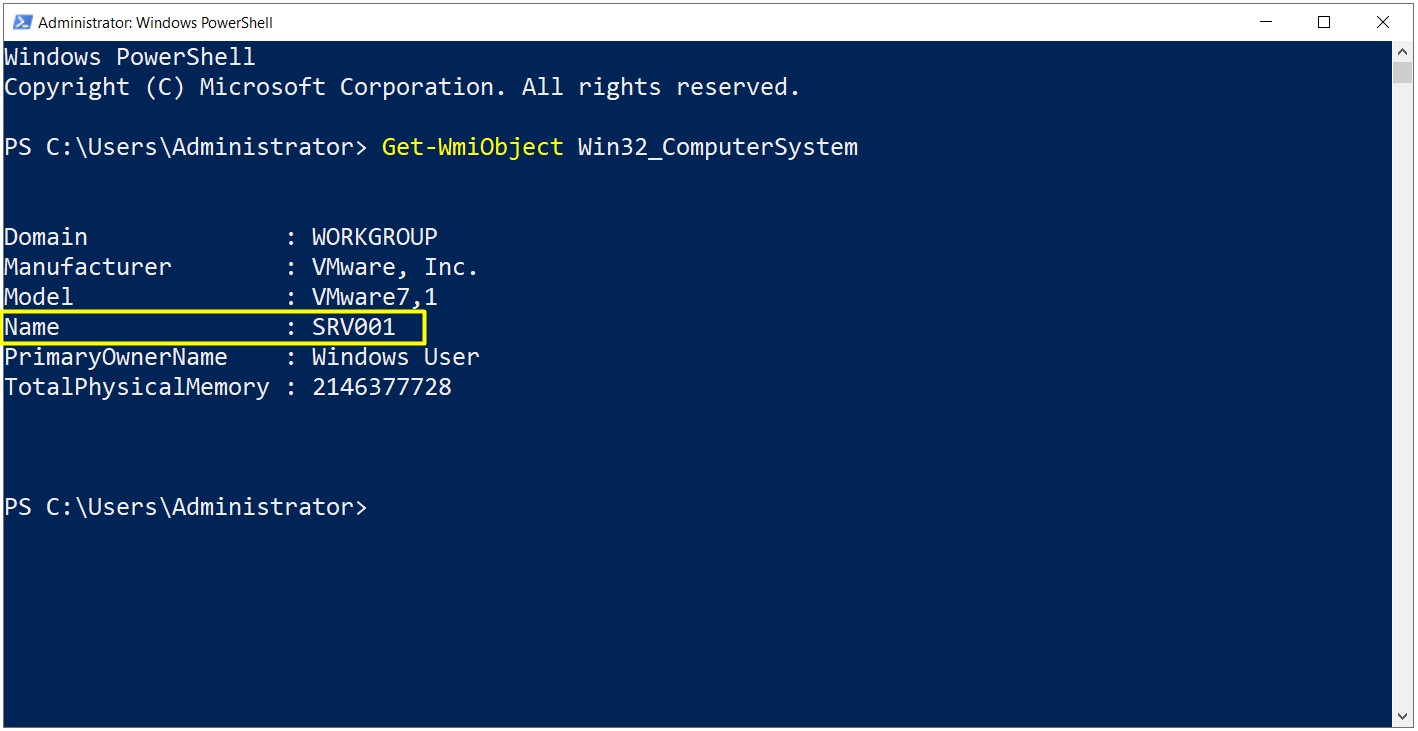
3- We can see that the server Host Name has changed to SRV001 after the restart process.
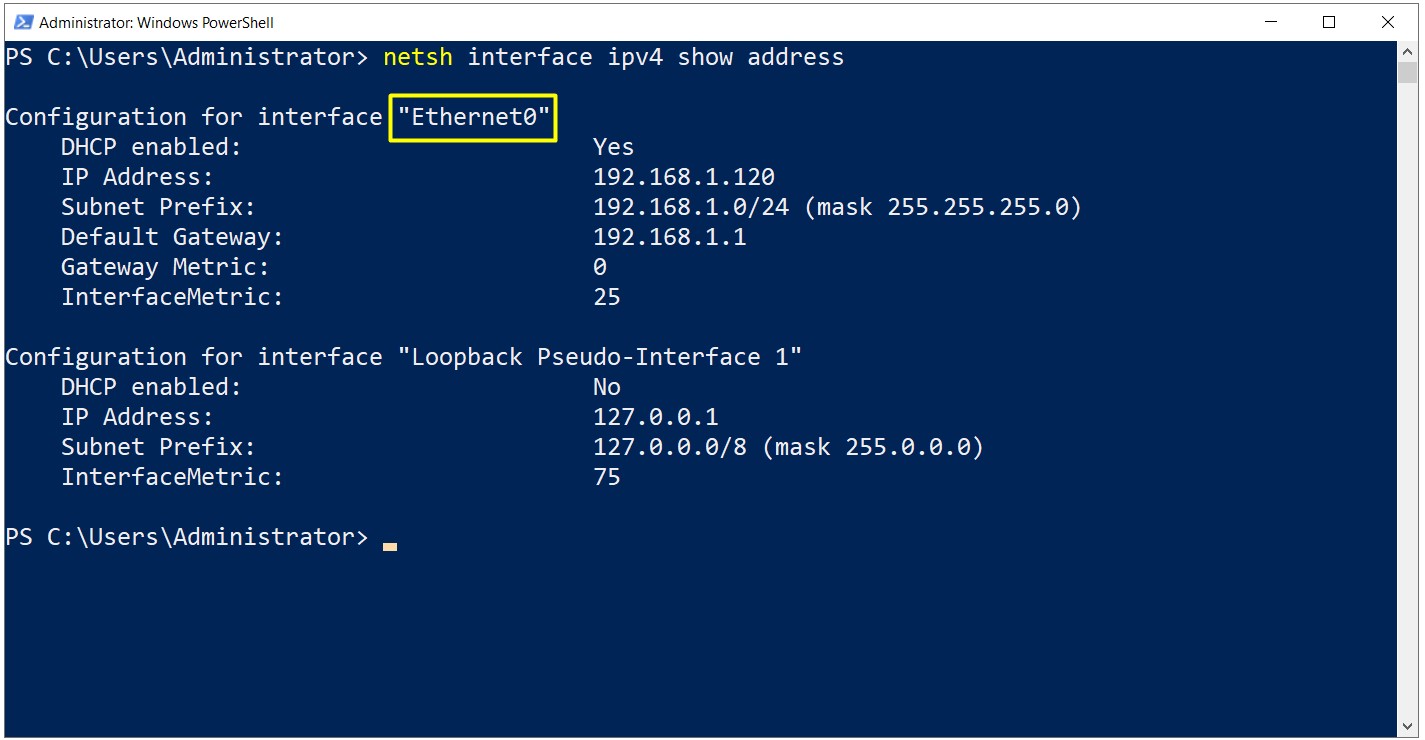
4- The next step will be to set a static IP address for our server. But first, I am reviewing the Network Interface Cards installed on my server with the help of the netsh interface ipv4 show address command. The NIC installed on my server appears as Ethernet0.
5- If you wish, you can also change the name of the installed Network Interface Card by using the
|
Rename-NetAdapter -Name "Ethernet0" -NewName "LAN_NIC" |
command.
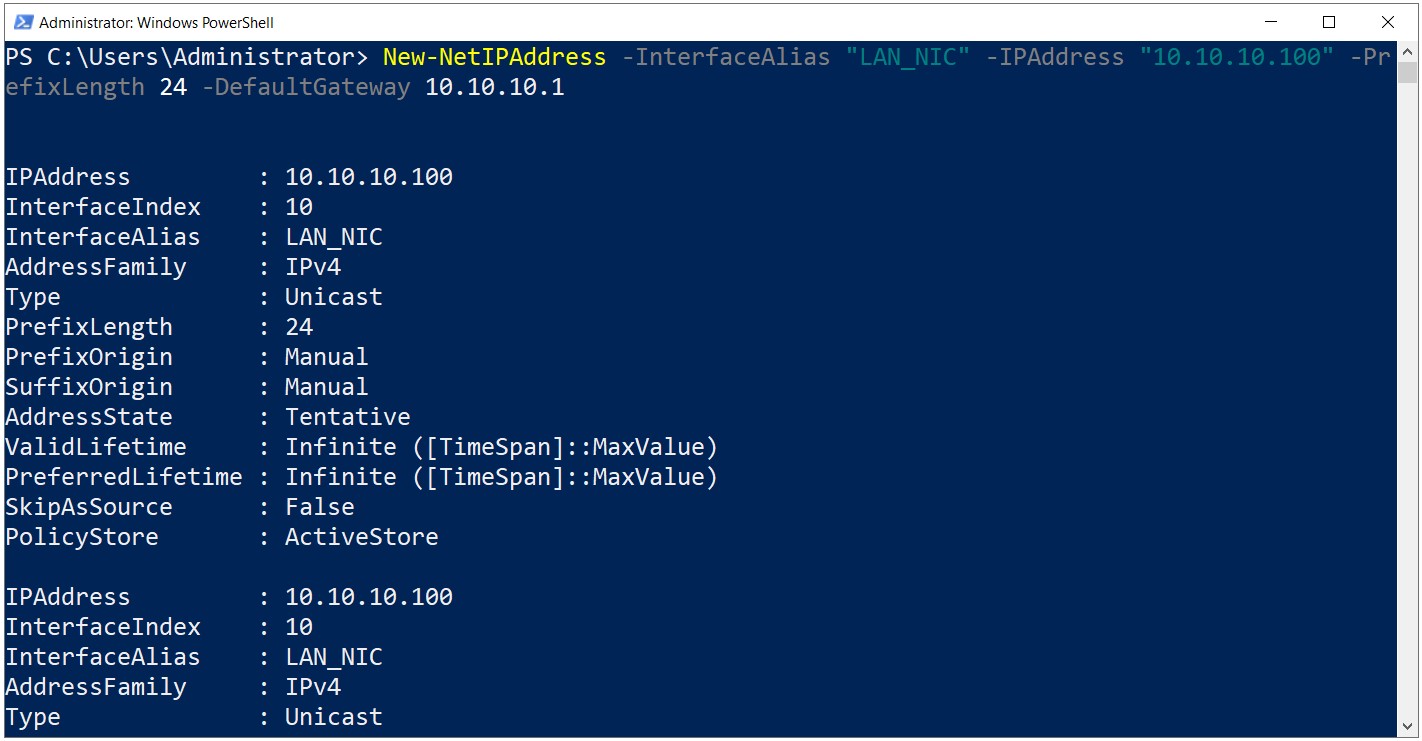
6- It is sufficient to use the
|
New-NetIPAddress –InterfaceAlias “LAN_NIC” –IPAddress “10.10.10.100” –PrefixLength 24 -DefaultGateway 10.10.10.1 |
command to set a static IP address for our server.
I have made the definitions for the following with the help of this command;
● Static IP Address
● Subnet Mask
● Default Gateway
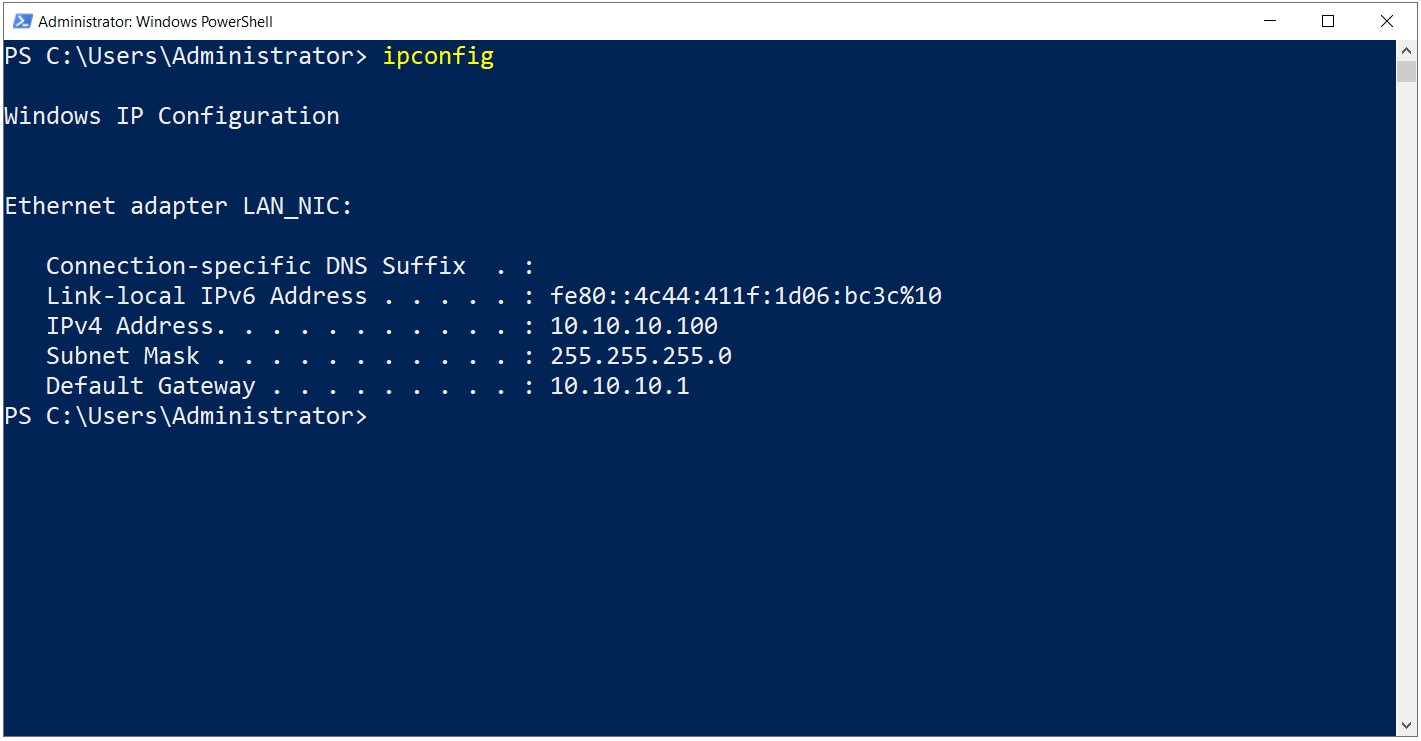
6.1- You can also view the definitions with the help of ipconfig command.
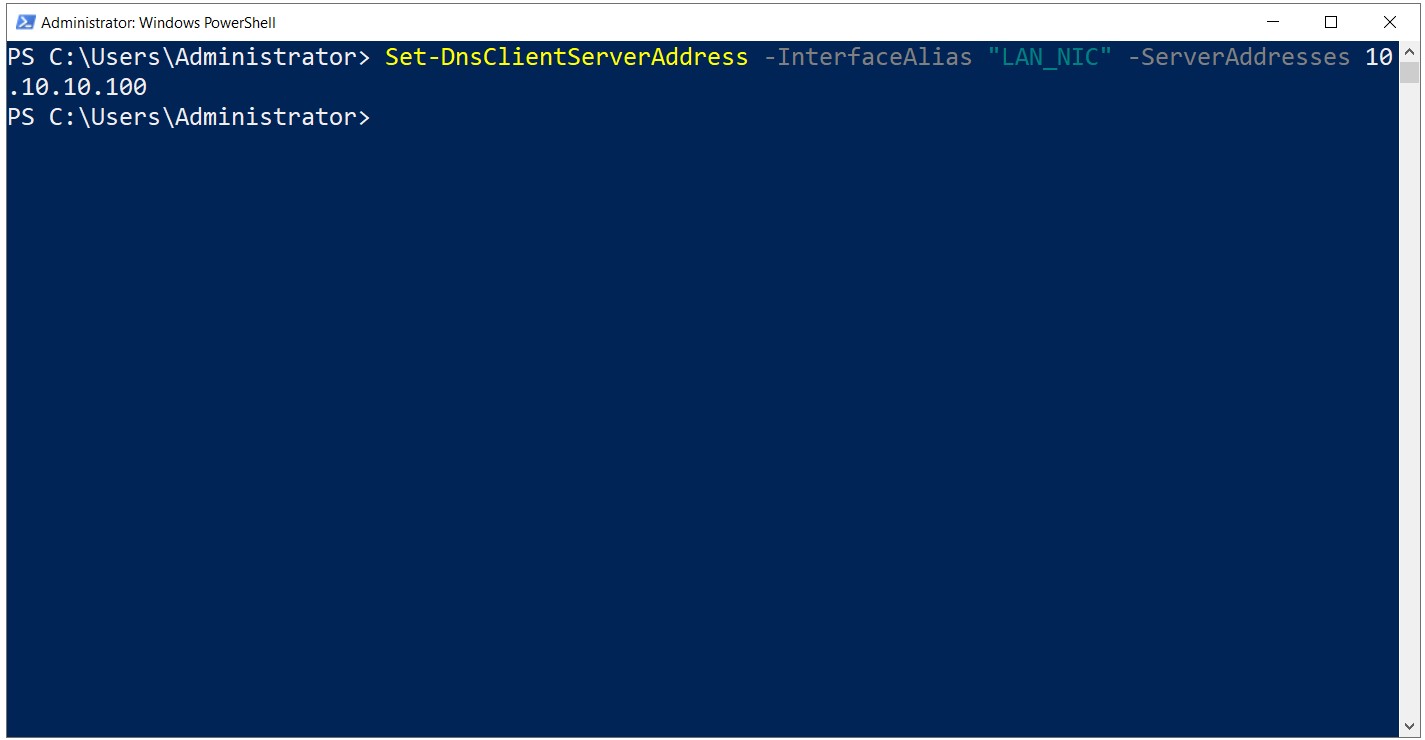
7- It is time to set a static DNS IP address after setting a static IP address. It is enough to use the command of
|
Set-DnsClientServerAddress -InterfaceAlias “LAN_NIC” -ServerAddresses 10.10.10.100 |
for this process.
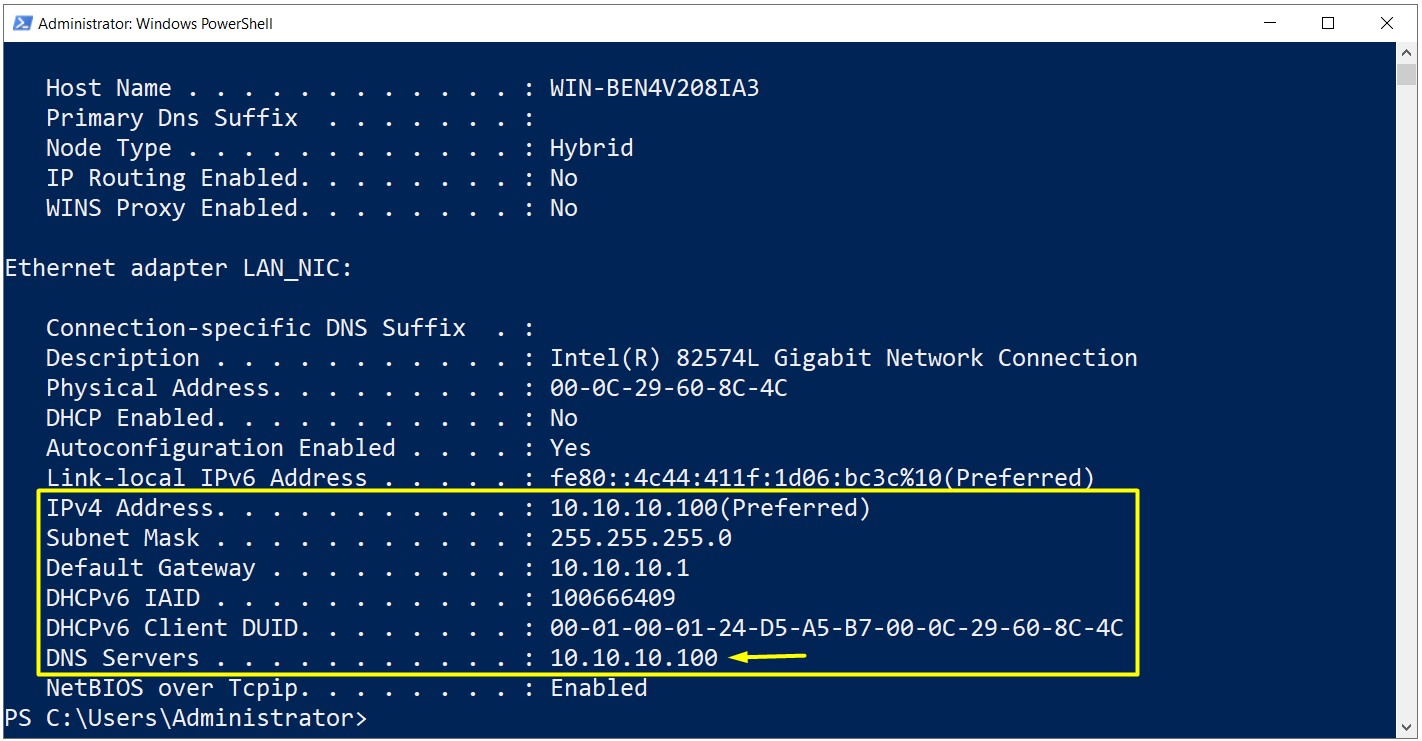
7.1- You can also view the definitions with the help of ipconfig / all command.
8- It is time to install the Active Directory Domain Services role after completing all our pre-configuration settings such as changing Host Name, setting static IP addresses of the server itself and the DNS server
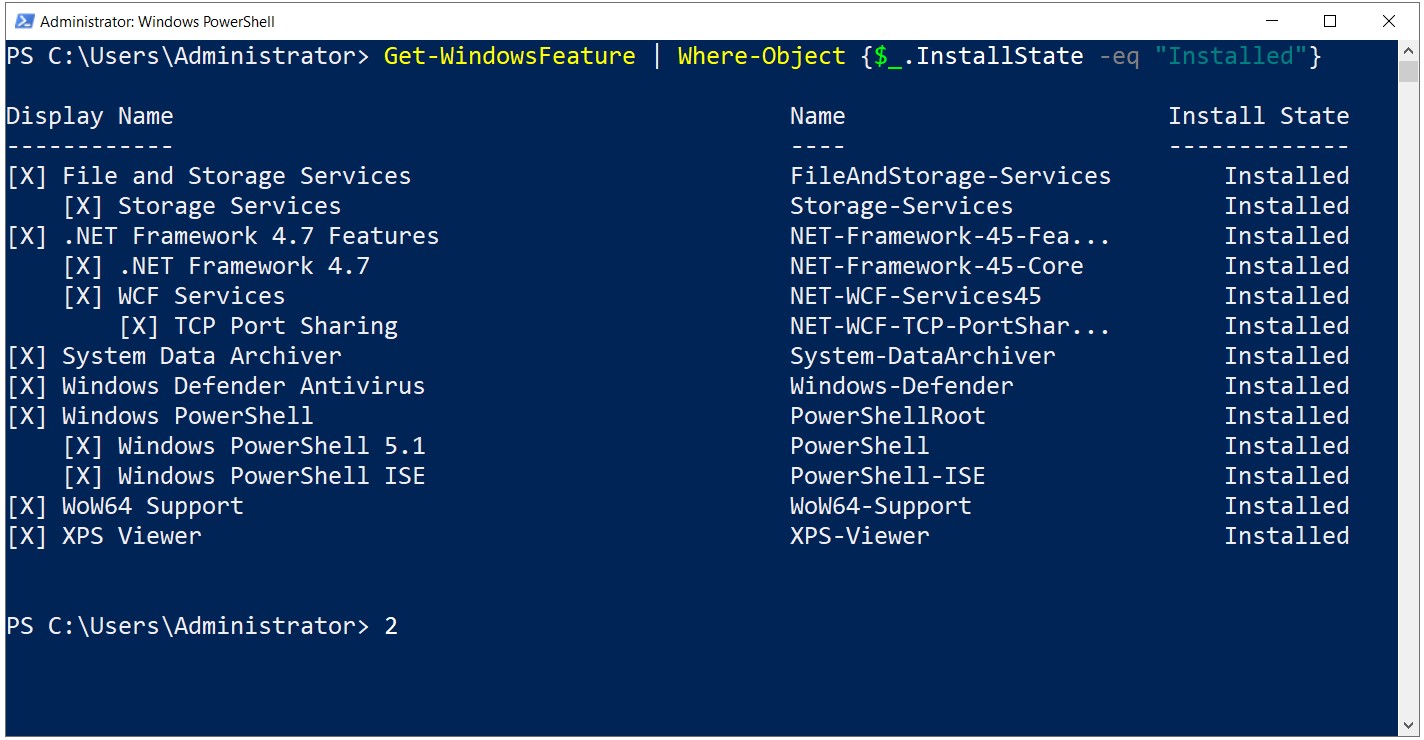
8.1- I am checking out the list of all installed roles and services on my server before installing the Active Directory Domain Services role.
|
Get-WindowsFeature | Where-Object {$_.InstallState -eq “Installed”} |
It is time to perform the action of seting up Active Directory Domain in Windows Server 2019 after all these pre-configuration preparations are completed.
Domain Controller Installation process consists of two stages.
1. Active Directory Domain Services Installation.
2. Promoting to Active Directory Domain Controller.
1. Installation of Active Directory Domain Services
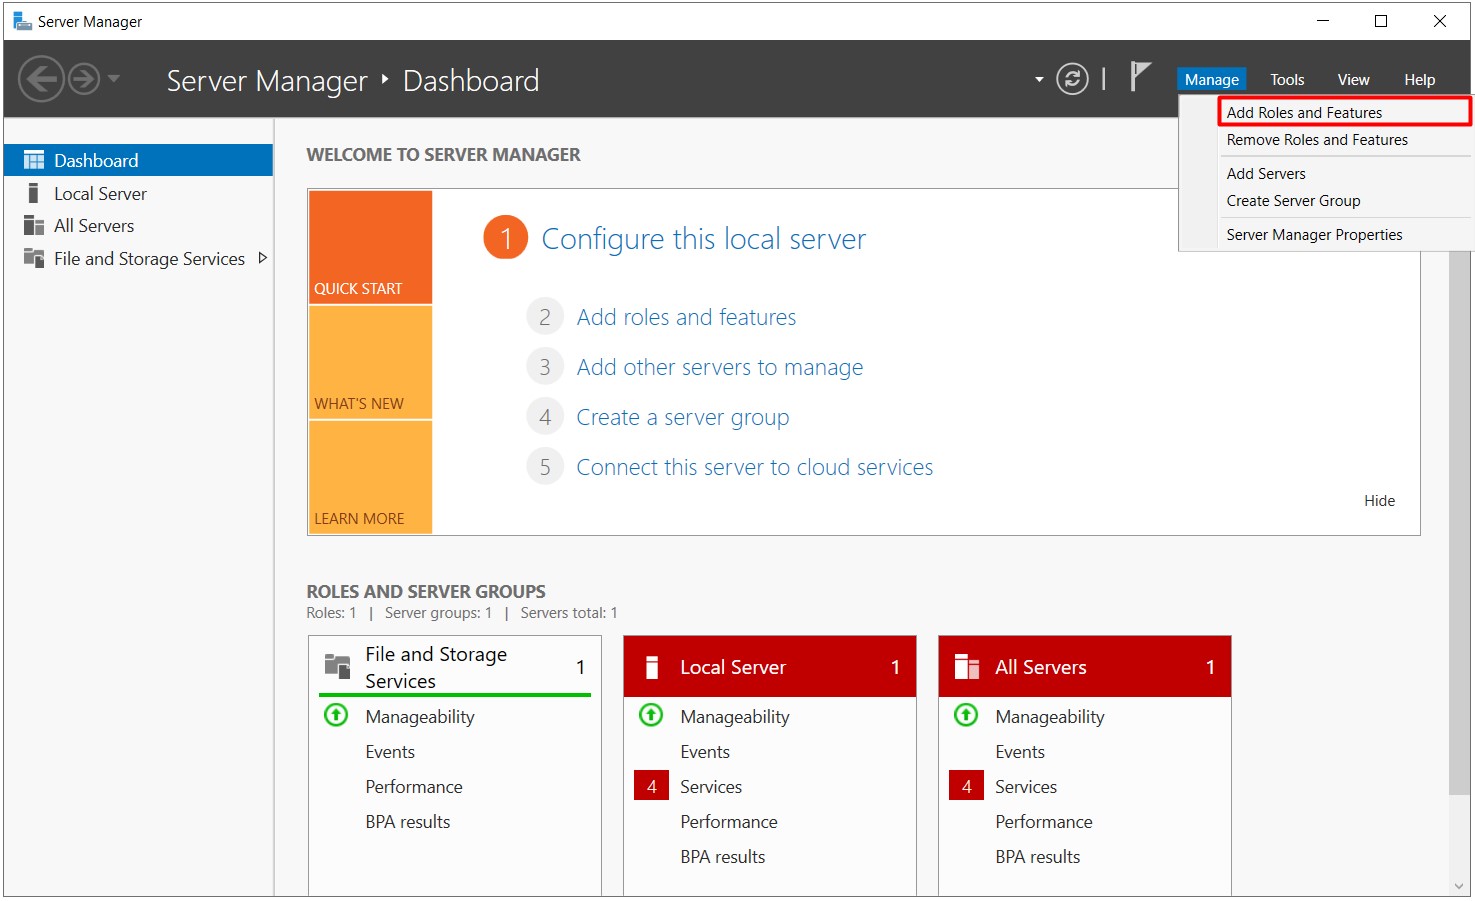
1.1- I am running the Server Manager and selecting the Add roles and features option and pressing on the Add Roles and Features option from the Manage menu.
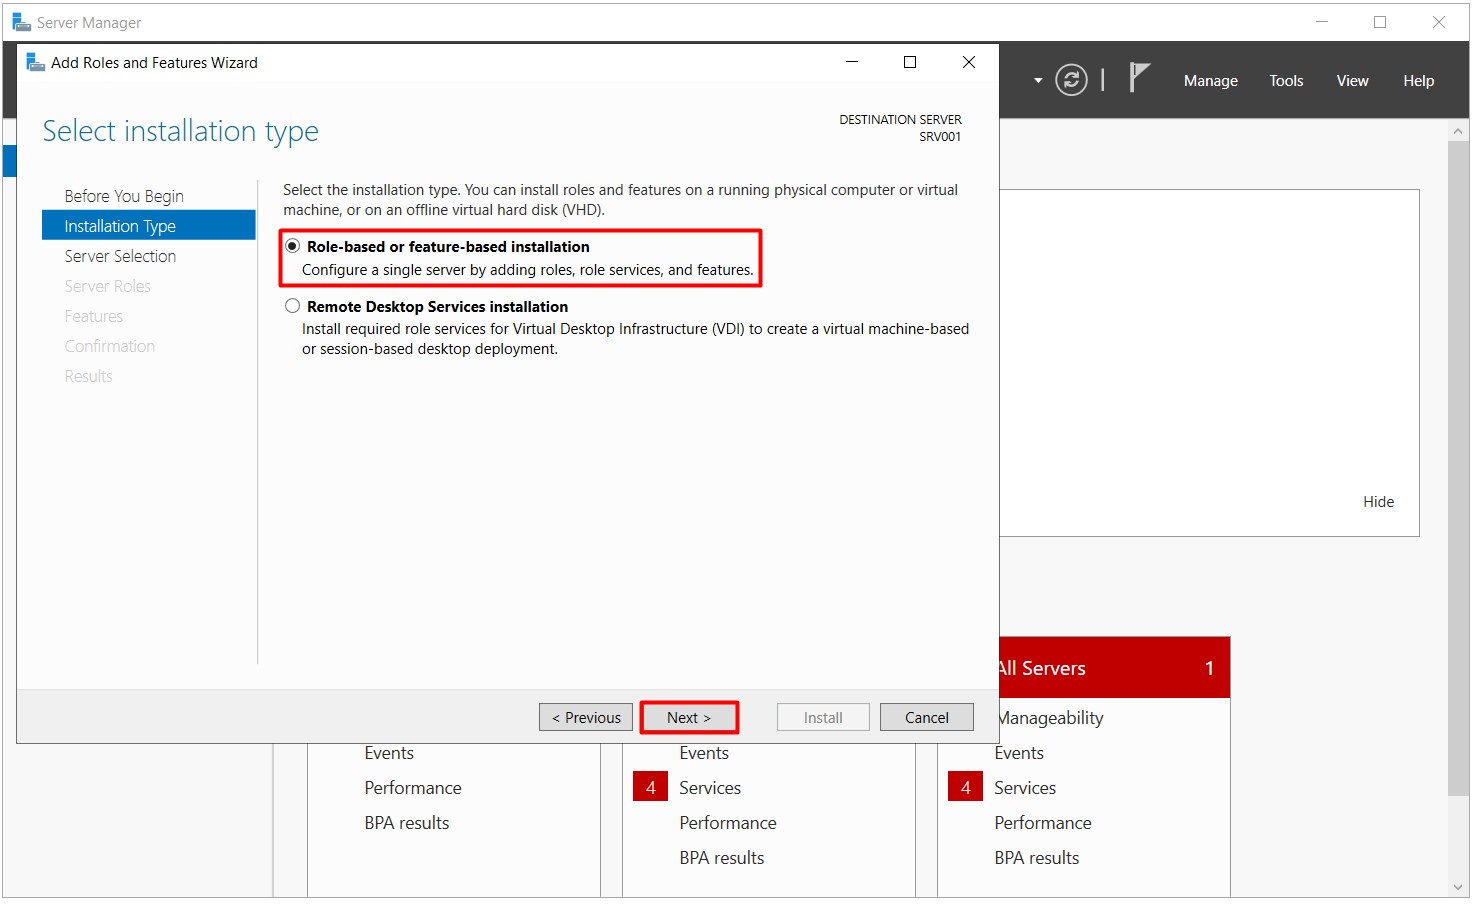
1.2- I am choosing the Role-based or fature-based installation option in the Installation Type field, and proceeding by clicking on the Next button to continue the installation action of Active Directory Domain Controller in Windows Server 2019.
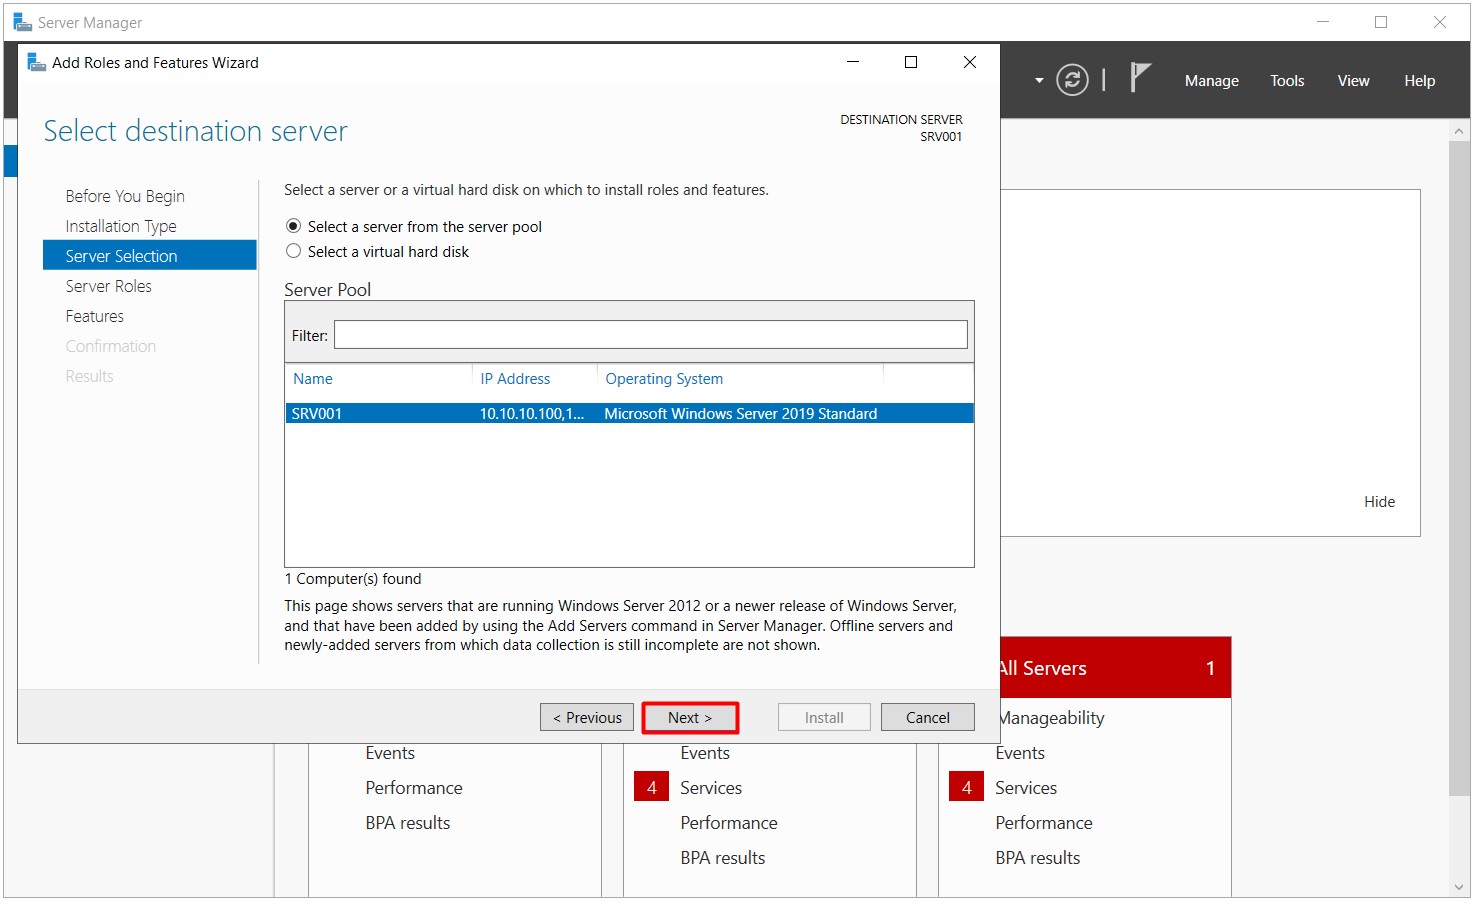
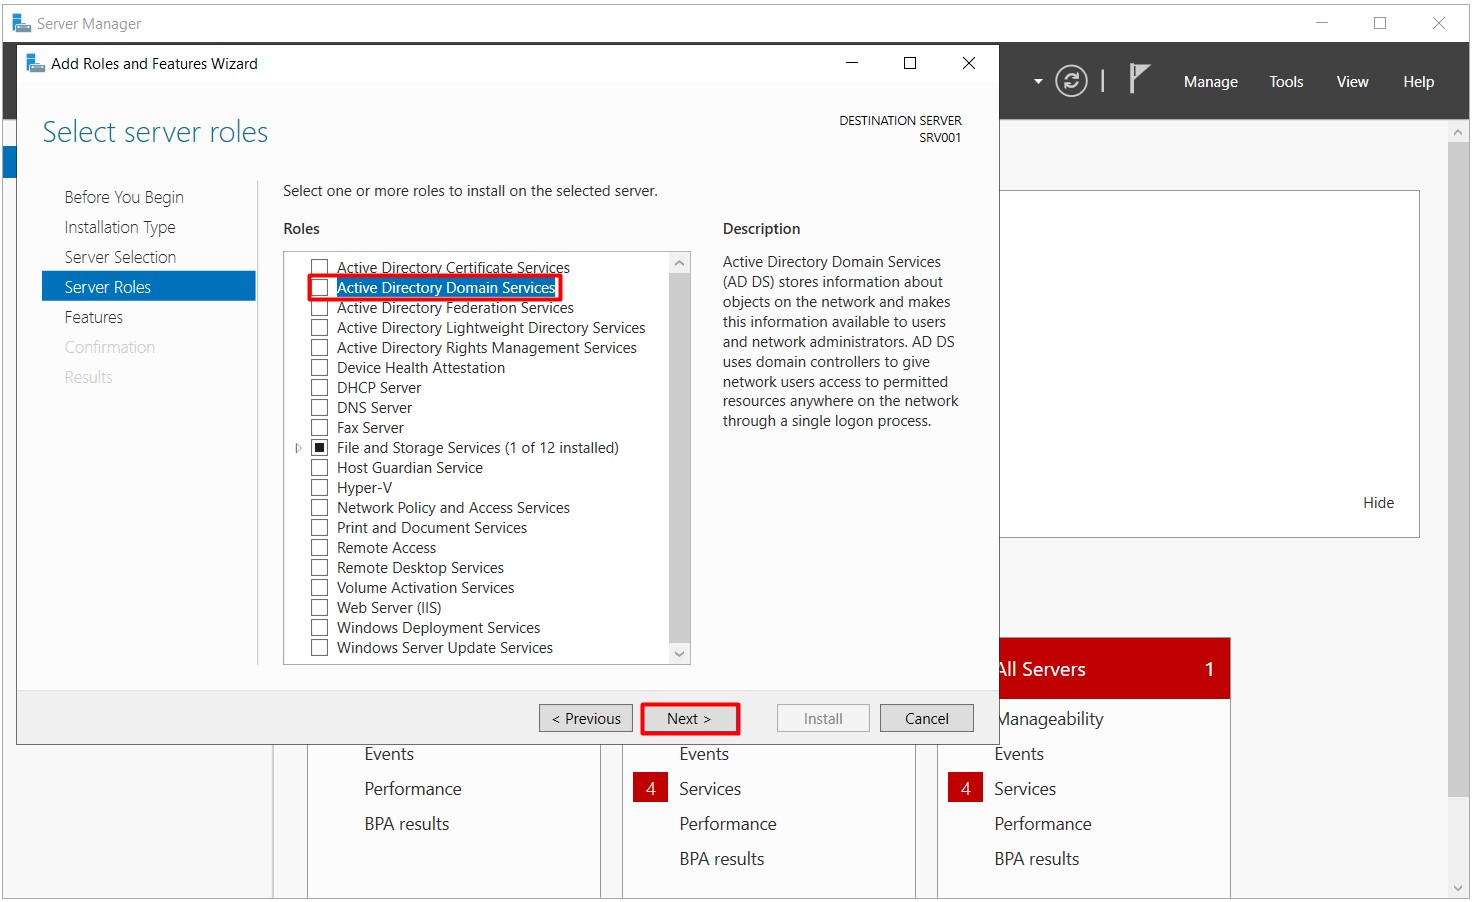
1.3- I am selecting Active Directory Domain Services in the Server Roles field after selecting to which server I will perform the installation of Active Directory in the Server Selection field.
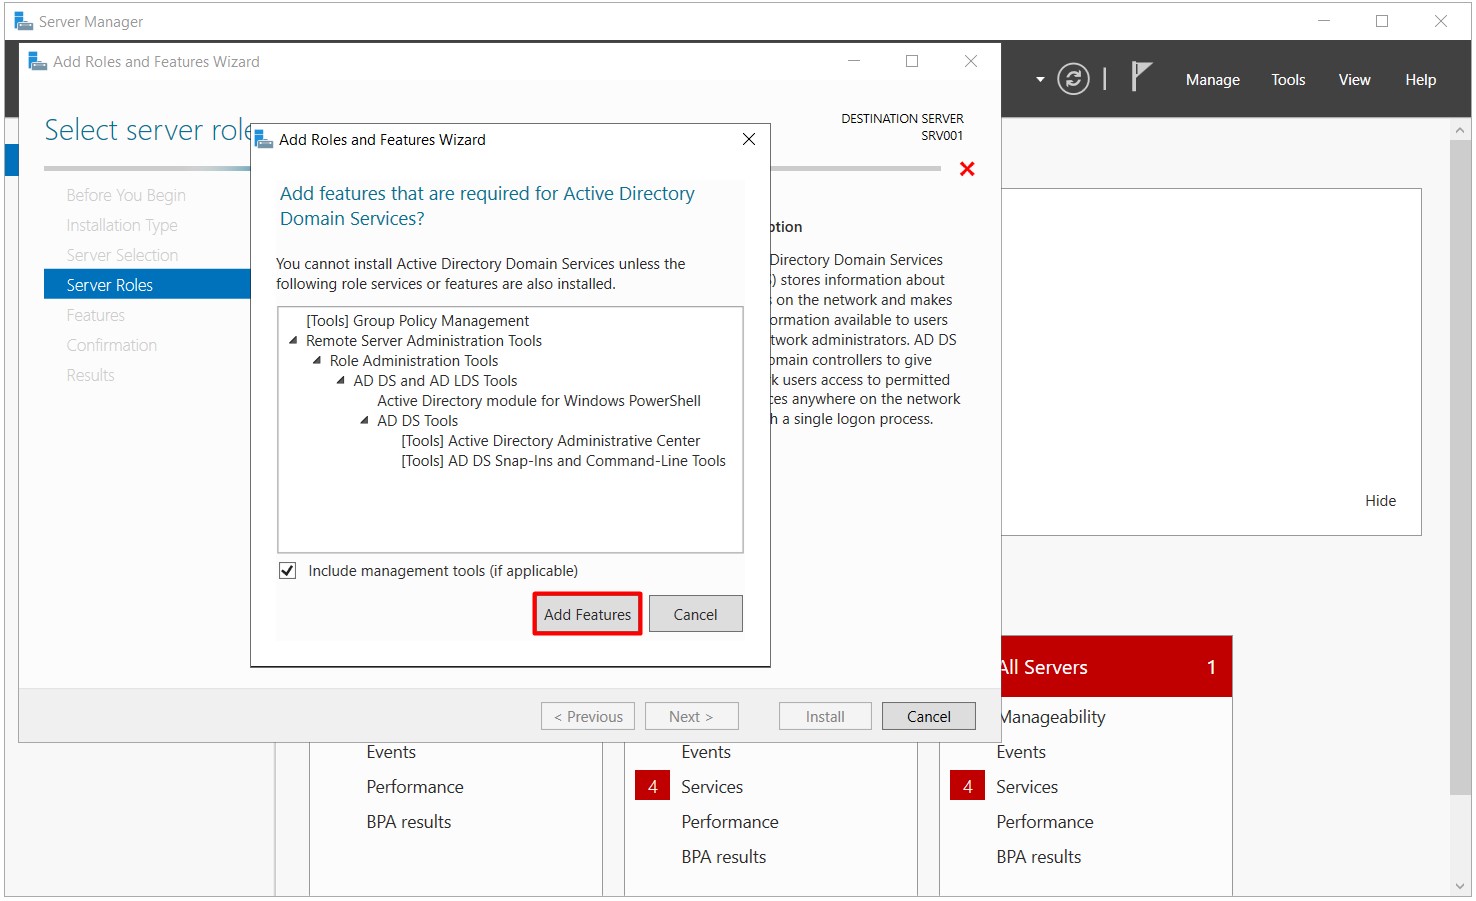
1.3.1- We are informed that the mandatory features associated with the service will be installed after checking the option of ctive Directory Domain Services. I am clicking on the Add Features button and proceeding by clicking on the Next button to continue the installation process of Active Directory Domain Controller in Windows Server 2019.

NOTE 2: DNS Server is also installed with the installation of Active Directory Primary Domain Controller. Even if we do not select this service in the Server Roles field, we can choose whether to install the DNS Server during the Promoting process.
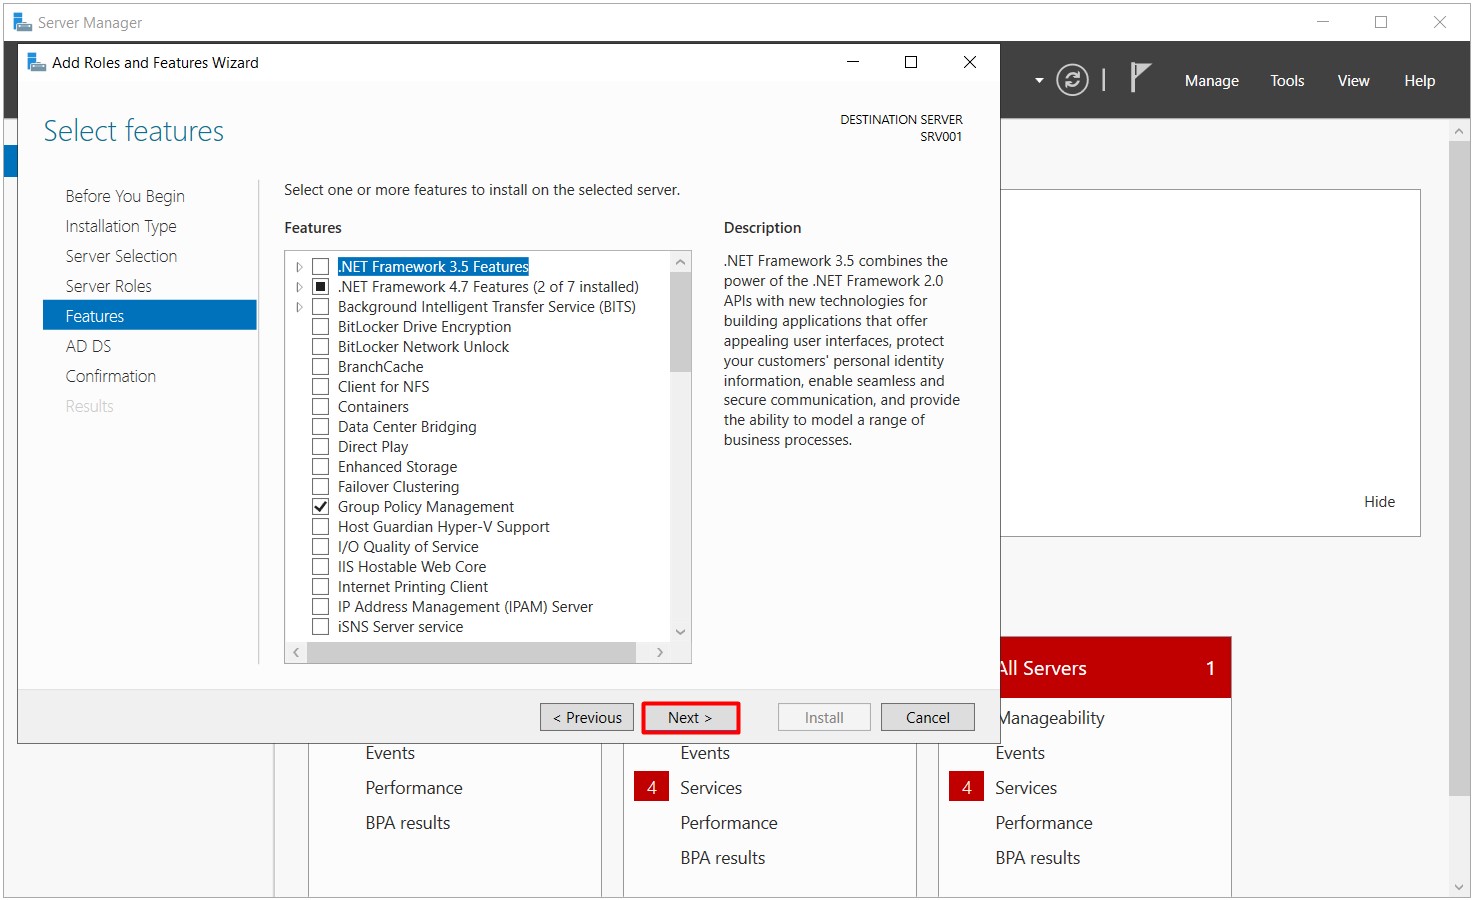
1.4- After selection of Active Directory Domain Services and DNS Server roles, since I will not install any additional features in the Features field, I am proceeding by clicking on the Next button to continue the installation process of Active Directory Domain Controller in Windows Server 2019.
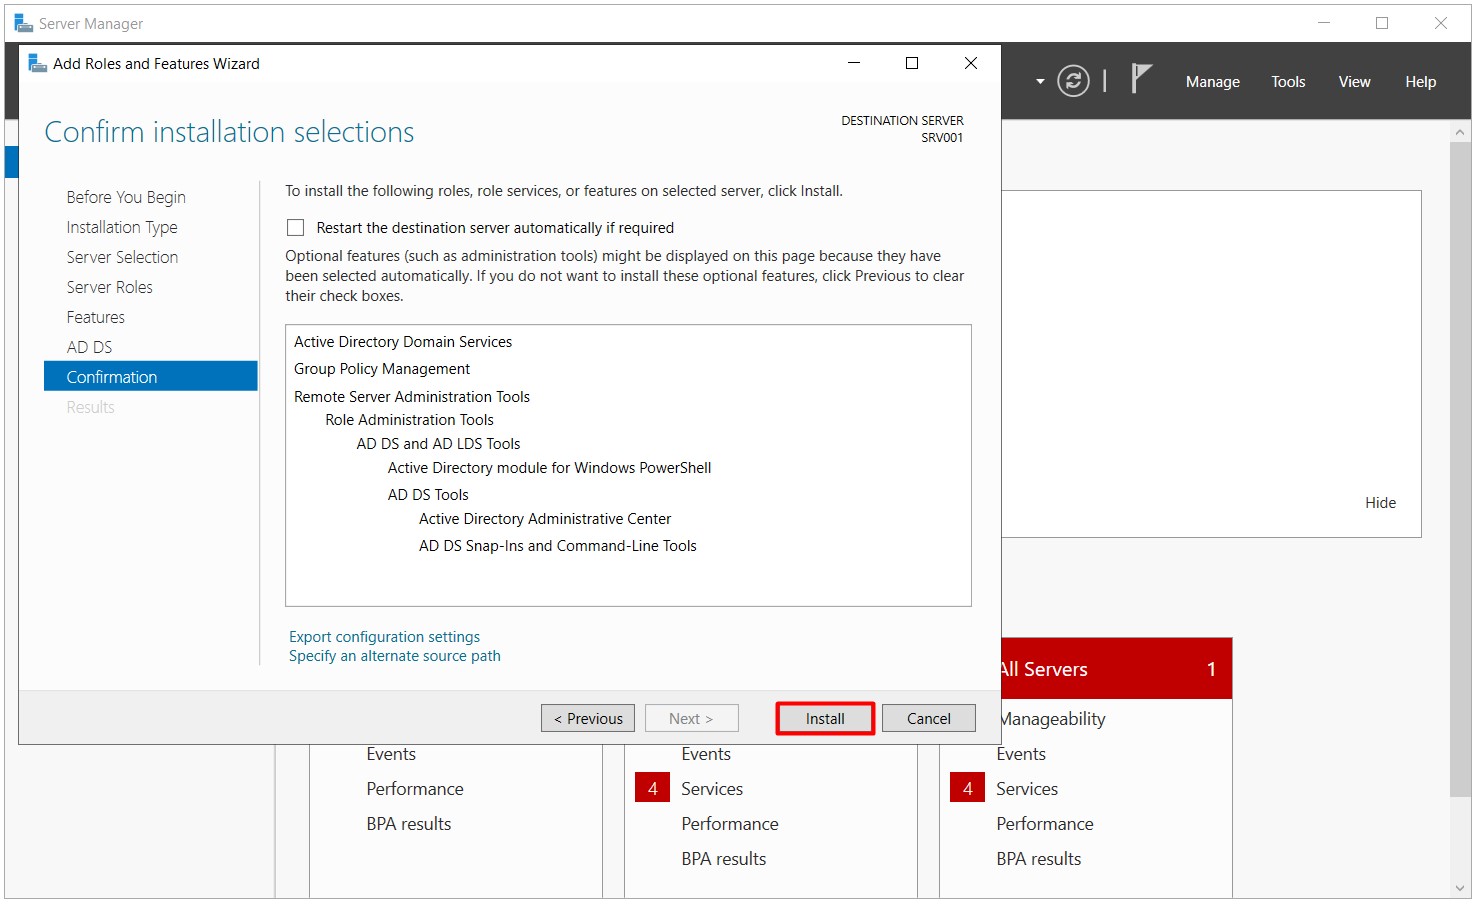
1.5- The Confirmation field contains the role (service) and Feature information that I will install. I am starting the installation process of Active Directory Domain Services and DNS Server role (service) and feature by clicking the Install button in this area.
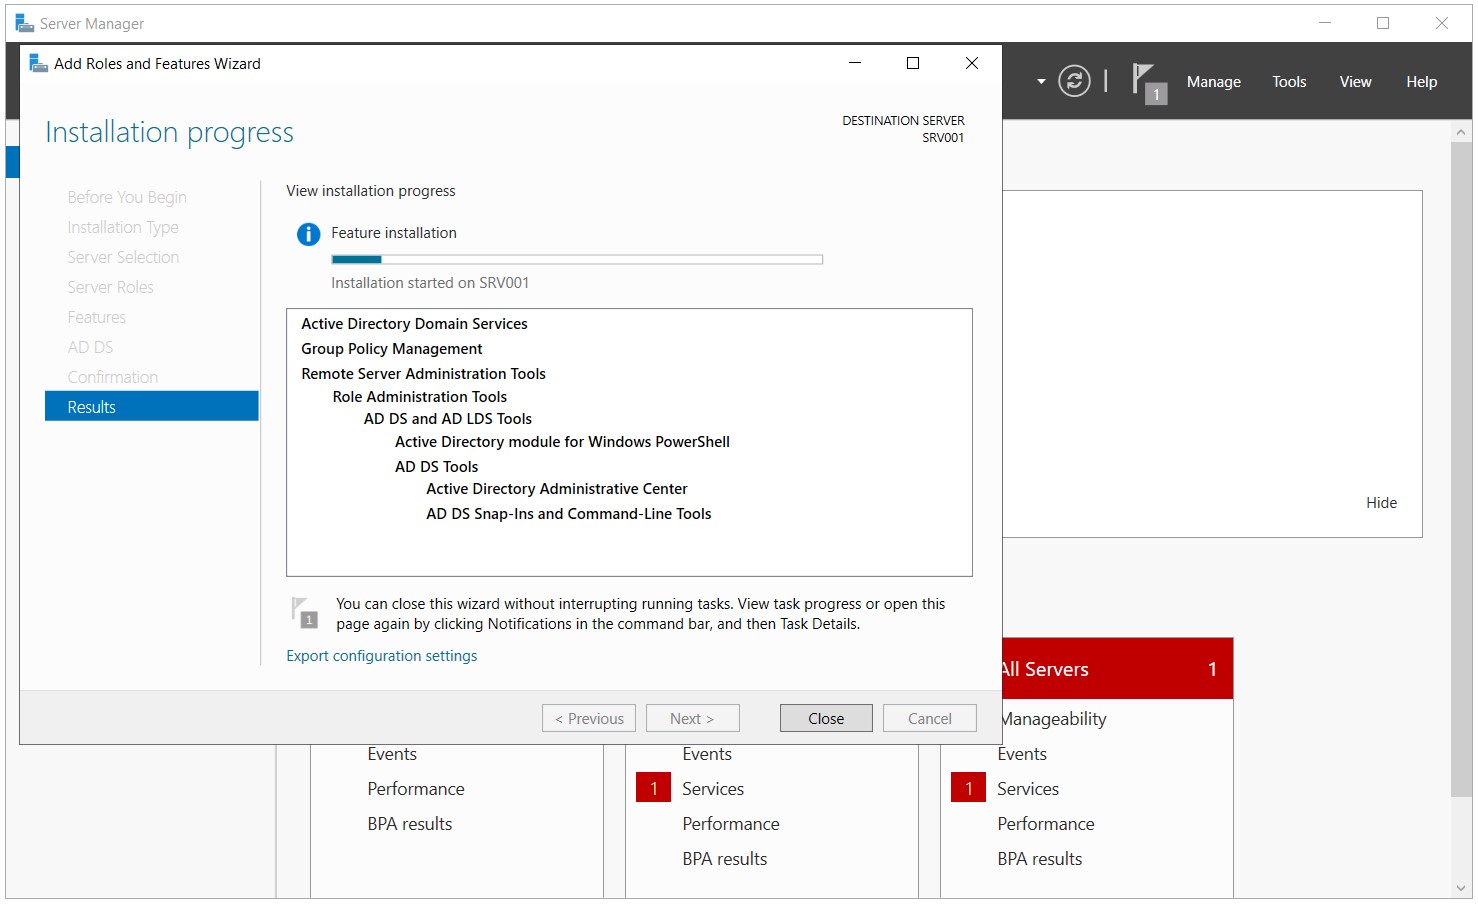
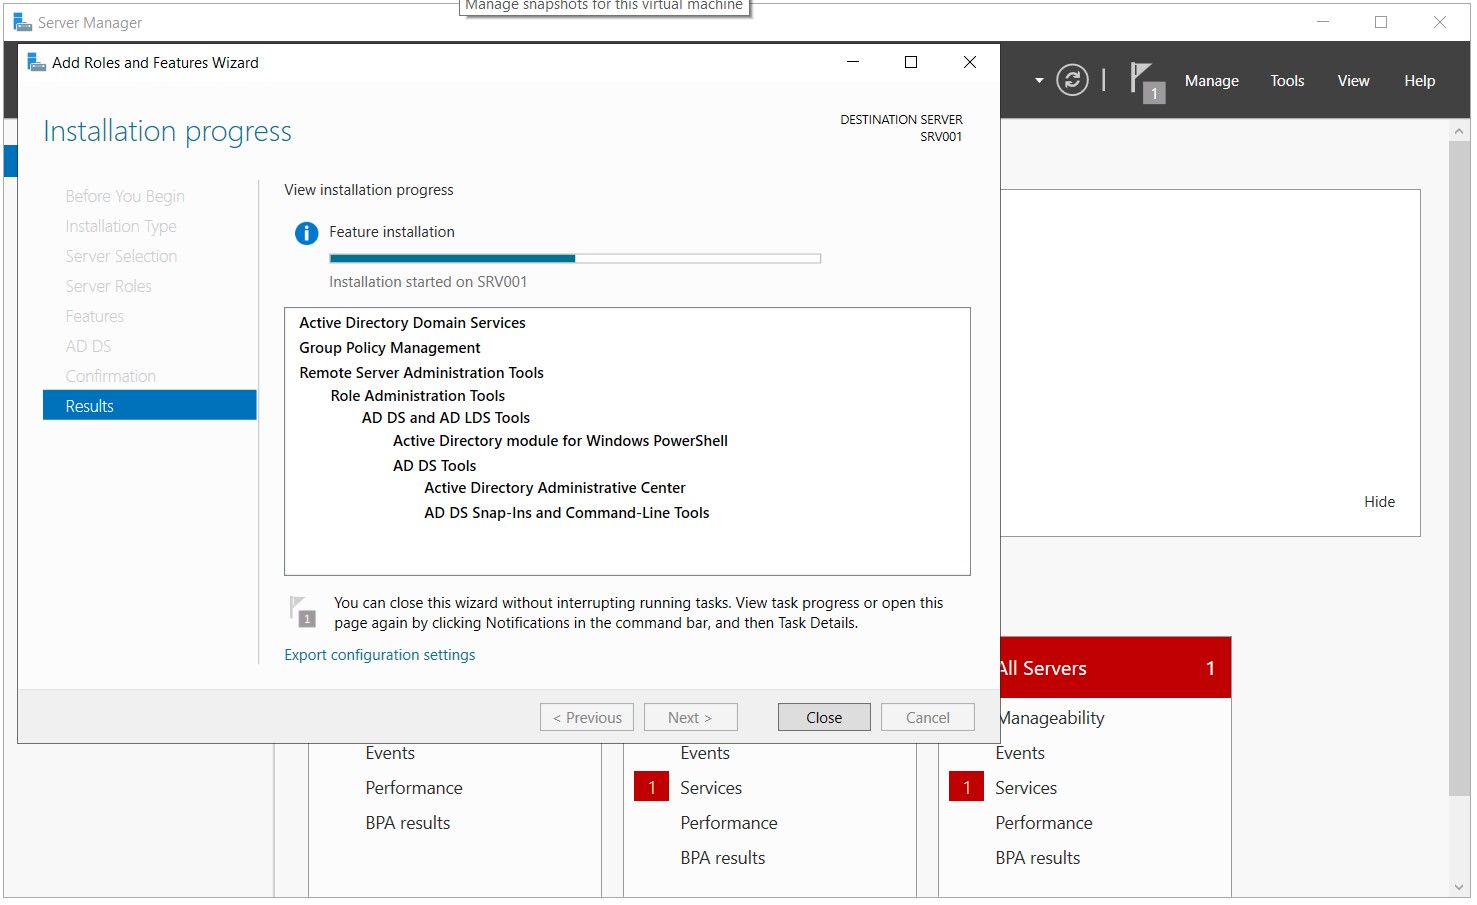
1.6- Active Directory Domain Services Installation process has started at the first stage of Primary Domain Controller (PDC) installation in Windows Server 2019.
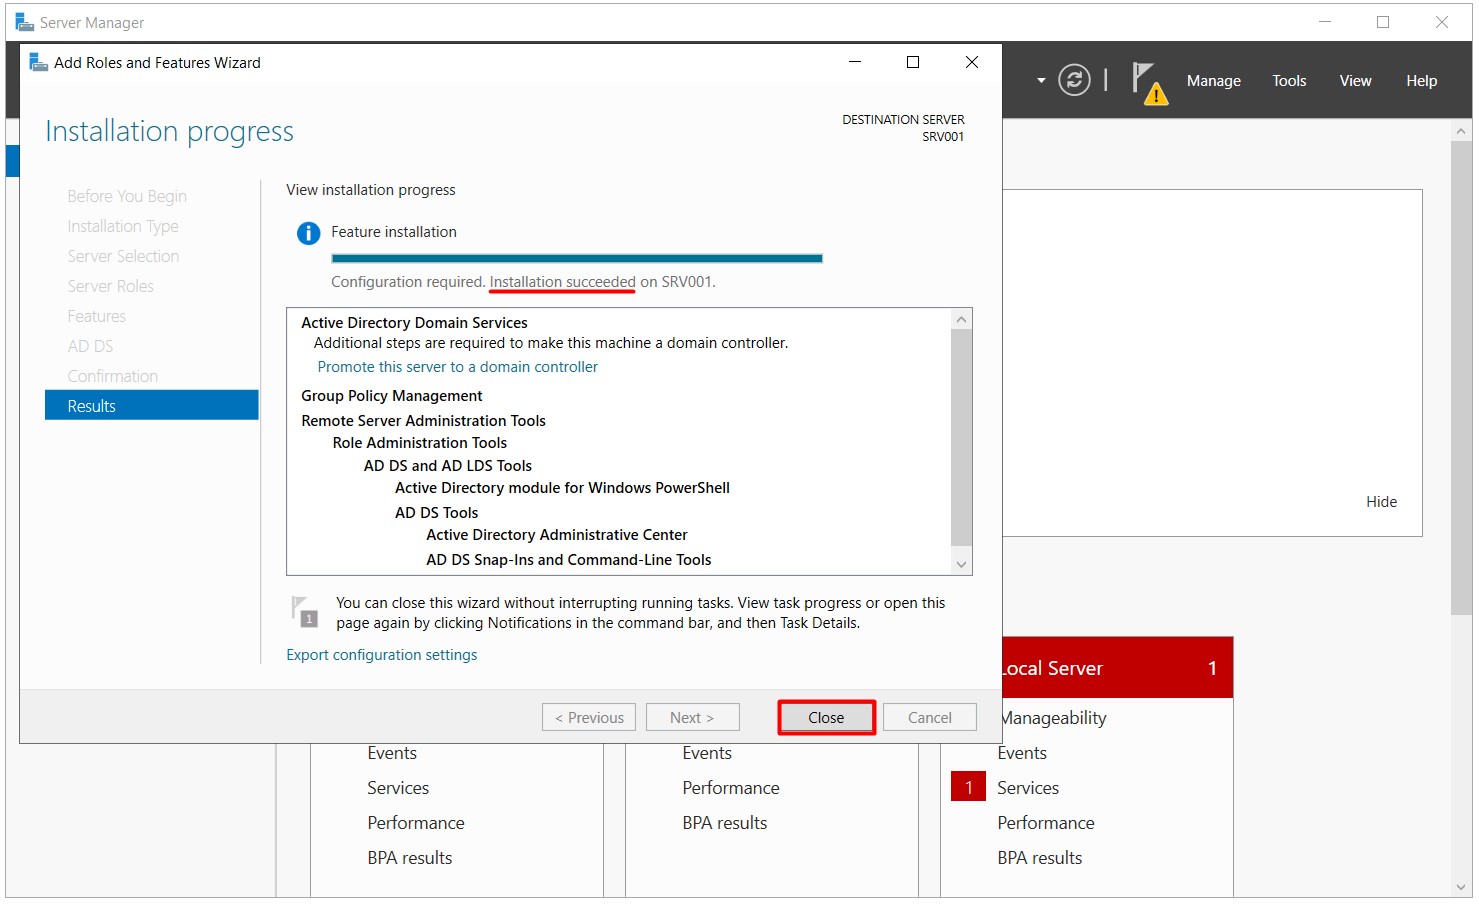
1.7- The first phase of the Primary Domain Controller (PDC) installation is the Active Directory Domain Services Installation process in Windows Server 2019. I am closing the Wizard by clicking on the Close button.
2. Promoting to Active Directory Domain Controller.
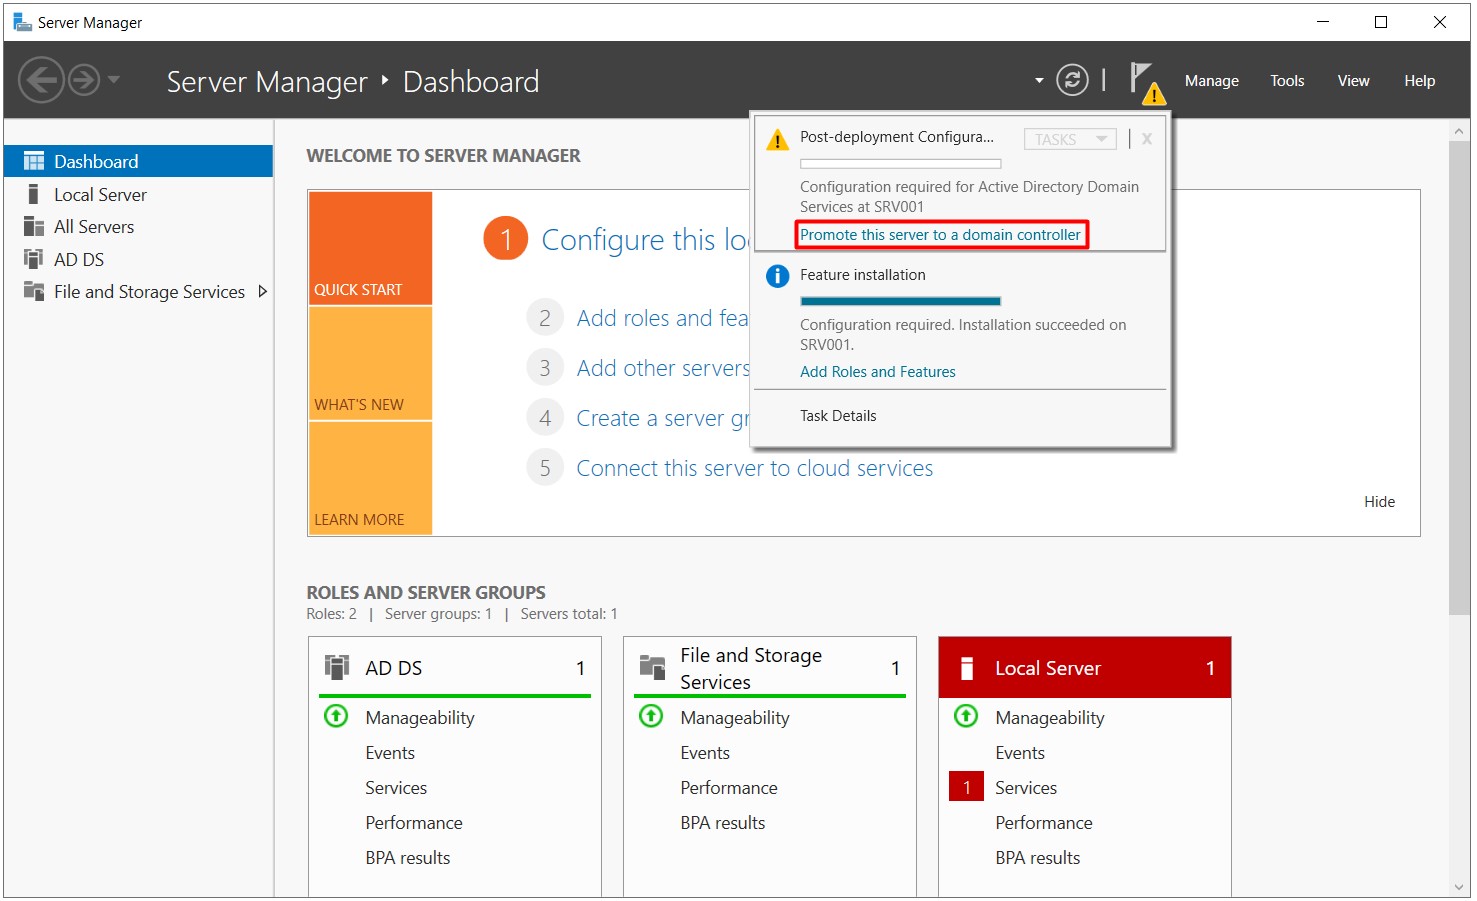
1.8- A yellow exclamation mark appears under the flag icon in the upper right corner of the Server Manager after the Active Directory Domain Services installation process is completed. What this means is that it usually waits for you to complete the configuration settings after a service you install.
When you click on it, under the warning message stating Configuration required for Active Directory Domain Services.
I am starting the Active Directory Domain Controller installation process by clicking on Promote this server to a domain controller.
3. After clicking on Promote this server to a domain controller, the Active Directory Domain Services Configuration Wizard window appears. On this wizard that opens;
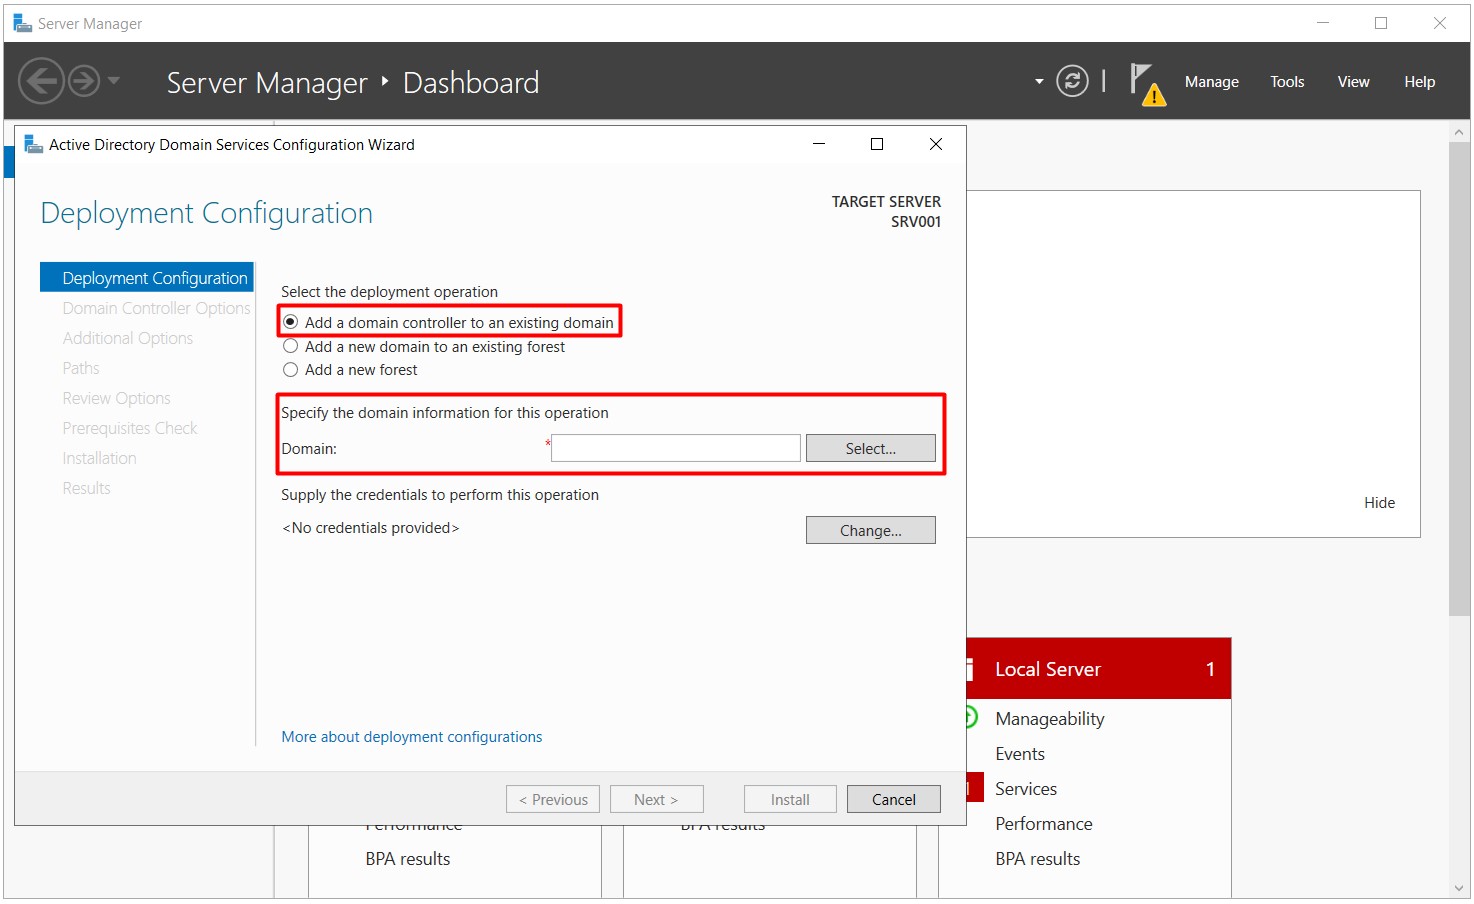
3.1- In the Deployment Configuration step;
3.1.1- Under Select the deployment operation;
• Add a domain controller to an existing domain: An Additional DC installation is performed on the existing domain structure with this option.
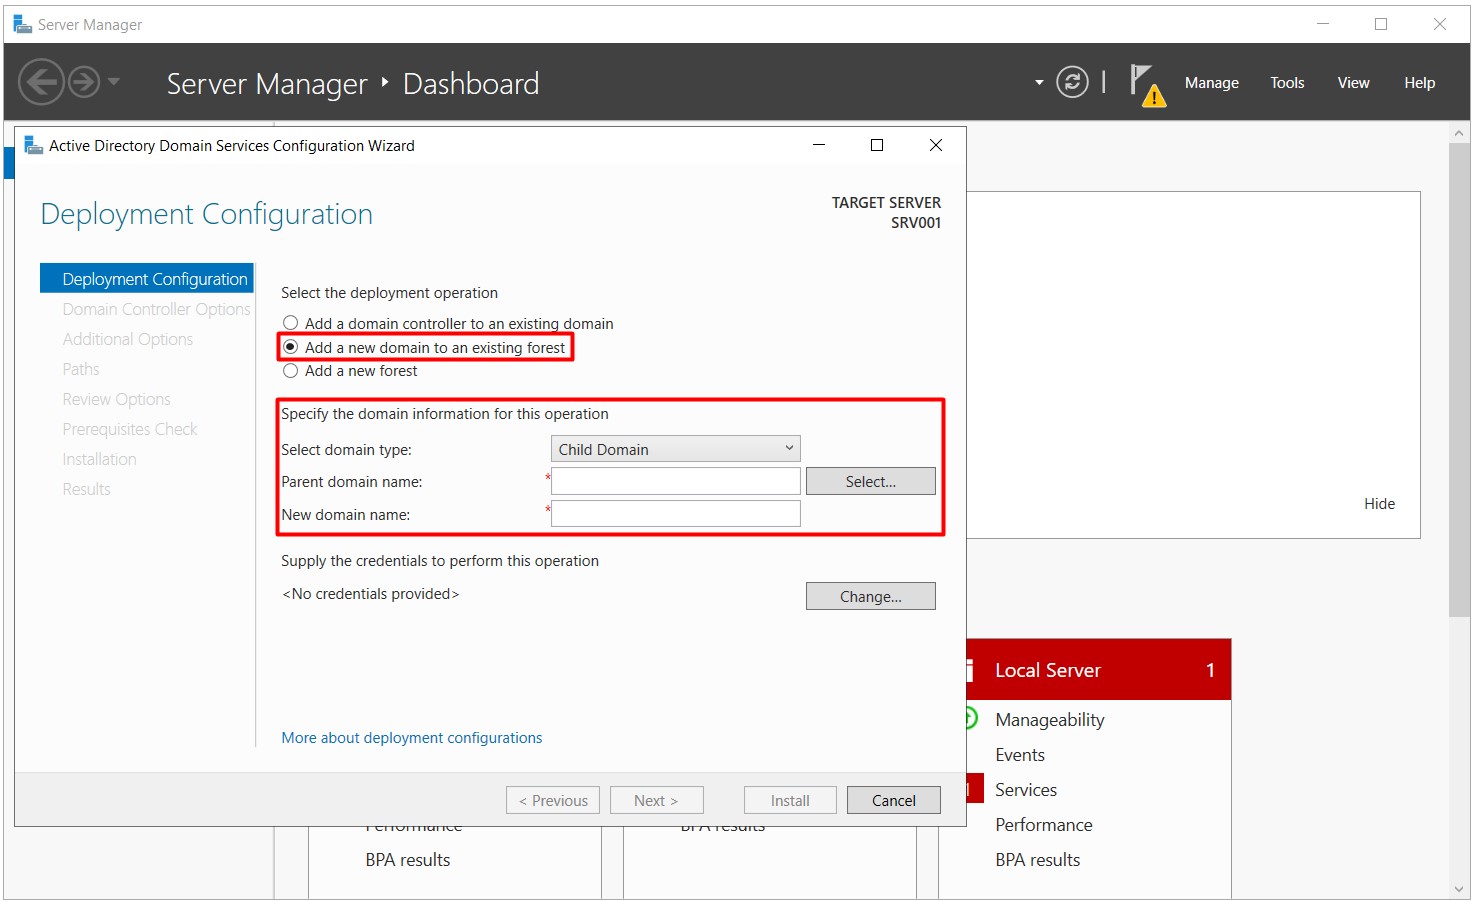
• Add a new domain to an existing forest: A Child Domain installation is performed on the existing domain structure with this option.
• Add a new forest: A new domain installation is performed with this option.
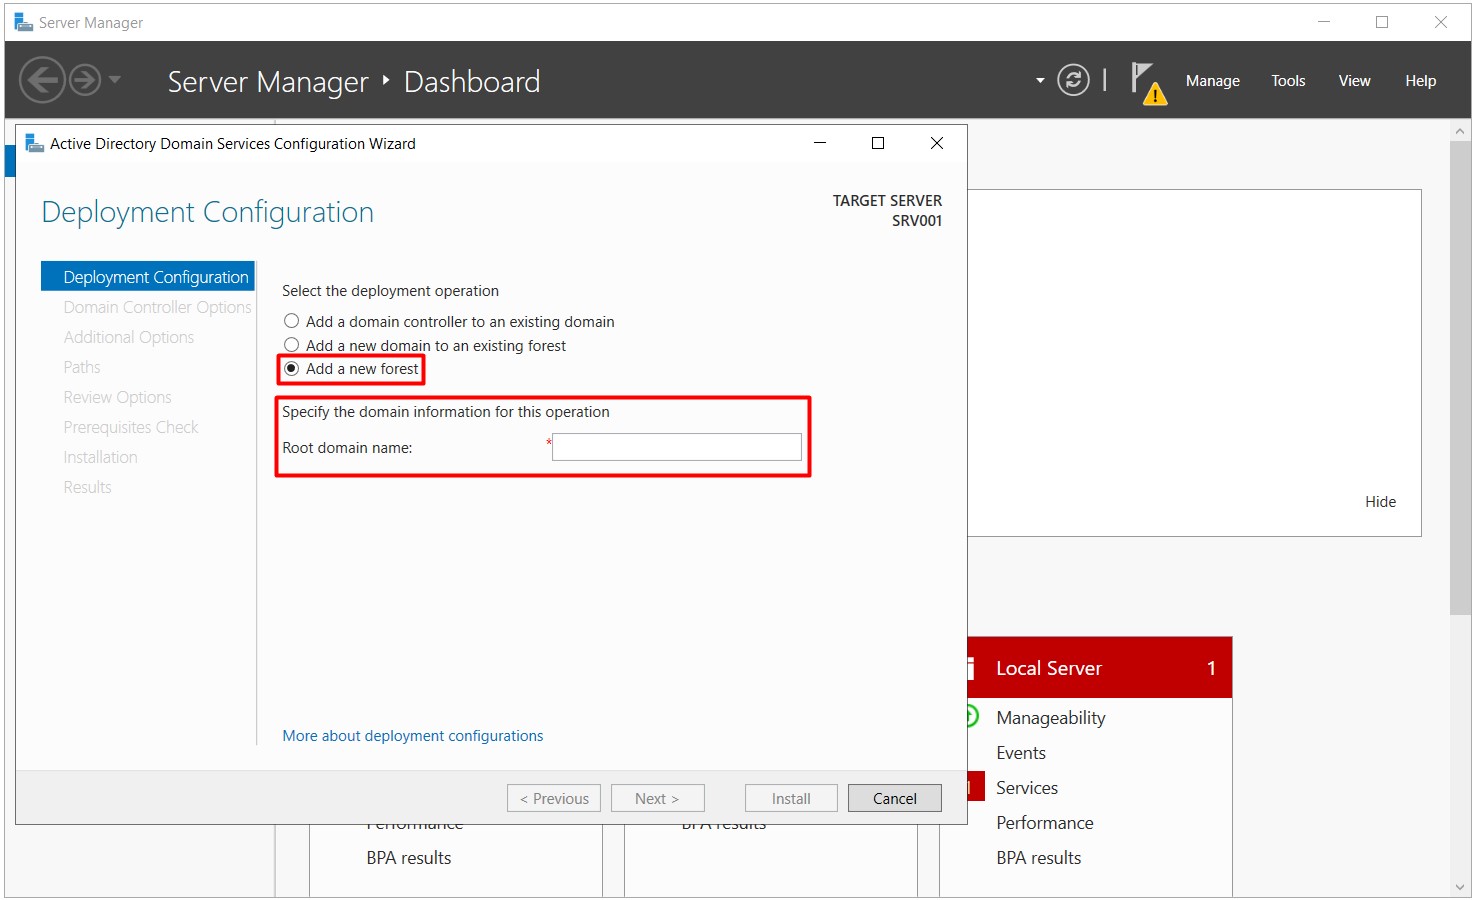
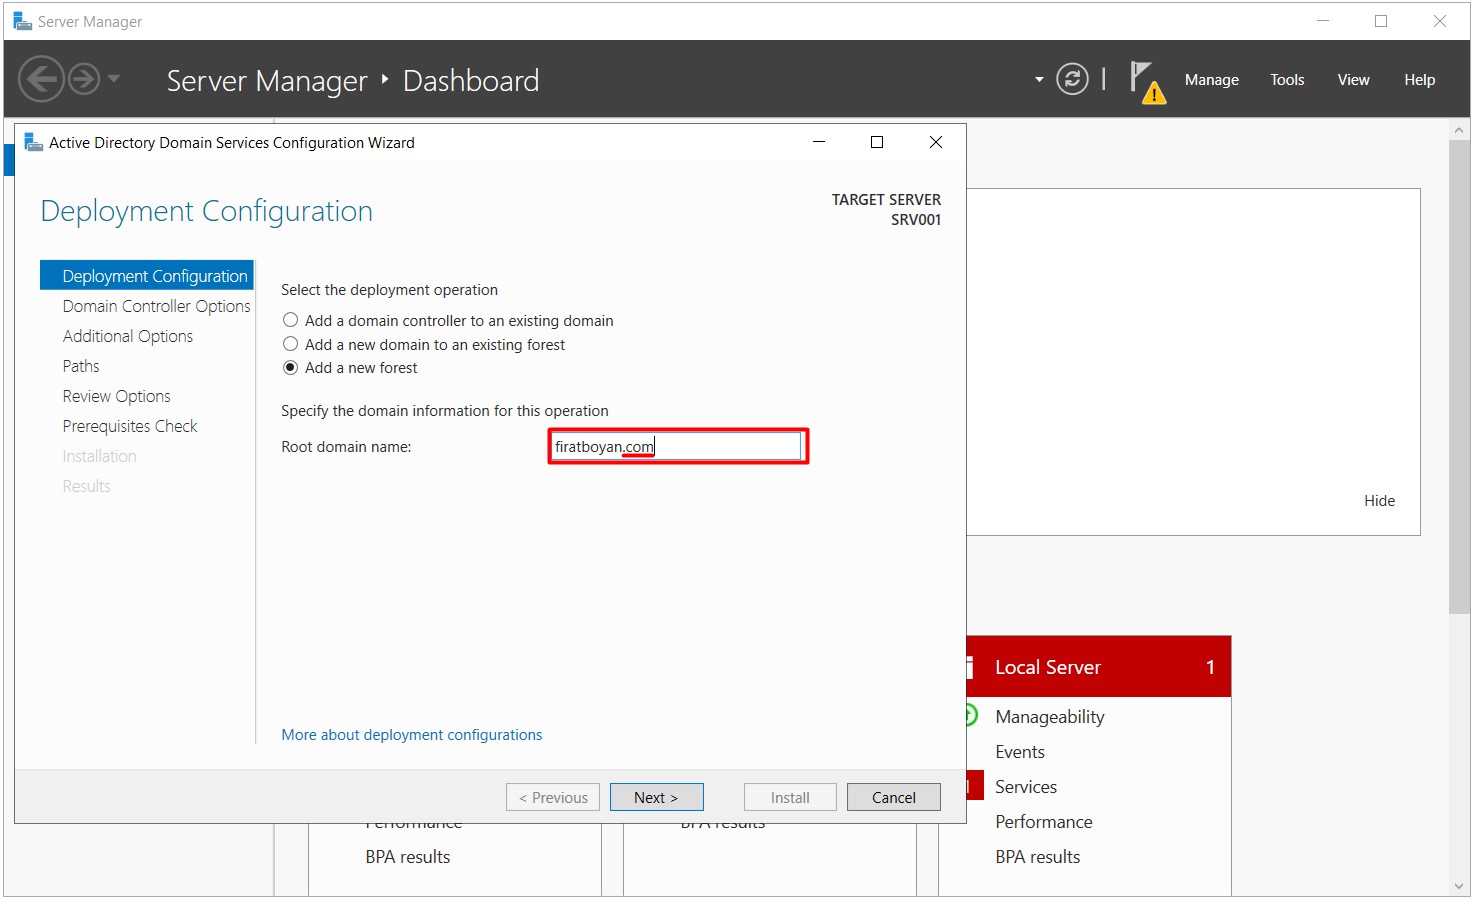
Info!: Put a .(dot) to specify a suffix, which is usually preferred as .local in a LAN environment while specifying the Domain name, right after the domain name. Which suffix name you would like to use is a matter of preference, but if it is left blank, without entering a .(dot) and a suffix, it will give an error.
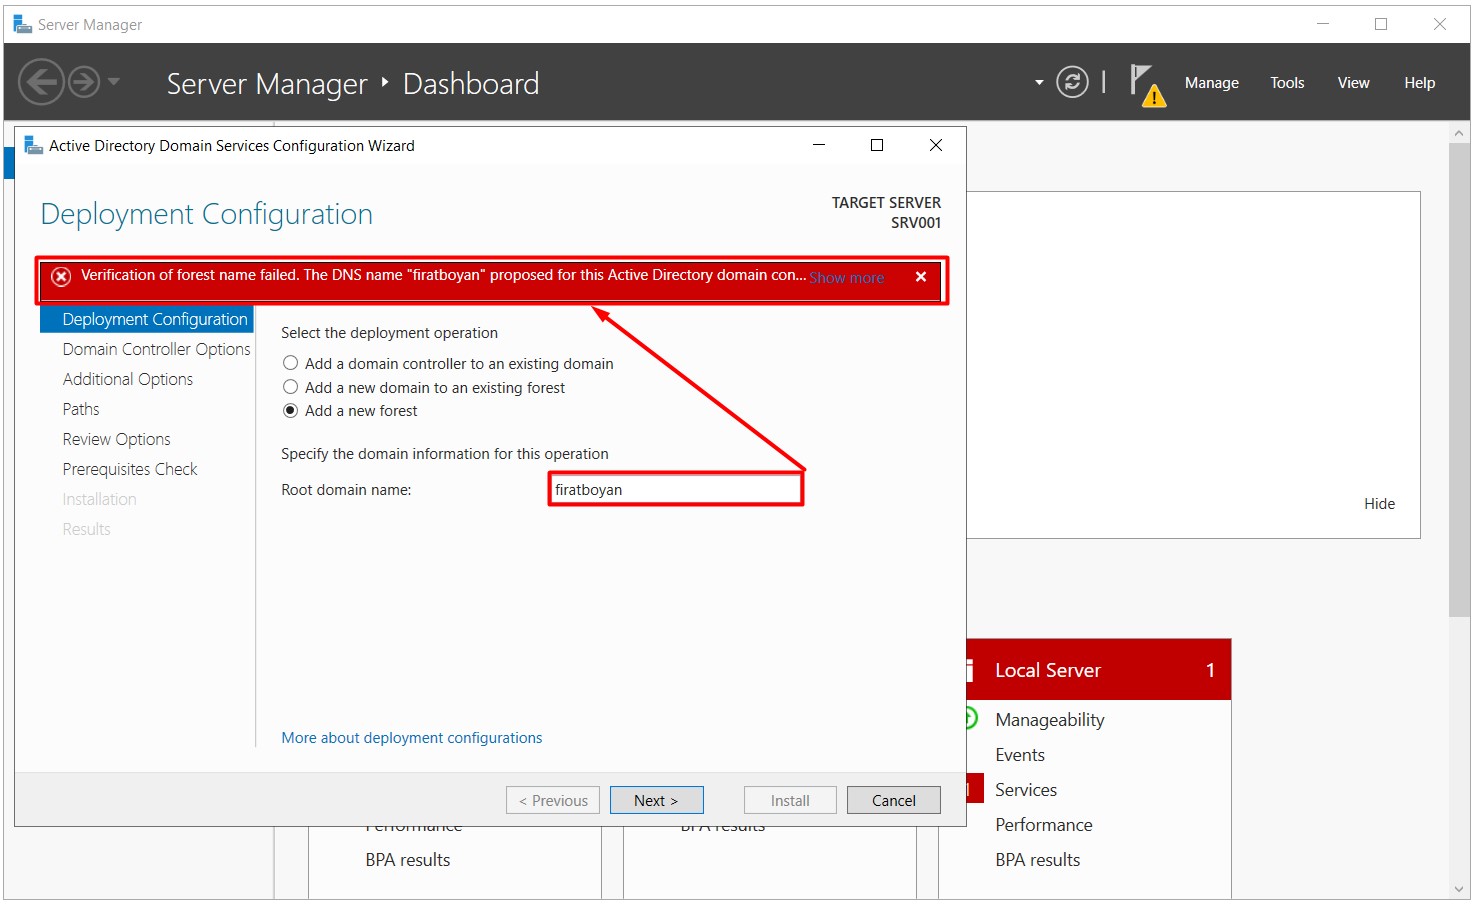
3.1.2- I am choosing the option of Add a new forest since I am installing a new Domain environment. Then, I am typing the domain name I want, which is firatboyan, and a suffix .com right after the domain name into the Root domain name field. Upon completing the required selection and typing the domain name actions, I am proceeding by pressing on the Next button.
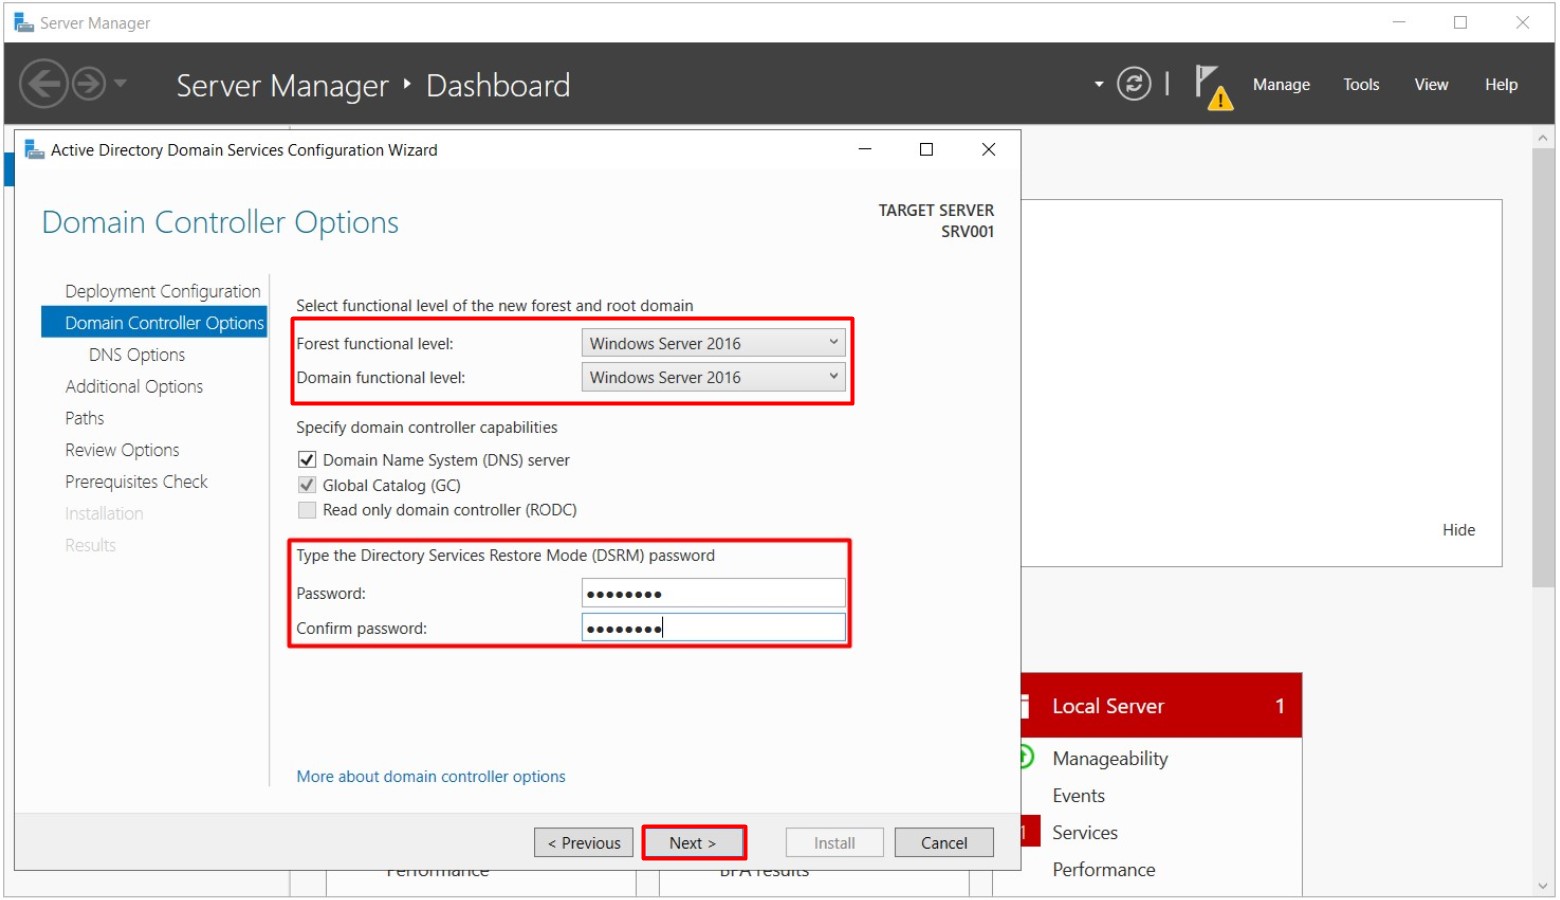
4. In the Domain Controller Options step;
4.1- We understand that the Functional Levels in Windows Server 2019 remain as Windows Server 2016 under Select functional level of the new forest and root domain,that is, a new functionality feature specific to Windows Server 2019 is not introduced. Here you can determine your Functional levels in terms of your needs.
4.2- Under Specify domain controller capabilities;
4.2.1- Domain Name System (DNS) server: I am leaving it as default for DNS Server installation during the Active Directory Promoting process.
4.2.2- Global Catalog (GC): Global Catalog is a service on Domain Controller(s). The Domain Controller that runs this service is also called Global Catalog Server. The Global Catalog, whether or not it contains Child Domains, maintains an index of Active Directory objects in a Forest. This Index information is limited Attribute (attribute) information in about 1400 along with the Domain Naming (DN) information of Active Directory objects. There is the most frequently referenced Attribute information in this limited number.
In other words; Similarly, in the contents section of a book you have taken, it provides querying and finding the objects searched with Domain Naming (DN) information, directory information of Active Directory objects and Attribute information.
It is necessary to install the Global Catalog, and you do not have the chance to remove the option in the first installed Domain environment, namely with the installation of Primary Domain Controller. On the contrary, it is your choice whether the server will be installed as the Global Catalog or not, but it is recommended that each Domain Controller is configured as a Global Catalog for redundancy with installation actions of Additional Domain Controller.
Membership information of Universal groups is also kept in Global Catalog Servers. If your user is a member of the Universal Group and there is no Global Catalog active on the Network, you cannot logon. The only exception is members of the Domain Admins group. Members of this group can always logon, even if there is no Global Catalog (GC) active in the environment.
4.2.3- Read only domain controller (RODC): The type of Domain Controller whose NTDS.DIT Database is a read-only. Generally, it is a Domain Dontroller type that is installed in environments where security is not fully established for security reasons. But this option is not active during the installation of the Pimary Domain Controller. However, during installation of an Additional Domain Controller, its installation is optional.
5- Type the Directory Services Restore Mode (DSRM) password: This is a Password assigned to the Local Administrator account to be used for Active Directory Recovery. This Password can be changed at any time with the NTDSUTIL command as long as Windows Server can be accessed with the Domain Administrator account, but it is strongly advised to remember just in case. I am proceeding by pressing on the Next button after all the necessary settings are configured.
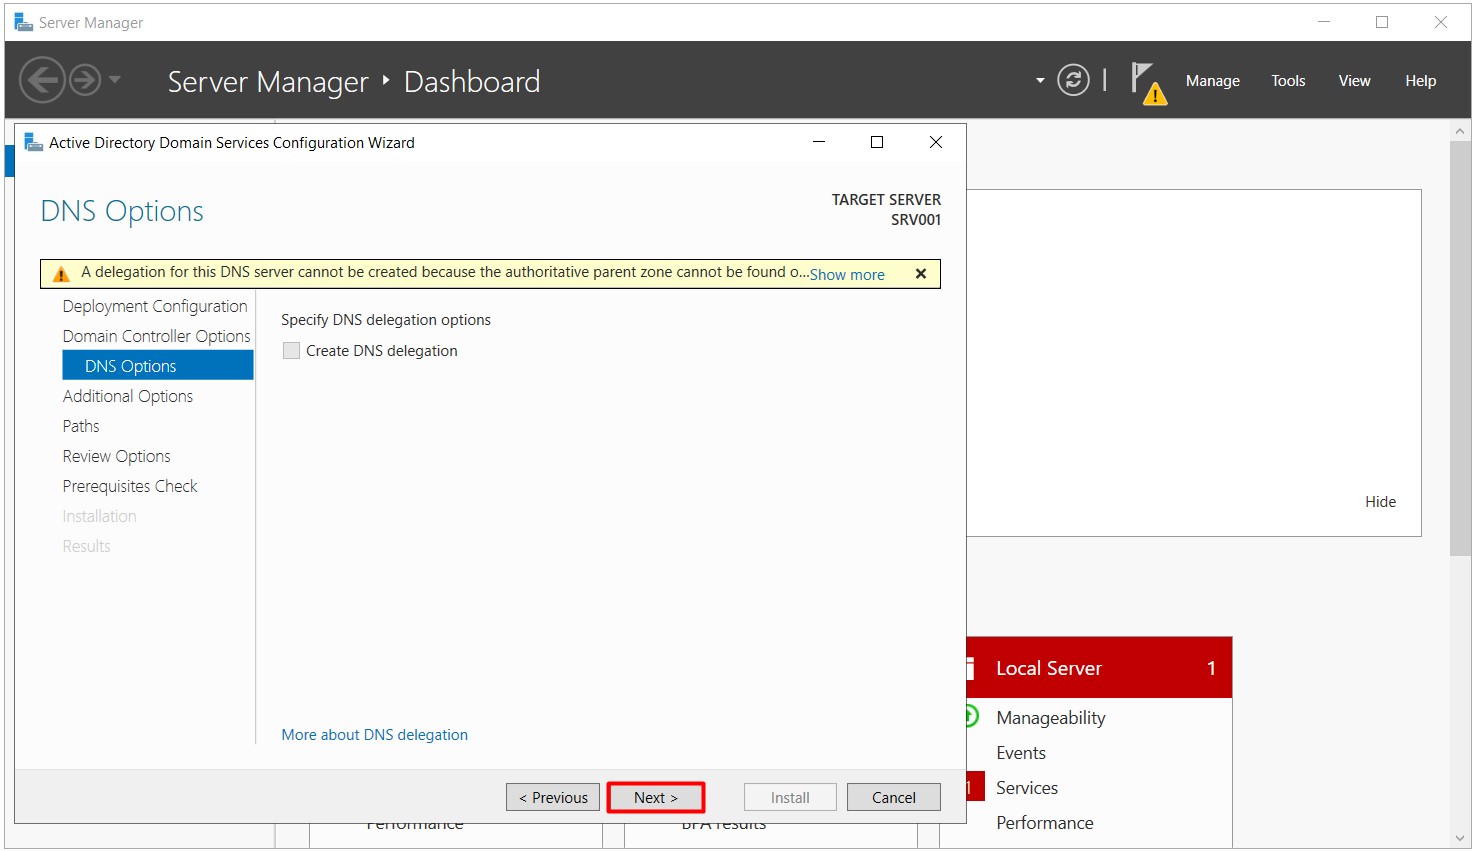
6- A warning appears stating that A delegation for this DNS server cannot be created because the authoritative parent zone cannot be found... in the DNS Options step. This warning does not pose any problem for the Domain Controller installation. This warning occurs because there is no DNS Server in the environment yet and an authorization has not been given to access firatboyan.com Zone from the external environment (Internet) on this DNS Server. I am proceeding by pressing on the Next button.
7- The Domain NetBIOS (Network Basic Input / Output System) name information is created, which will be the same as the Domain name we have specified as in the Deployment Configuration step in The NetBIOS domain name field under the Additional Options step.
To explain the fields where the Domain NetBIOS Name is used,
7.1- Box solutions such as Firewall, Mail Gateway and 3rd Party software authenticate with the NetBios names of the domains during Active Directory integration.
7.2- When we set up your domain environment, if you type firatboyan.com for the domain name, this request will be interpreted on the DNS Server and a reply will be returned to you. If you type only FIRATBOYAN, without the suffix, it will be interpreted on WINS, if any, and you will receive a reply in this case. If there is no WINS, the Domain is found by Broadcast message.
7.3- You can logon in the form of firat@firatboyan.com or FIRATBOYAN\firat on a Windows 7 or Windows 10 operating system. However, for non-Microsoft products, the spelling as firat@firatboyan.com, which we call UPN (Universal Principle Name), is not supported, and you must use the NetBios name in the form of FIRATBOYAN\firat, which we call SamAccountName.
WARNING!: You can change the Domain NetBIOS Name information as you wish, but NEVER add the Host Name of the Server on which you install the Domain Controller as this Domain NetBIOS Name!

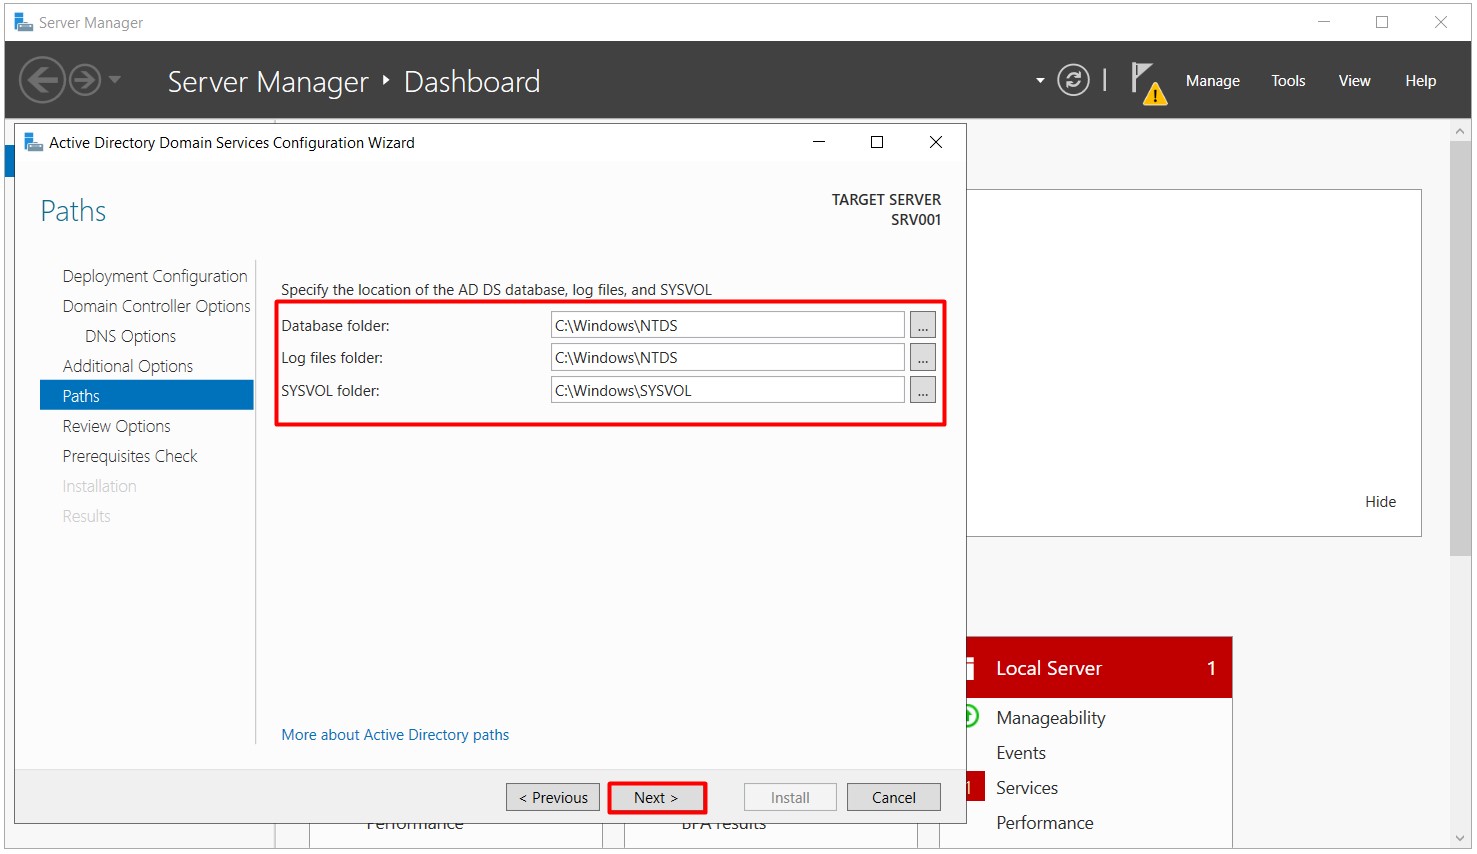
8- There are some technical terms which need to be explained in Paths step;
8.1- Database Folder: It contains Path information where the Active Directory Database (database) NTDS.DIT will be located. By default, it is located under the NTDS folder under the C:\ Windows directory.
8.2- Log files folder: The Path information where the LOG files of NTDS.DIT database will be located. It is located under the NTDS folder under the C:\ Windows directory where the NTDS.DIT Database (database) is located by default.
8.3- 2 folders are shared by default with the Active Directory Domain Controller Installation. These are the NETLOGON and SYSVOL (System Volume) folders.
• NETLOGON: This shared folder is used to run Script files that will be run during the user Logon or Logout actions by referencing the GPO (Group Policy Object) information in Group Policy. This folder has completely left its content access to the SYSVOL (System Volume) shared folder as of Windows NT. Any Script files in the NETLOGON shared folder is kept directly in the Scripts folder in SYSVOL (System Volume) and is replicated to other Domain Controllers from here. At this point, you can think of the NETLOGON folder as a shortcut to the Scripts folder within the SYSVOL (System Volume) shared folder.
• SYSVOL (System Volume): This shared folder hosts the Script files that will be run by referencing the GPOs (Group Policy Object) in Group Policy and the GPO (Group Policy Object) information in Group Policy, and this information can be used by other Domain Controllers. They are also replicated from here. As I mentioned above, Script files hosted in the NETLOGON folder have actually been kept in the Scripts folder in SYSVOL (System Volume) since Windows NT.
Info!: You can change this Path information of each from the related fields during the installation phase as you wish. It can also be changed via command lines after installation.
I am proceeding by clicking the Next button after configuring the path field as we wish.
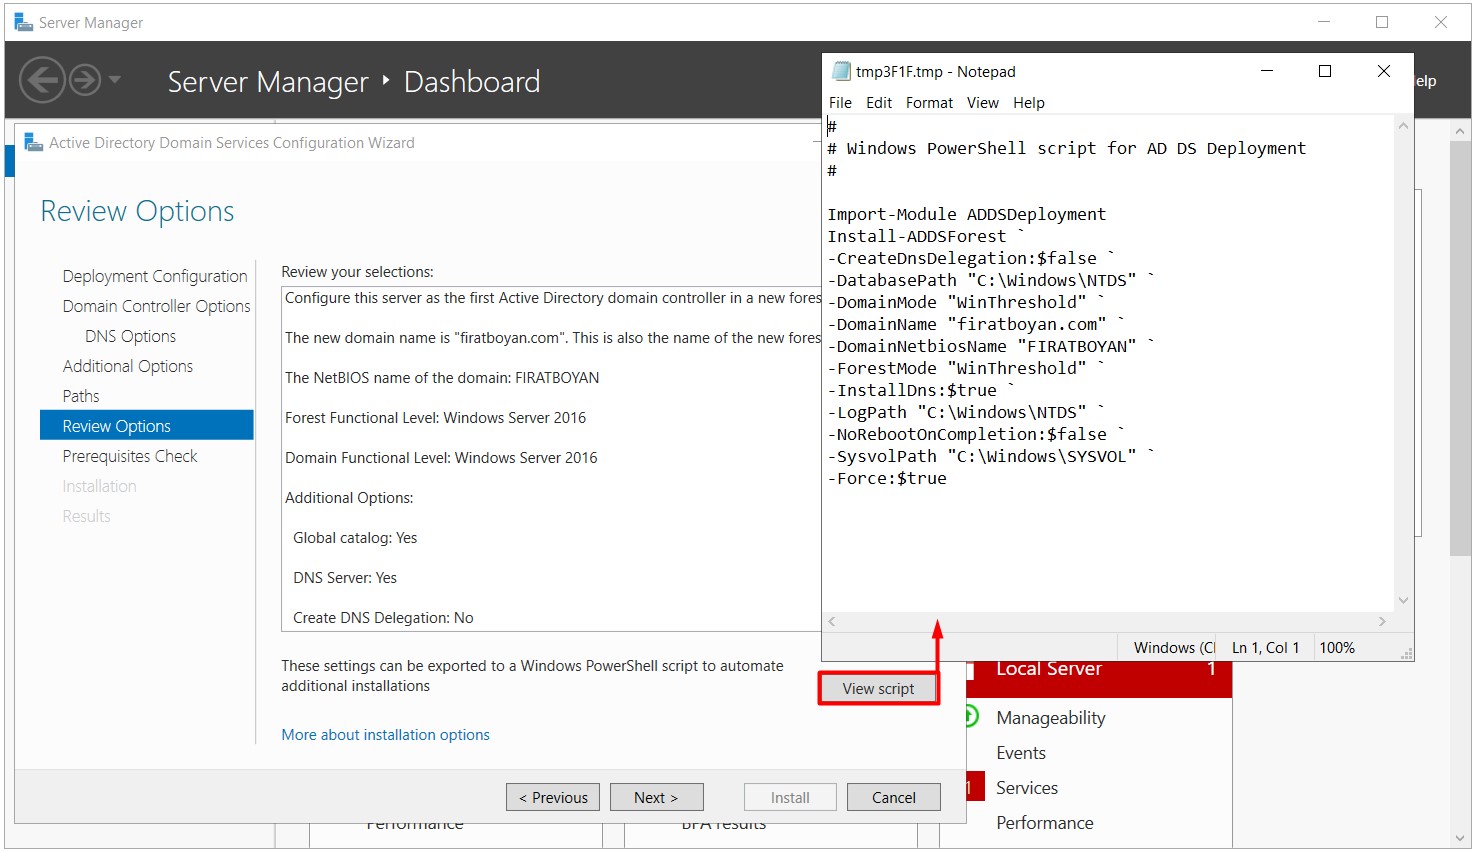
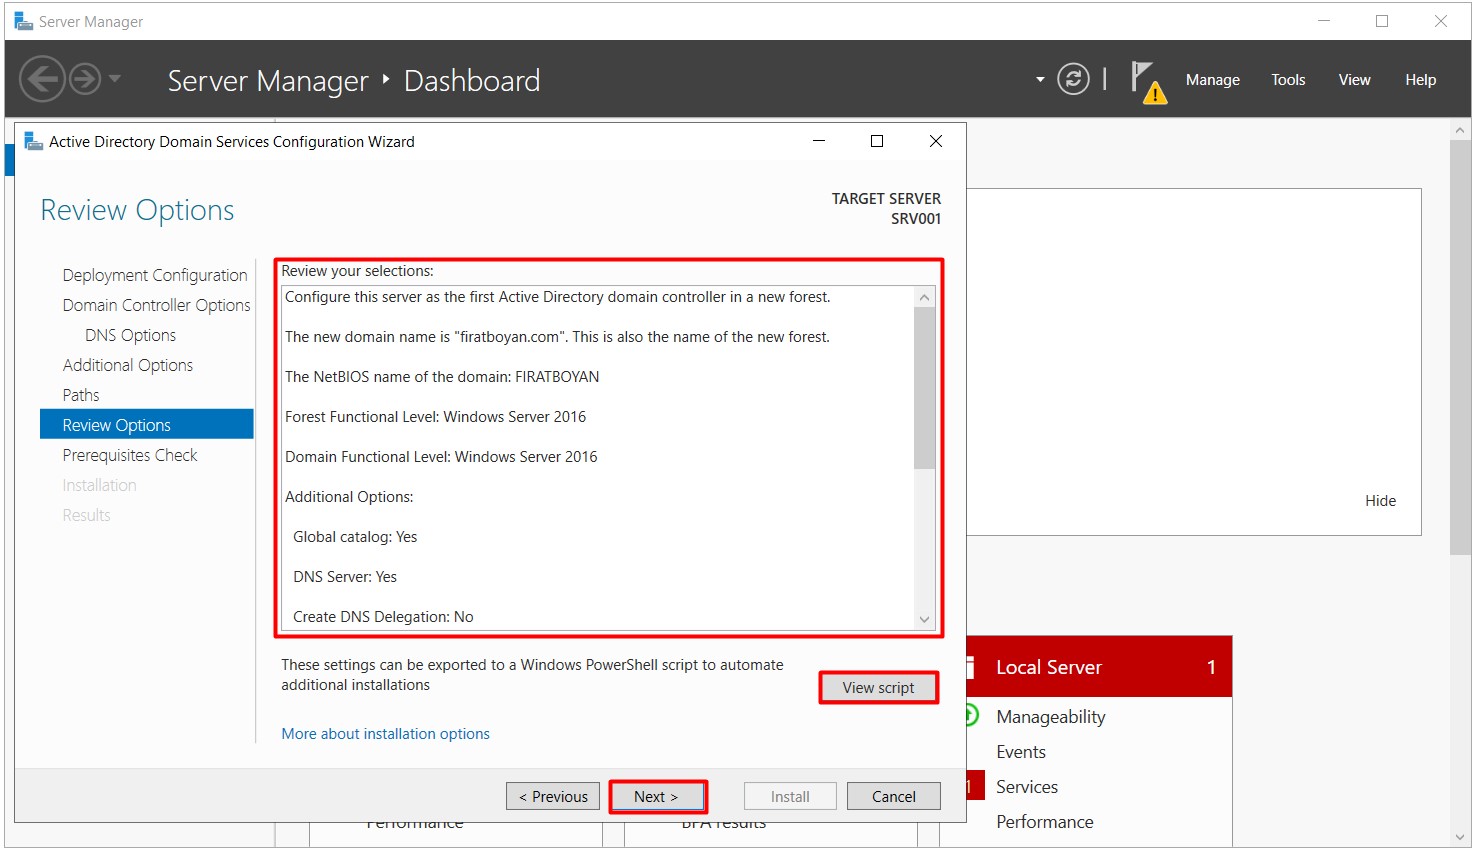
9- There is a summary of the settings I made in the Review Options step. In addition, when we click on the View script button, a Powershell Script is created for the installation of Active Directory. Domain Controller can be installed through Powershell with this Script. I am proceeding by pressing on the Next button.
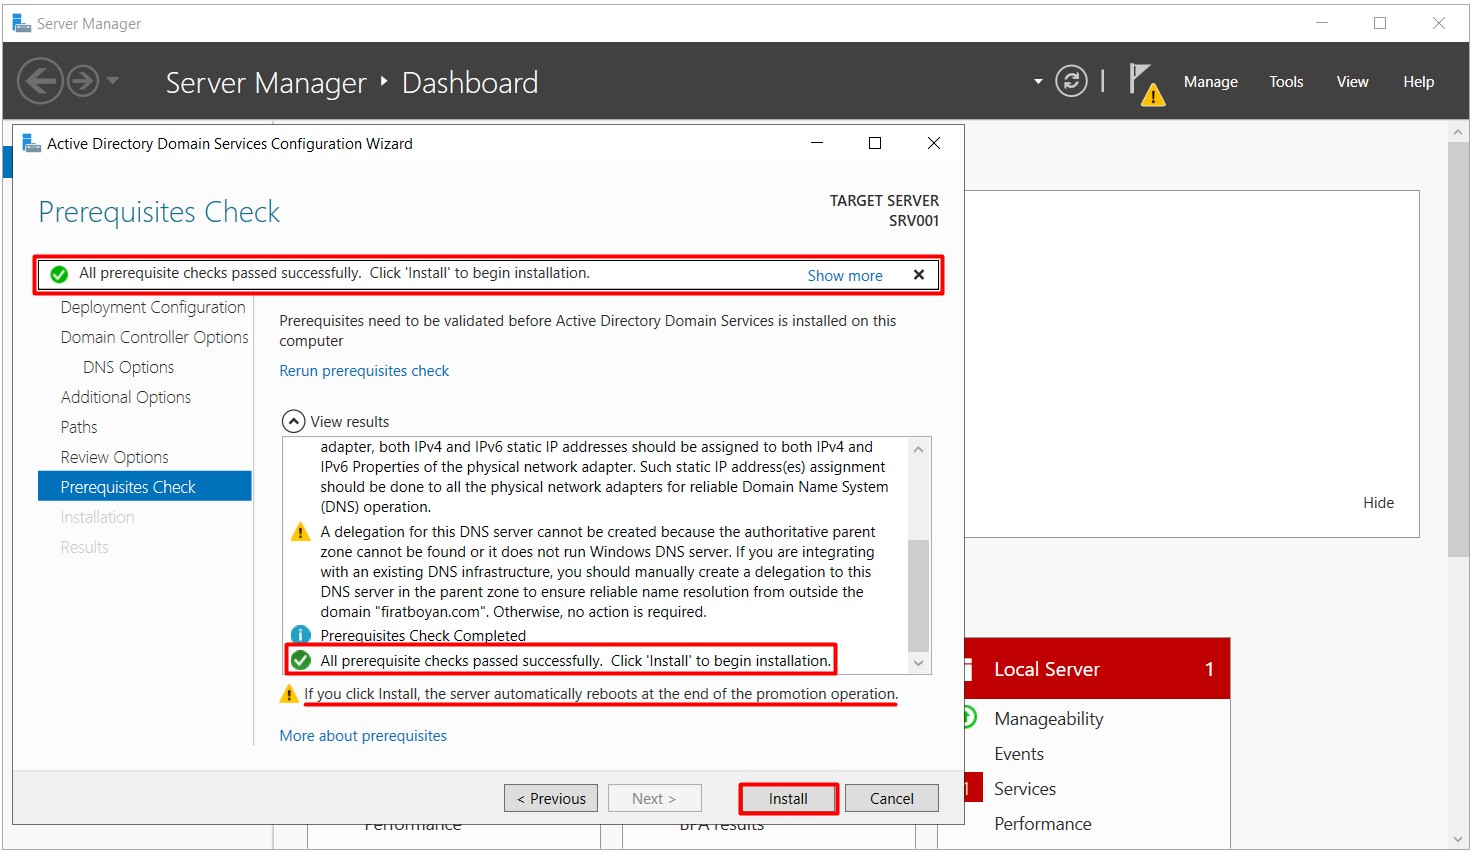
10- The prerequisites required for the installation of Active Directory are checked in the Prerequisites Check step. If all prerequisites are met, the Active Directory installation process can be started by clicking on the Install button.
10.1- Installation process of Active Directory Domain has started on Windows Server 2019.


11- The Server will be restarted after the Active Directory installation is completed.
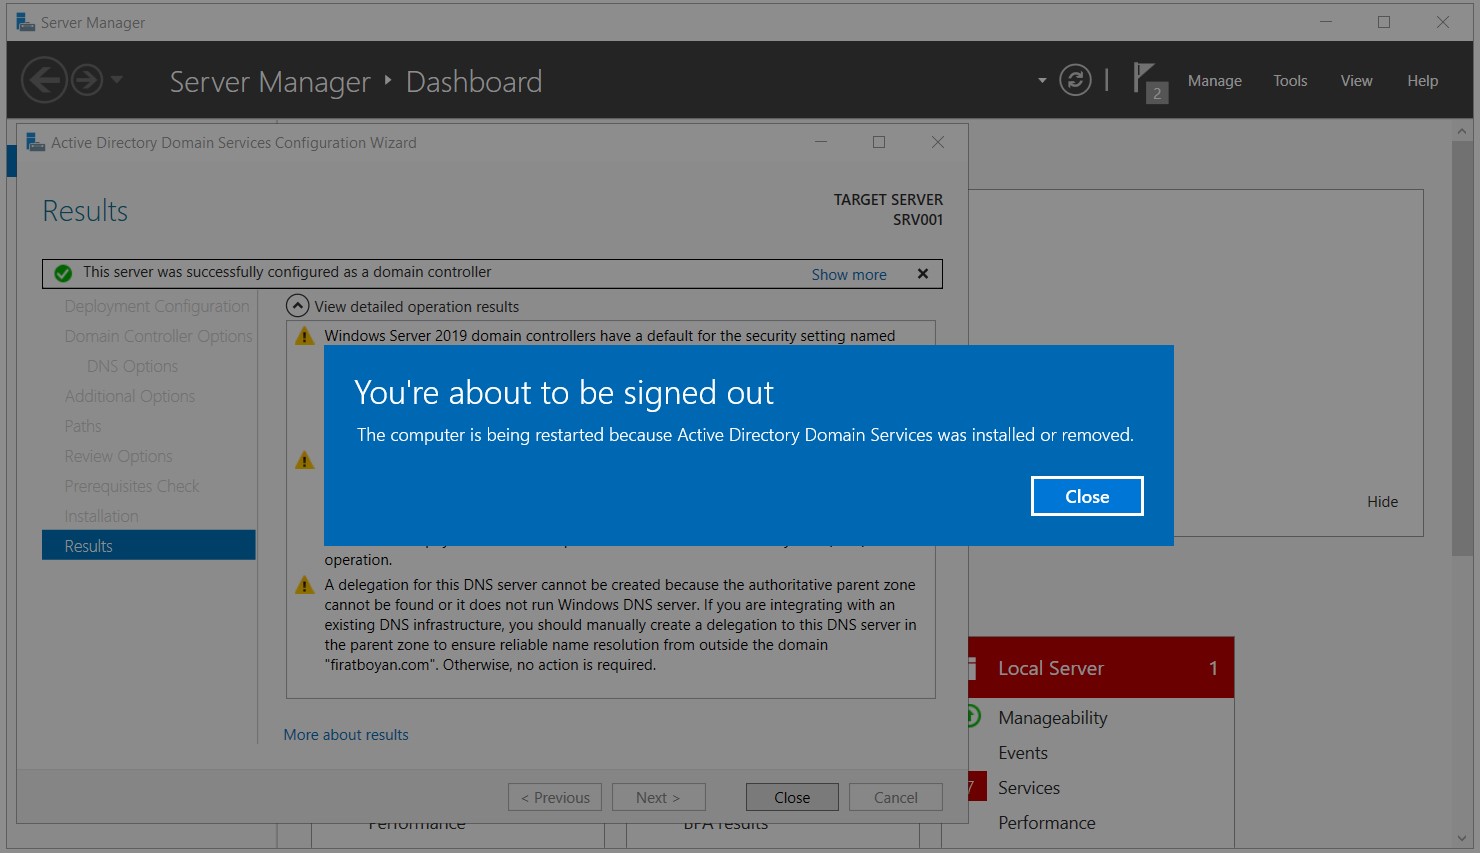
12- I am getting the Domain Controller information with the below Powershell command after the Active Directory installation is completed.
|
Get-ADGroupMember 'Domain Controllers' |

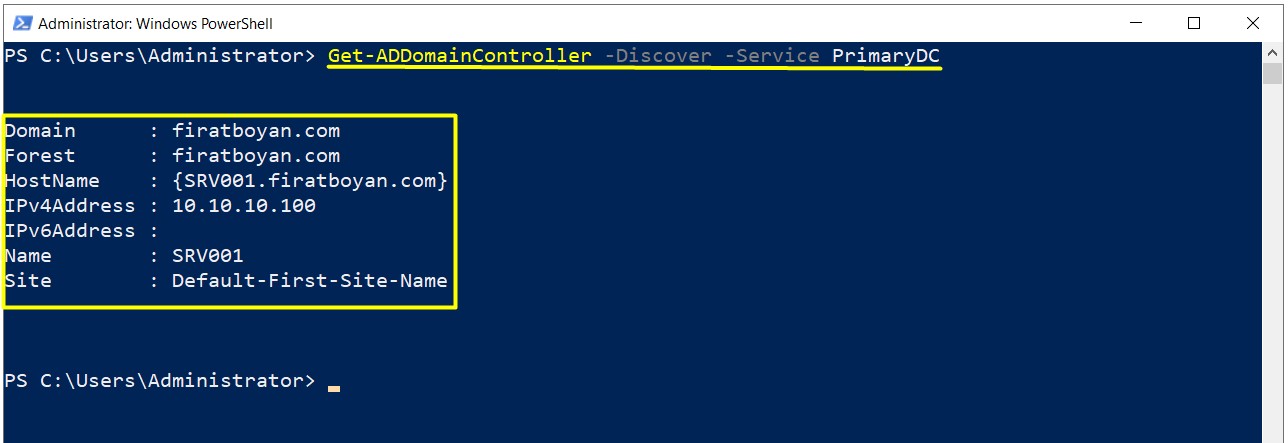
13- Some information of the Primary Domain Controller installed can also be obtained with the following Powershell command.
|
Get-ADDomainController -Discover -Services PrimaryDC |
I hope it benefits....
Tags: Windows Server 2019, Active Directory Installation, Domain Controller Installation, Primary DC Installation.
You may submit your any kind of opinion and suggestion and ask anything you wonder by using the below comment form.