When we want to install an operating system on a computer from the beginning, replace a disk, recover a failed system or bring a lab machine into service quickly, the first thing we need is installation media that the machine can read at startup. Years ago this was done with a DVD. Today almost no computer has an optical drive, so the bootable USB drive does this job.
The word bootable means that a storage device does not only carry files, but also contains the structure that the computer's firmware (BIOS or UEFI) can recognise as a boot device. Copying the ISO file to an ordinary USB flash drive does not achieve this. The disk must have the correct partition scheme, the correct file system and the boot loader files that the firmware looks for, in the correct locations.
The ISO concept also needs a short explanation here. An ISO is a disk image format that keeps an exact sector-by-sector copy of an optical disc in a single file, and it takes its name from the ISO 9660 file system standard. Microsoft distributes the Windows 11 installation media in this format. The file contains boot.wim, which runs Windows Setup, install.wim, which holds the Windows editions to be installed, and the Boot Manager files required for UEFI and BIOS. An ISO is only a file, and a computer cannot boot directly from inside it. The contents of the ISO must be extracted to the USB flash drive in a structure that the firmware understands, and this is exactly where Rufus is used.
Rufus is an open-source and completely free Windows application developed by Pete Batard under the GPLv3 licence. It does not require installation, consists of a single executable file of about 2 MB, and is designed to prepare a bootable USB drive from ISO files. What separates Rufus from its alternatives is that it handles the technical details of Windows installation media correctly. It creates the correct partition structure for UEFI and GPT. When FAT32 cannot be used because the install.wim file is larger than 4 GB, it selects NTFS and adds its own UEFI:NTFS component so that UEFI can boot from NTFS. It calculates the checksum values of the ISO so that you can check whether the file is original, and it lets you customise some Windows Setup behaviours through the Windows User Experience dialog. Microsoft's own Media Creation Tool does the same job, but Rufus makes the partition scheme, file system and boot loader choices visible, so you understand what you are doing.
In this article we follow the process from start to finish with real screenshots. First we clarify the prerequisites, then we download the Windows 11 ISO file from Microsoft's official page and verify it with its hash value, and then we prepare the media in Rufus while discussing what each field means and why that value is selected.
Let us start preparing our own Windows 11 bootable USB drive with Rufus.
Before we start, let us clarify what we need to have. The table below summarises the components required for the process in this article to run without problems, and why each one is needed.
|
Component |
Requirement |
Description |
|
Rufus |
Rufus 4.15 (4.15.2396) |
It must be downloaded only from rufus.ie or from the pbatard/rufus repository on GitHub. Standard, Portable, x86 and ARM64 versions are available. It does not require installation, it asks for Administrator rights through a UAC prompt, and its digital signature must appear as "Akeo Consulting". |
|
Computer that runs Rufus |
Windows 8 or later |
The Rufus 4.x series does not run on Windows 7 or earlier. The last version that runs on Windows 7 is 3.22. |
|
Windows 11 ISO |
Original, unmodified Microsoft ISO file |
It must be obtained from Microsoft's official download page, from a Visual Studio subscription or from the Microsoft 365 Admin Center. This article uses the 26H2 ISO that contains the business editions. ISOs produced with the Media Creation Tool are built differently on every run, so they cannot be verified with a hash. |
|
USB flash drive |
At least 8 GB, preferably 16 GB or more, USB 3.x |
The Windows 11 ISO is larger than 8 GB. All data on the disk will be erased, so take a backup. This article uses a 32 GB Kingston USB flash drive. |
|
Target computer |
UEFI firmware, Secure Boot, TPM 2.0, 4 GB RAM, 64 GB disk, supported CPU |
These are the official minimum requirements of Windows 11. In this article the media is prepared with GPT and UEFI (non CSM), so the target machine must boot in UEFI mode. |
|
Internet connection |
Required during the ISO download stage |
Rufus does not need the Internet while it writes the ISO to the USB drive. The ISO download (DOWNLOAD) feature inside Rufus appears only if the "Check for updates" setting is enabled. |
With the prerequisites complete, the first task is to obtain the Windows 11 ISO file. For this we go to Microsoft's Windows 11 download page.
When we scroll down the page, we see the "Download Windows 11 Disk Image (ISO) for x64 devices" section. This section offers a single multi-edition ISO for computers with Intel and AMD processors. Multi-edition means that a single ISO contains all consumer editions such as Home, Pro and Education, and that the product key you enter, or the key embedded in the OEM firmware, determines which one is installed during setup.
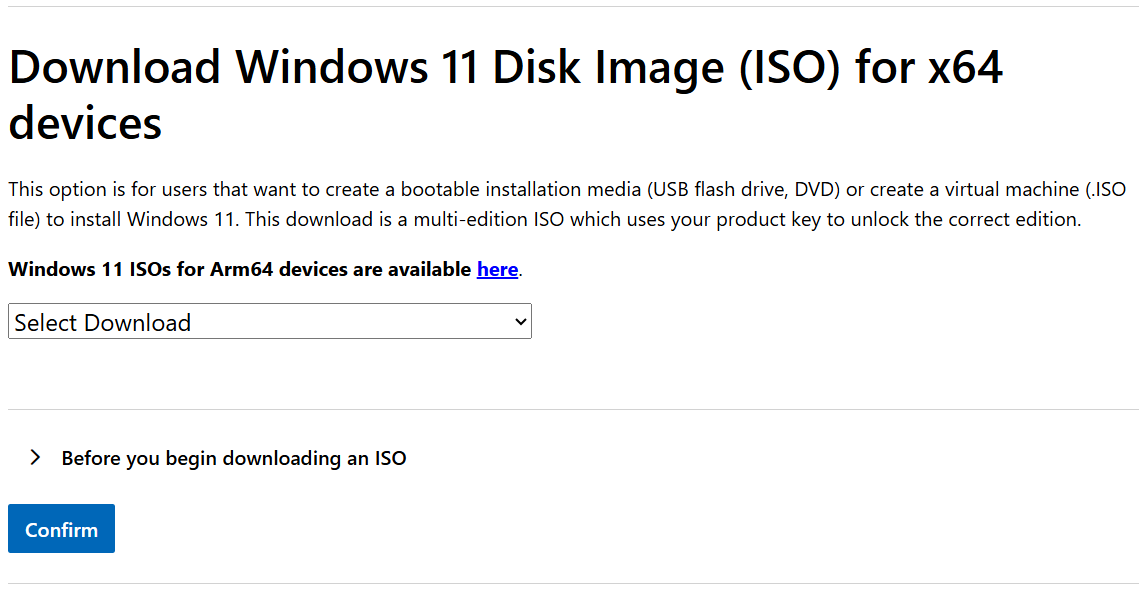
When the page first opens, the dropdown below the section shows "Select Download". In this state the "Confirm" button does nothing. We must first make a selection from the dropdown.
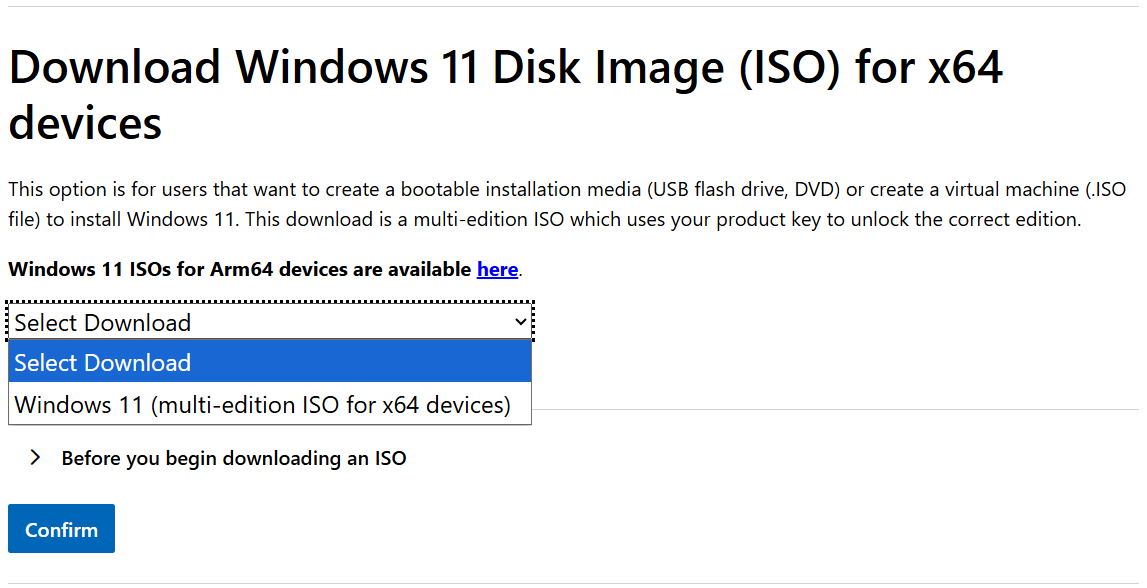
When we open the dropdown, we see that there is no real option other than "Windows 11 (multi-edition ISO for x64 devices)", and we select it. The link in the Arm64 line above the dropdown is for devices with ARM processors such as Snapdragon. If you are installing on an x64 computer, you must not use that link, because the ARM64 ISO does not boot on an x64 processor.
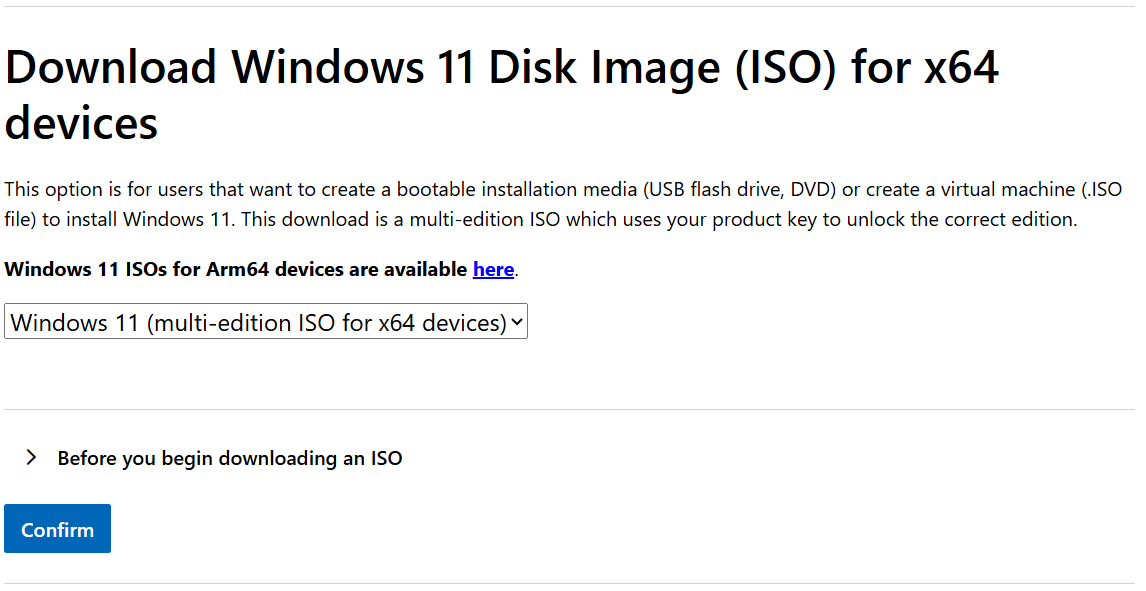
After we make the selection, the "Confirm" button becomes active. The button does not start the download directly. It takes you to the next step, which is the product language selection.
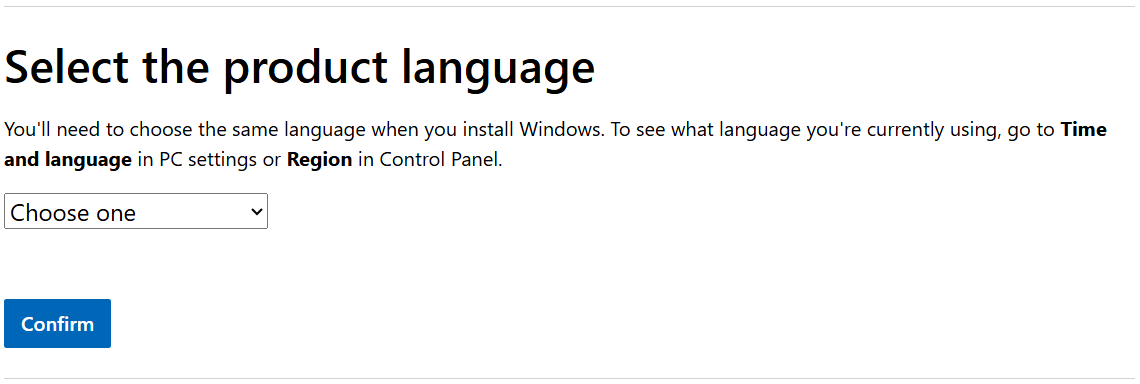
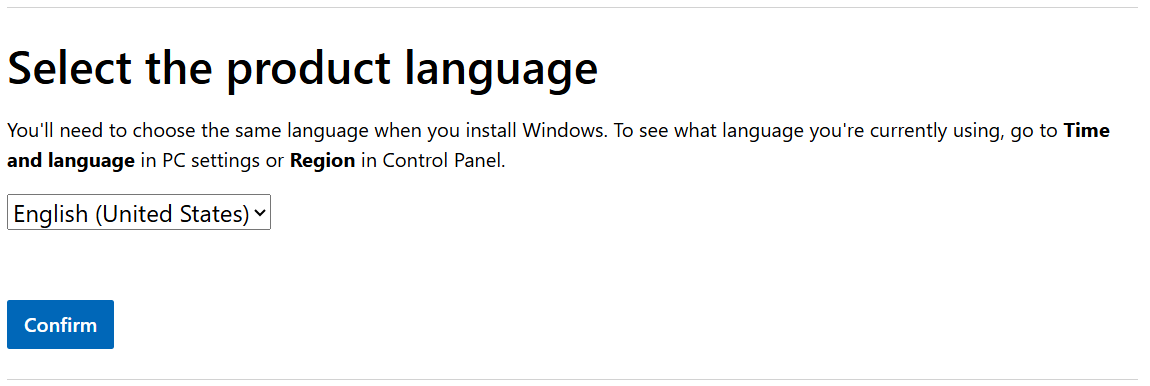
The product language selection is more important than it looks. As the page also states, the language you select here becomes the base system language of the installed Windows, and the hash value of the ISO also changes with the language. You can add another display language later, but the base language comes from the ISO. The dropdown initially shows "Choose one".
In this step we select "English (United States)" and continue with "Confirm". If you want a Turkish interface, you can select Turkish here. No step changes on the Rufus side, only the ISO file name and the Volume Label are different.
After the confirmation, a "64-bit Download" button appears under the "Download - Windows 11 Client - Build 26300.9457 English" heading. This button is a signed download link generated at that moment on Microsoft's CDN, and it is valid for 24 hours from the time it is created. The page shows the expiry time of the link in UTC. The same screen has a collapsible area titled "Verify your download". When you open this area, a separate SHA256 value is listed for each language. This is the reference value that we use after the download finishes.
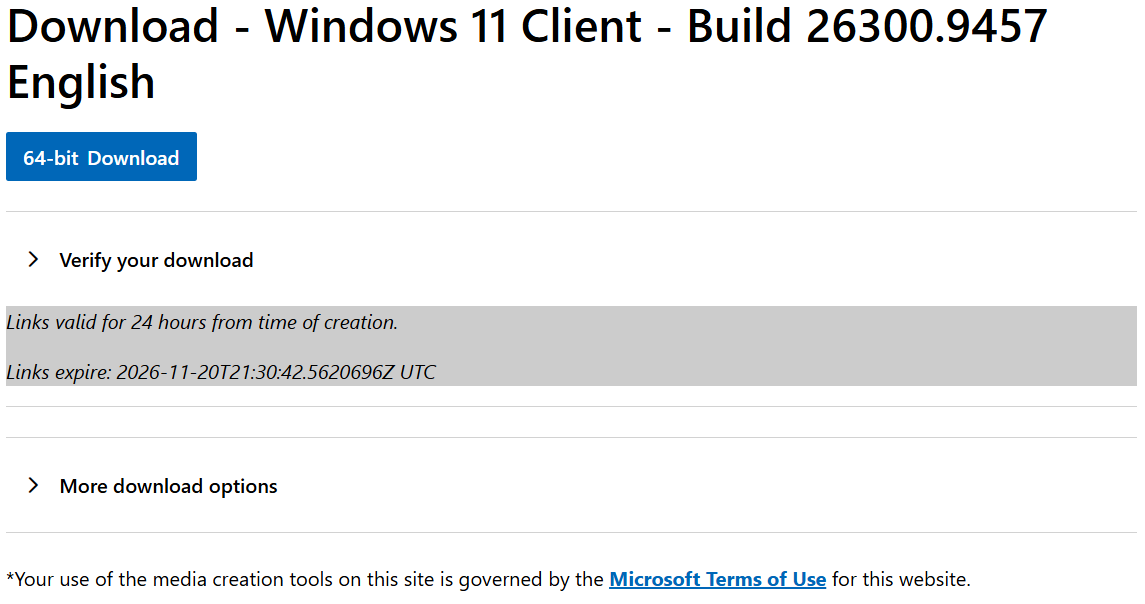
The SHA256 value that Microsoft publishes is specific to the language and the ISO version. If you selected a different language, you must use the value in the row for your own language as the reference.
When the download is complete, we verify the hash to make sure that the ISO arrived without corruption and without modification. Skipping this step can mean a corrupt file error in the middle of the installation, after the write to the USB drive has finished. Worse, it can mean installing a component that was added to an ISO from an unofficial source, without noticing it. Windows does not need an additional tool for this. The Get-FileHash cmdlet in PowerShell is enough.
Get-FileHash -Path "C:\ISO\Windows 11\en-us_windows_11_business_editions_version_26h2_x64_dvd_16357792.iso" -Algorithm SHA256
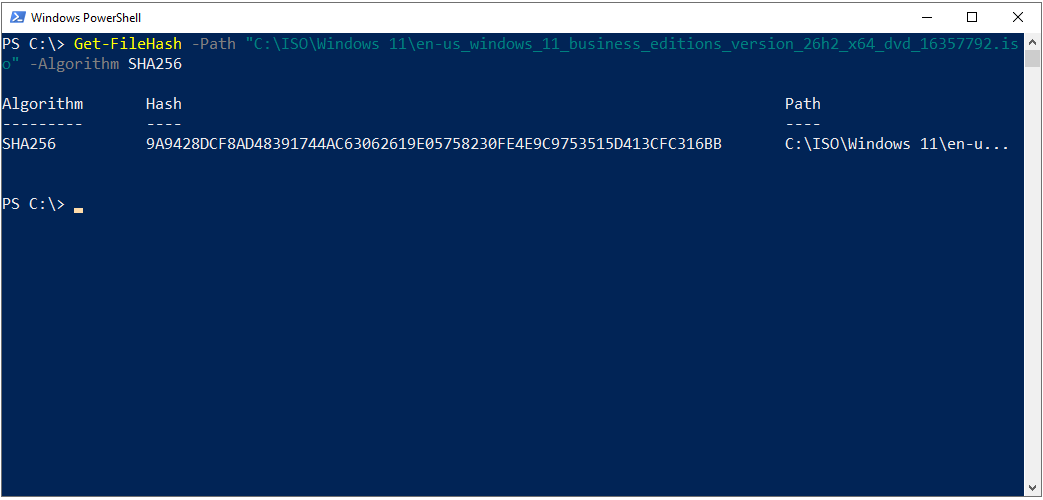
Compare the Hash column in the output with the SHA256 value given for your own language in the "Verify your download" area on the Microsoft page. If the 2 values are exactly the same, the ISO is original. Rufus can also do the same verification internally, so we will see this step on the Rufus side shortly.
We can now move on to Rufus. When we run Rufus, the UAC prompt appears. After we approve it, the single-window interface opens.
The Rufus interface is based on the classic Windows Format dialog and follows a workflow from top to bottom. The Drive Properties section defines what is written to which disk, and the Format Options section defines how it is written.
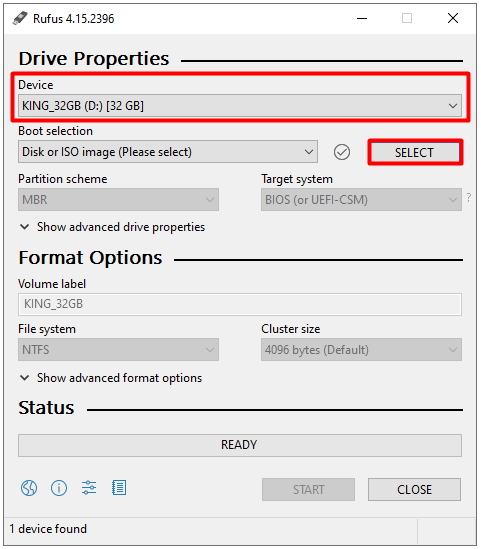
The first field, Device, shows the target disk that Rufus writes to. To prevent accidental data loss, Rufus never lists internal disks, and it also hides USB HDDs and SSDs by default. Only USB flash drives are visible. Here, the list shows the 32 GB Kingston drive as "KING_32GB (D:) [32 GB]".
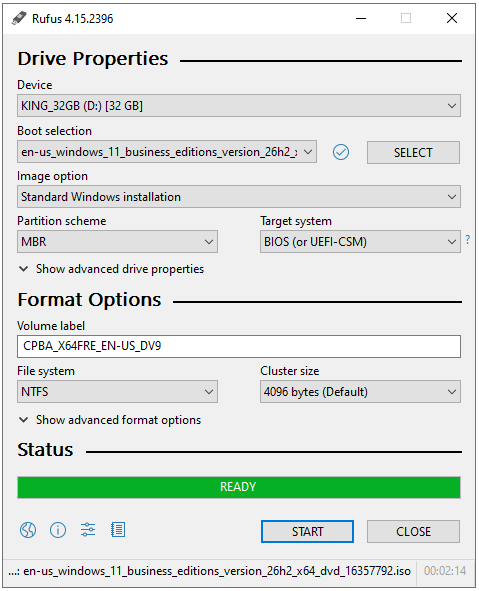
Because we have not selected an ISO yet, the Partition scheme and Target system fields are greyed out and show their default values, MBR and BIOS or UEFI-CSM. We do not change them for now.
We point to the ISO file with the SELECT button next to the Boot selection field.
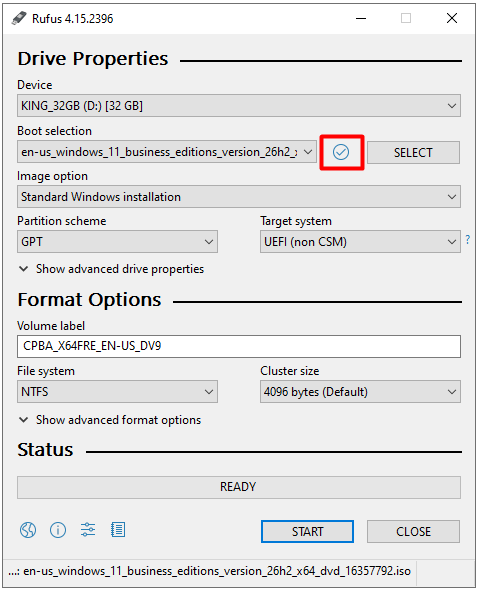
As soon as the ISO is selected, Rufus analyses the file and the fields in the interface are filled in automatically. We did not enter any of these values manually. Rufus examined the contents of the ISO and the file sizes inside it, and selected the correct combination for Windows 11.
1- The Boot selection field shows the name of the ISO file.
2- The Image option field becomes "Standard Windows installation".
3- The Partition scheme field becomes GPT.
4- The Target system field becomes UEFI (non CSM).
5- The Volume label field receives the ISO's own label, "CPBA_X64FRE_EN-US_DV9".
6- The File system field becomes NTFS.
The tick inside a circle to the left of the SELECT button is the checksum calculation button. We press this button to repeat inside Rufus the verification that we did with PowerShell a moment ago.
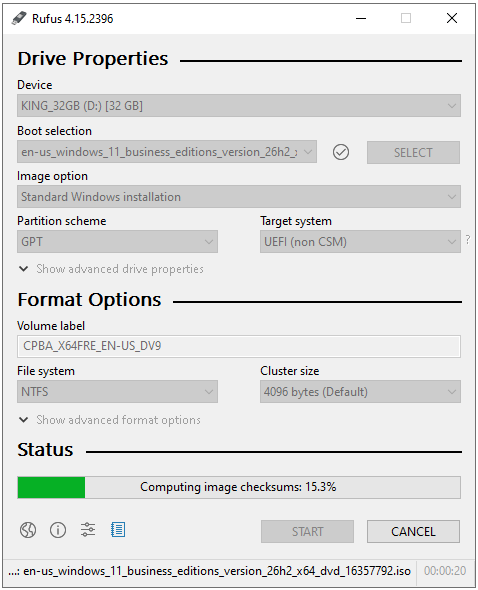
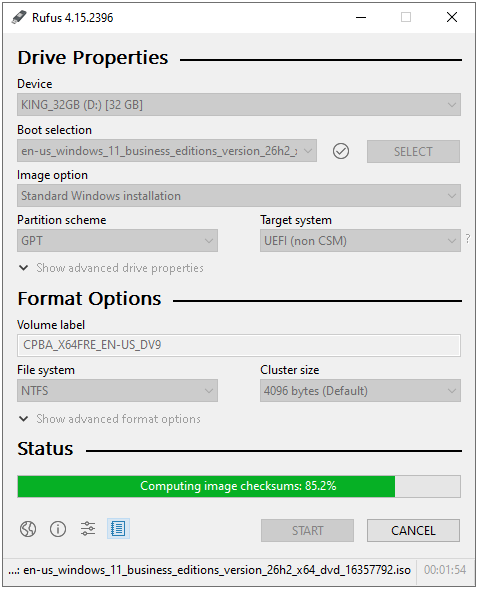
Rufus reads the ISO file from start to finish and calculates the MD5, SHA-1 and SHA-256 values at the same time. Because it runs the 3 algorithms in parallel, there is no difference in duration compared with calculating a single algorithm.
For the 8.3 GB ISO, this operation takes 1 to 2 minutes, depending on the read speed of the disk. The progress is shown as a percentage in the Status bar.
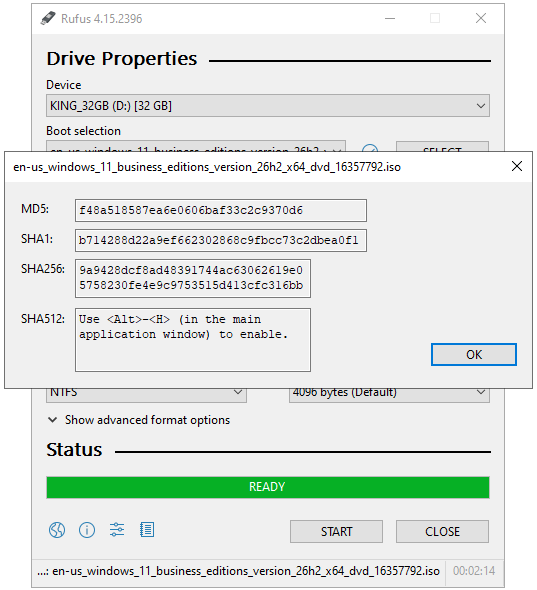
When the calculation finishes, a small window opens and shows the 3 hash values. The SHA256 value here must be the same as both the PowerShell output and the reference value on the Microsoft page. For the ISO used in this article, the SHA256 value was calculated as shown in the window below.
The note on the SHA512 line says that this algorithm can only be enabled with the Alt-H key combination in the main window. SHA256 is enough for Windows ISO verification.
If we want to see what Rufus detected about the ISO, we press the Log button, which is the last of the 4 icons in the lower left corner. The log records every operation that Rufus performs, in English, and it is the first place to look when a problem occurs.
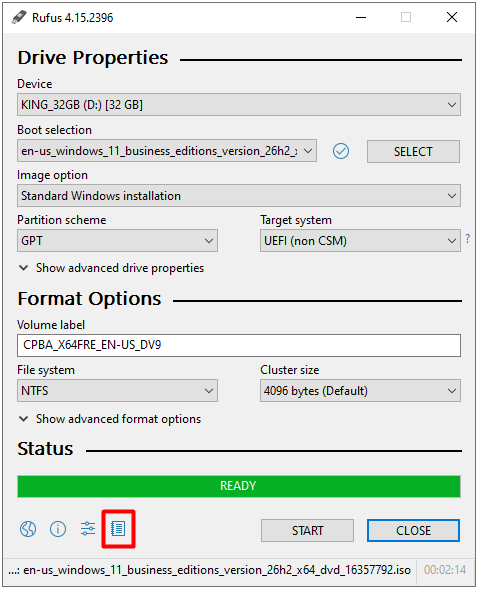
The Log window shows the analysis that Rufus performed on the ISO, line by line. For the ISO in this article, Rufus reports the following:
1- The image is in UDF format and does not contain a boot marker.
2- The image contains the EFI boot files and Bootmgr.
3- The image uses install.wim.
4- The image is Windows 11 Build 26300.9457.
5- The image contains a file larger than 4 GB.
Among the lines below, the most important is the "Has a >4GB file" line. The install.wim file is 7.5 GB in size and exceeds the 4 GB limit that FAT32 allows for a single file. This is exactly the technical reason why Rufus will shortly offer only NTFS in the File system field.
The UEFI bootloaders analysis section of the log also needs attention. Rufus detects that the bootmgr.efi and bootx64.efi files in the ISO are signed with the Microsoft Windows Production PCA 2011 certificate, and it notes that these files may fail Secure Boot validation on systems whose firmware has been moved to the Windows UEFI CA 2023 certificate.
If the PCA 2011 certificate has been revoked on the target machine, that is, added to the DBX, media prepared in this state does not boot. We will see the option that solves this situation shortly, in the Windows User Experience dialog.
We close the Log window and return to the main screen. From this point we go through the fields that Rufus filled in automatically, one by one.
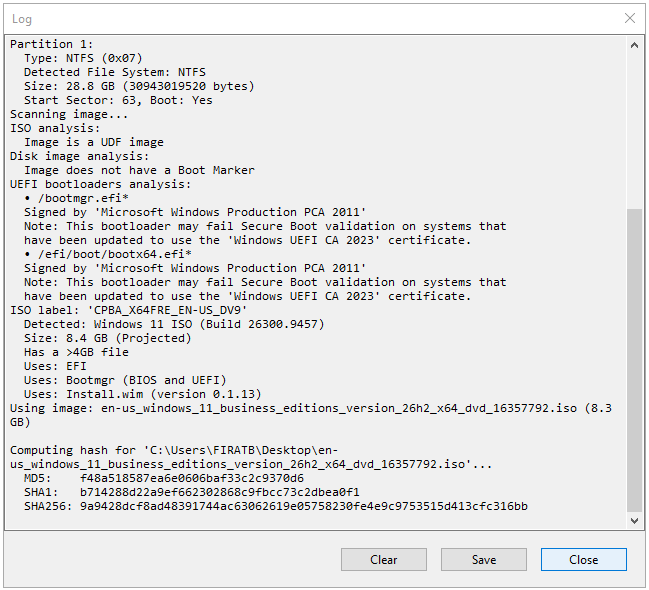
The first field is Image option. When we open the dropdown, we see 2 options.
1- Standard Windows installation: Makes the USB drive a classic installation medium that starts Windows Setup.
2- Windows To Go: Applies the install.wim file directly to the USB drive, and Windows runs from the USB drive without running Setup. This requires an SSD-based USB drive with a high random write speed.
Because we are preparing installation media, "Standard Windows installation" remains selected.
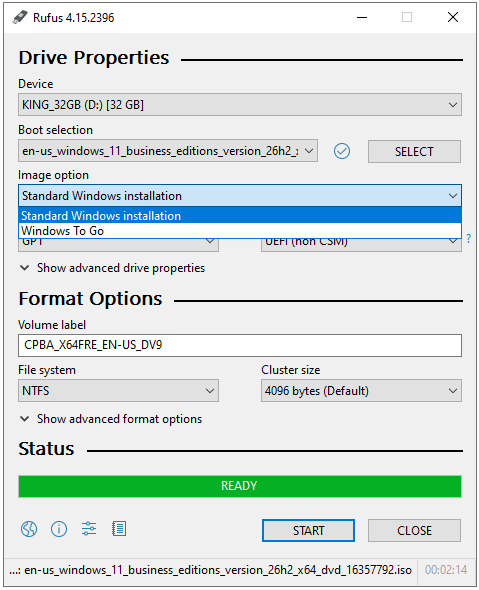
The next field is Partition scheme. This field determines which firmware type the media boots with, and it offers 2 options.
1- MBR (Master Boot Record): This structure has been in use since 1983. It keeps both the partition table and the boot code in the first sector of the disk, and supports a maximum of 4 primary partitions and a 2 TB disk size. It is the format that Legacy BIOS expects.
2- GPT (GUID Partition Table): This is part of the UEFI standard. It identifies each partition with a GUID, allows 128 partitions and a disk size above 2 TB, keeps a backup of the partition table at the end of the disk, and performs an integrity check with CRC32.
Because Windows 11 is supported only on UEFI, the correct choice is GPT, and Rufus has already selected it.
I covered the differences between GPT and MBR, their partition structures and how Windows boots with each of them in detail in my earlier article on the differences between GPT and MBR. Readers who want to study the subject in depth can read that article.
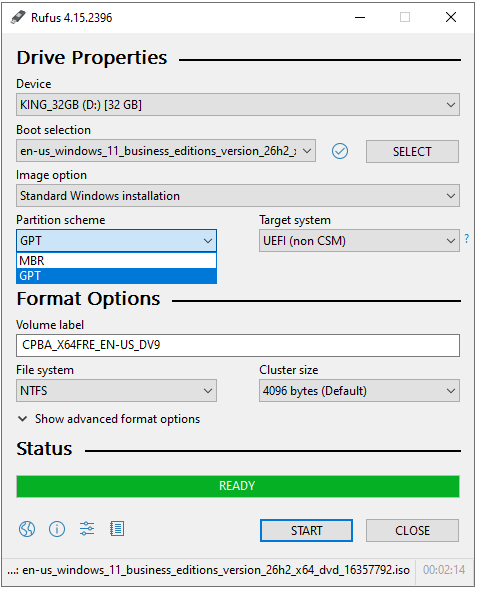
When we select MBR in the Partition scheme field, we see that the Target system field automatically changes to "BIOS (or UEFI-CSM)". These 2 fields are linked. MBR is for Legacy BIOS or for the BIOS emulation layer of UEFI, which is called CSM (Compatibility Support Module). GPT is for pure UEFI. In Rufus, Windows installation media is prepared either for UEFI or for BIOS. Hybrid media that supports both at the same time is not produced, and this is a deliberate design decision.
This screenshot was taken only to show the relationship. We return to GPT immediately, because Windows 11 in CSM mode is not officially supported, and media prepared with MBR does not boot in UEFI (non CSM) mode.
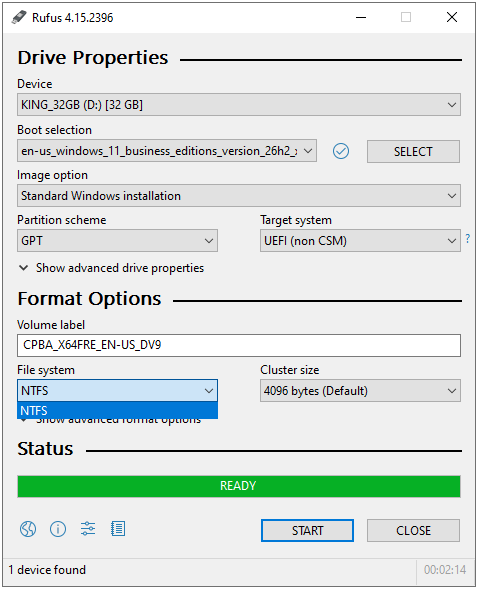
After returning to GPT, we look at the File system field. The dropdown contains only NTFS. FAT32 and exFAT are not listed. The reason is the 7.5 GB install.wim file that we saw in the log. FAT32 has a 4 GB limit for a single file, so this ISO does not fit on a FAT32 partition.
At this point the question may arise whether UEFI boots only from FAT32. The UEFI specification requires a firmware to be able to boot from FAT32 at least, but it does not say that the firmware can boot only from FAT32. UEFI is file system agnostic.
Here Rufus uses its own UEFI:NTFS component, and the boot chain works as follows.
1- Rufus creates 1 more small FAT partition on the USB drive, next to the main NTFS partition.
2- The firmware first loads the Secure Boot signed UEFI:NTFS bootloader from this FAT partition.
3- This bootloader loads the NTFS driver into memory.
4- Control is passed to Windows Boot Manager on the main NTFS partition.
For this reason we select NTFS without hesitation.
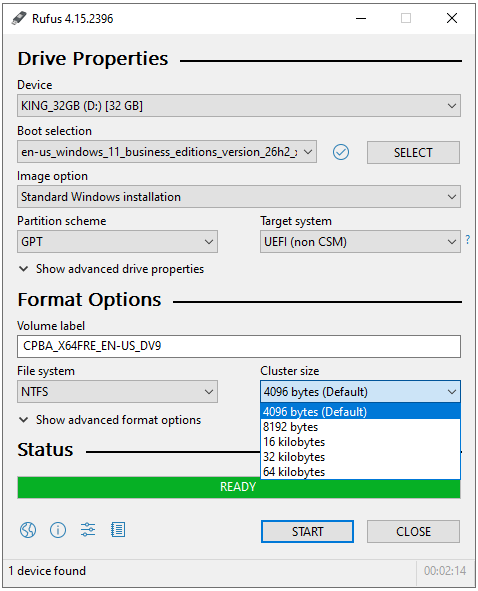
The Cluster size field defines the smallest allocation unit of the NTFS partition. The file system allocates at least 1 cluster to every file. If the file is smaller than this unit, the difference is wasted. If it is larger, the file is spread over more than 1 cluster. The values that Rufus offers are summarised in the table below.
|
Cluster Size |
Meaning |
Assessment for Installation Media |
|
4096 bytes (Default) |
This is the default value that Windows uses for NTFS partitions up to 16 TB. Wasted space on small files is lowest, and NTFS Compression is supported only at this size and below. |
This is the correct choice. The ISO content consists of many small files and a single large install.wim file, and 4 KB gives a balanced result for both types. |
|
8192 bytes |
Halves the number of clusters, and wasted space on small files increases. |
Does not give a measurable benefit for installation media. |
|
16 kilobytes |
Reduces the MFT and allocation overhead on large files, and the waste on small files becomes noticeable. |
Unnecessary for installation media. |
|
32 kilobytes |
Intended for very large files and scenarios with mostly sequential writes. |
Unnecessary for installation media. |
|
64 kilobytes |
This is the largest value that Rufus offers. It is meaningful only on partitions that hold very large files. |
Unnecessary for installation media. Windows Setup does not take the cluster size of the media into account. |
✔ We leave the value at the default, 4096 bytes. For installation media, the other values add nothing in terms of performance or compatibility.
✔ The Volume label field keeps the "CPBA_X64FRE_EN-US_DV9" value that comes from the ISO. This label becomes the name of the USB drive shown in Windows, and you can change it if you want.
✔ Under "Show advanced format options", Quick format stays selected and Check device for bad blocks stays cleared. The bad blocks check tests every sector of the disk, so it takes an unnecessarily long time.
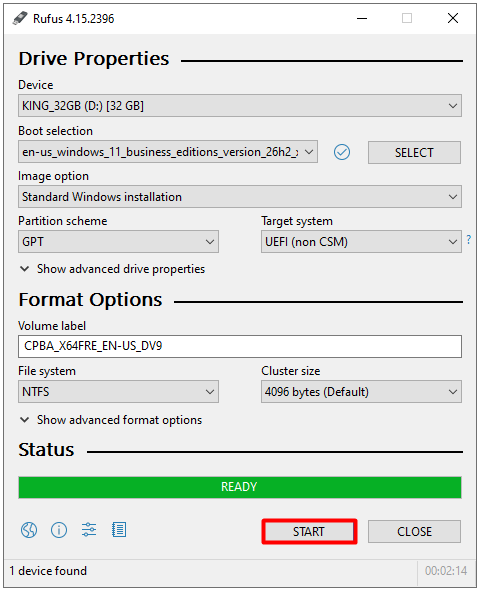
We have reviewed all the values. Before pressing the START button, we make sure that the fields on the screen match the table below.
|
Field |
Value |
|
Device |
KING_32GB (D:) [32 GB] |
|
Boot selection |
en-us_windows_11_business_editions_version_26h2_x64_dvd_16357792.iso |
|
Image option |
Standard Windows installation |
|
Partition scheme |
GPT |
|
Target system |
UEFI (non CSM) |
|
Volume label |
CPBA_X64FRE_EN-US_DV9 |
|
File system |
NTFS |
|
Cluster size |
4096 bytes (Default) |
|
Quick format |
Selected |
|
Check device for bad blocks |
Cleared |
After making sure that all settings match the values in the table, we press the START button. At this point nothing is written to the USB drive yet. Rufus first asks about the customisation options and then gives a final warning.
When we press the START button, the Windows User Experience dialog opens for Windows 10 and Windows 11 images. This dialog was added in Rufus 3.19 and has been extended since then. Its purpose is to write some Windows Setup behaviours that interrupt the installation process into the media before the installation starts. Rufus does this not by modifying Windows files, but by adding offline registry entries to boot.wim and by writing an autounattend.xml file to the root of the USB drive.
When the dialog opens, it shows 9 options. Some of them bypass the hardware and account requirements of Windows 11, some answer OOBE steps in advance, and the rest are for more specific scenarios such as the Secure Boot certificate chain. Selecting options without knowing which option solves which problem can produce an unsupported installation without you noticing, or media that does not boot on the target machine.
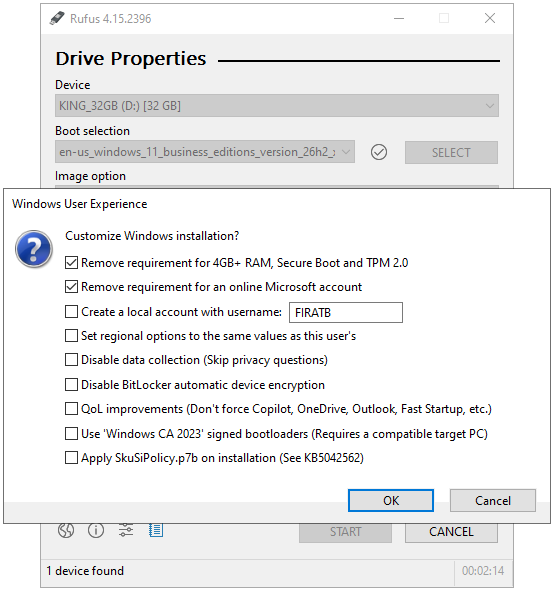
The table below summarises what the options do and how they do it.
|
Option |
What It Does |
How It Does It / Points to Note |
|
Remove requirement for 4GB+ RAM, Secure Boot and TPM 2.0 |
Bypasses the hardware check of Setup. |
The BypassTPMCheck, BypassSecureBootCheck and BypassRAMCheck values are written under the HKLM\SYSTEM\Setup\LabConfig key in boot.wim. Windows 11 installed in this way is not supported by Microsoft. |
|
Remove requirement for an online Microsoft account |
Brings back the local account option in OOBE. |
Works only if there is no network connection on the account screen. Microsoft tends to close this path in new builds. |
|
Create a local account with username |
Creates a local administrator account with the given name. |
Applied with autounattend.xml. The box is filled in automatically with the name of the user who runs Rufus. The password is empty, and the user is asked to change it at the first sign-in. |
|
Set regional options to the same values as this user's |
Carries the language, region, keyboard and time zone settings to the target. |
The settings of the machine that runs Rufus are written into autounattend.xml. The related OOBE steps are skipped. |
|
Disable data collection (Skip privacy questions) |
Sets all the privacy questions in OOBE to "Don't allow". |
Does not change the installation. It can be reverted in Settings after the installation. |
|
Disable BitLocker automatic device encryption |
Turns off automatic device encryption on Modern Standby devices. |
Applied through the registry. It is unnecessary on devices where you manage BitLocker with Intune. |
|
QoL improvements |
Removes OneDrive, Outlook and Teams, and disables Copilot and Fast Startup. |
Applied with the registry and policy methods documented by Microsoft, and no file is deleted. To restore OneDrive, set the HKLM\Software\Policies\Microsoft\Windows\OneDrive\DisableFileSyncNGSC value to 0. |
|
Use 'Windows CA 2023' signed bootloaders |
Replaces the bootloaders on the media with the ones signed with Windows UEFI CA 2023. |
This is the answer to the PCA 2011 warning that we saw in the log. The media boots only on machines that have this certificate installed in their firmware. It requires a Windows 11 25H2 or later ISO. |
|
Apply SkuSiPolicy.p7b on installation |
Applies the Secure Boot revocation policy to the installation. |
The SkuSiPolicy.p7b file is copied to the ESP. See KB5042562 for details. After it is applied, older media signed with PCA 2011 does not boot on the same machine. |
Windows 11 installed with the hardware requirement bypass is in a state that Microsoft does not support. Updates are not guaranteed for such installations, and they must not be used in corporate environments.
In this step we do not select any option. Let us go through the 2 boxes that are selected when the dialog opens, one by one.
1- Remove requirement for 4GB+ RAM, Secure Boot and TPM 2.0: The target machine meets the TPM 2.0, Secure Boot and 4 GB RAM requirements, so this bypass is not needed. We clear the box.
2- Remove requirement for an online Microsoft account: We will choose the account ourselves in the Windows initial setup wizard (OOBE). We clear the box.
The remaining options are already cleared. When all boxes are empty, Rufus does not modify the ISO content in any way, no registry entry is added to boot.wim, and no autounattend.xml is created. The resulting media is completely standard installation media, functionally the same as the media that Microsoft's Media Creation Tool produces. We continue by pressing the OK button.
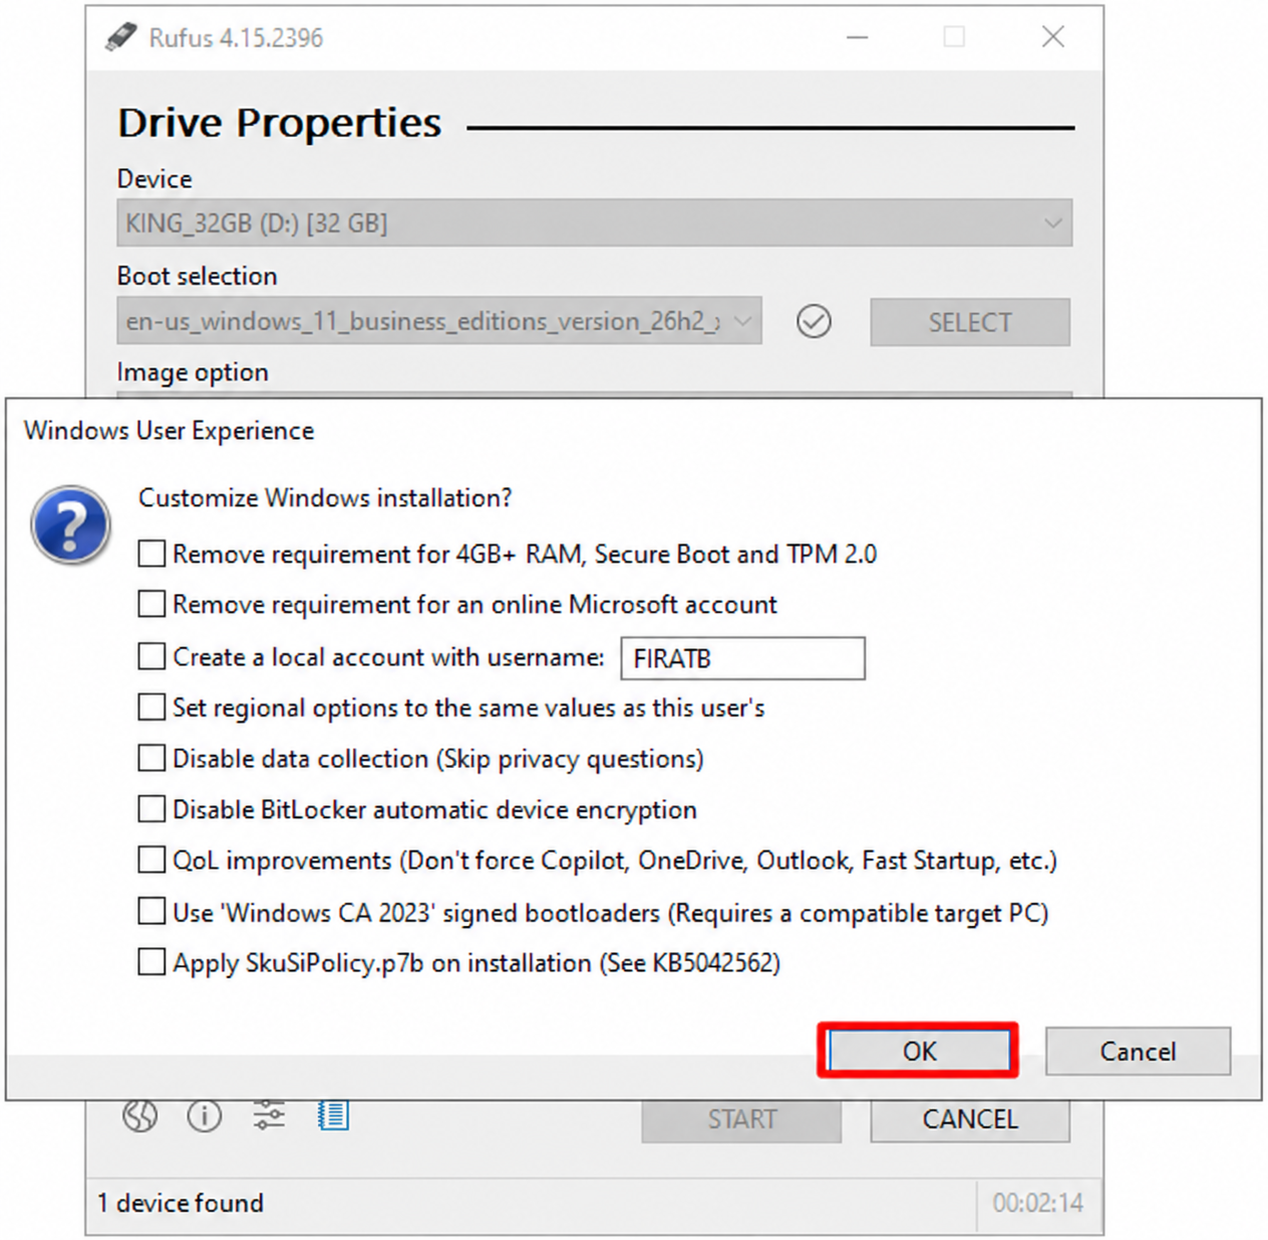
Before it starts writing, Rufus shows the "WARNING: ALL DATA ON DEVICE 'KING_32GB (D:) [32 GB]' WILL BE DESTROYED" warning. This warning is not decoration. As its first action, Rufus completely erases the partition table on the disk and creates a new GPT. Because the partition table and the file system records are erased, data recovery is not possible in practice.
After making sure that the device name and size in the warning really belong to the USB drive that you want to write to, we press the OK button.
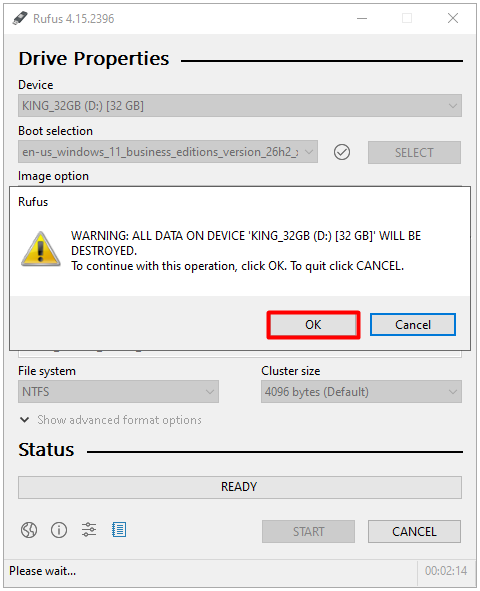
As soon as you press OK, all partitions on the USB drive are erased. If you selected the wrong disk, there is no way back after this step.
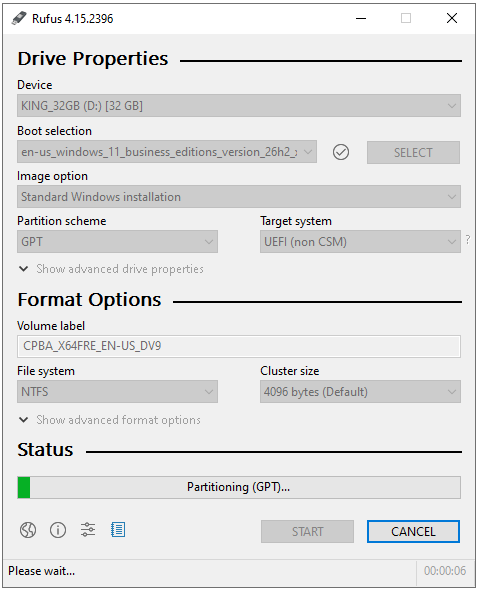
The write operation goes through 3 stages, and each stage is visible in the Status bar.
The first stage is the "Partitioning (GPT)..." step, and no file is copied at this stage yet. Only the partition structure of the disk is built from the beginning.
1- Rufus erases the existing partition table on the USB drive. It does not matter whether the disk had MBR or GPT before, the traces of both are cleaned.
2- A new GPT partition table is written to the start of the disk. The Protective MBR that GPT requires and the backup GPT table at the end of the disk are also created in this step.
3- 2 partitions are defined in the GPT. The first is the large NTFS partition that the ISO content is copied to, and the second is the small FAT partition that holds the UEFI:NTFS bootloader.
At this stage the partitions are only recorded in the table. The file system is written into them in the next stage. The step takes a few seconds.
The second stage is the "Creating file system" step, and Rufus reports it as 12 subtasks. The main partition is quick formatted with NTFS, the UEFI:NTFS partition is prepared with FAT, and the bootloader files are placed. On the screen we see the "Task 11/12 completed" message. The total time is about 1 minute.
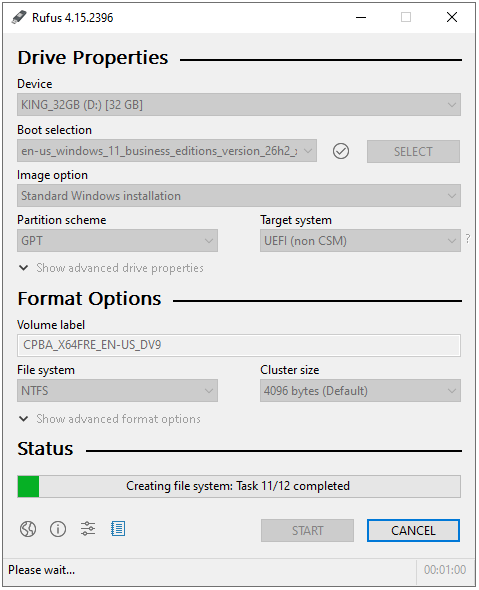
The third and longest stage is the "Copying ISO files" step. Rufus does not copy the ISO sector by sector in DD mode. It opens the file system inside the ISO and writes the files to the NTFS partition one by one. As a result, the USB drive appears as a normal disk in Windows and additional files can be copied to it.
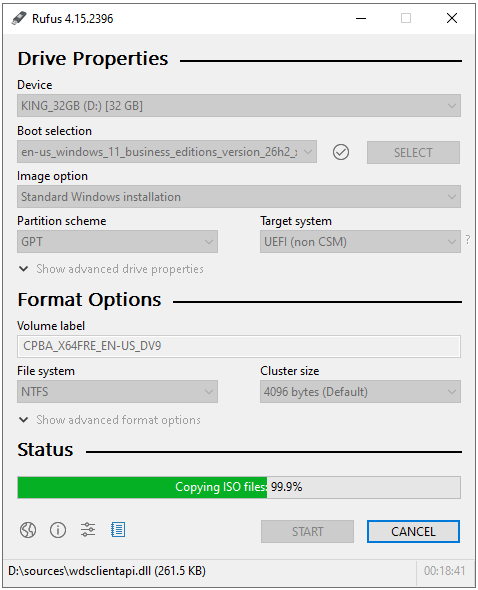
The bottom information bar shows which file is being written at that moment. Most of the time is spent on the 7.5 GB D:\sources\install.wim file. In the screenshots, install.wim is still being written at 30, 55 and 95 per cent, and this is normal.
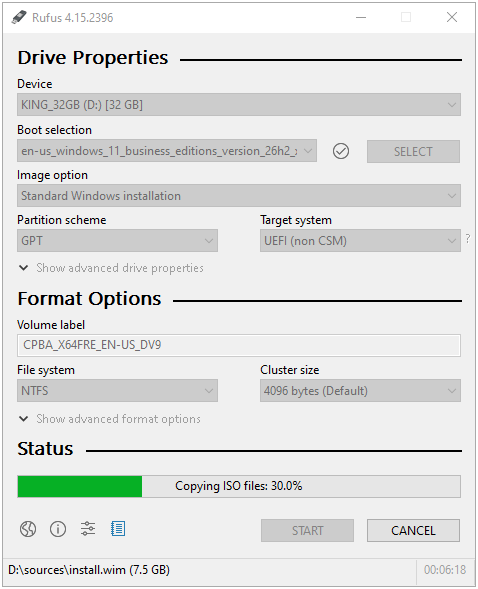
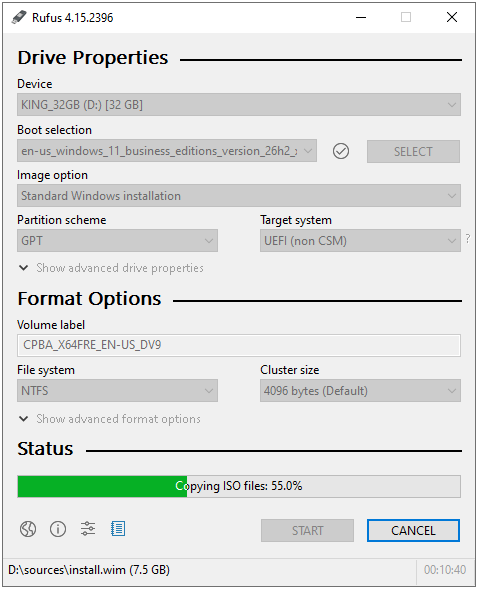
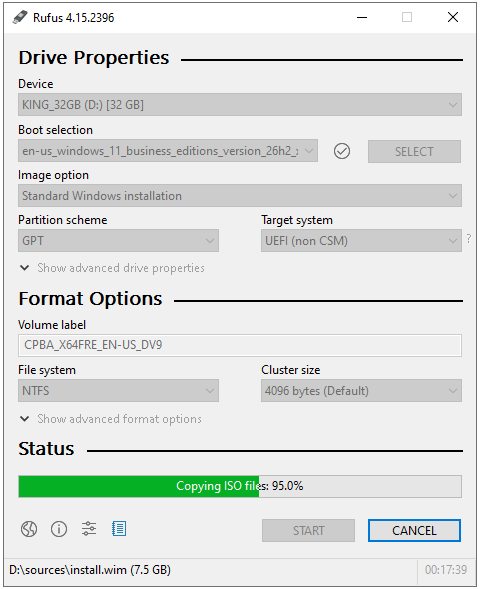
When install.wim is complete, only small files remain. At 99.9 per cent, the bottom bar shows that a 261 KB file that belongs to Windows Deployment Services, such as D:\sources\wdsclientapi.dll, is being written. This is the sign that the operation is near its end.
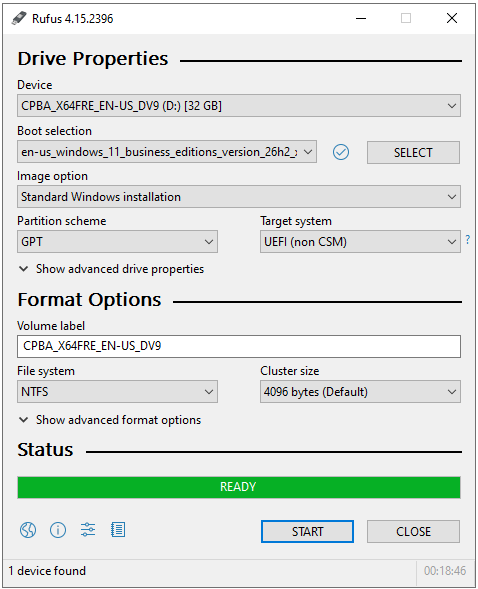
When the Status bar shows a green "READY", the operation is complete. The counter in the lower right corner gives the total time. For this operation on a USB 3.x drive, the time was 18 minutes 46 seconds.
Note that the name of the disk in the Device field is now "CPBA_X64FRE_EN-US_DV9 (D:) [32 GB]". Rufus wrote the value in the Volume label field to the disk, so the name of the USB drive shown in Windows changed.
The START and CLOSE buttons become active again. We close Rufus with CLOSE and remove the USB drive with safe removal in Windows.
We now have a bootable USB drive with a GPT partition scheme and an NTFS file system, compatible with Secure Boot through UEFI:NTFS, that carries Windows 11 26H2 installation files whose authenticity has been verified.
On the target computer, the only thing you need to do is insert the USB drive, press the manufacturer-specific boot menu key at startup and select the entry for the disk that starts with the "UEFI:" prefix in the list. If you select the Legacy entry, you see a screen with a short message that Rufus placed in the MBR, which reminds you that the media was prepared only for UEFI.
If the USB drive does not boot while Secure Boot is enabled, you need to check 2 points.
1- Whether the "Microsoft 3rd Party UEFI CA" option is enabled in the firmware settings.
2- Whether the PCA 2011 certificate has been revoked on the target machine. In this case you need to prepare the media again with the "Use 'Windows CA 2023' signed bootloaders" option.
When you want to use the same USB drive as a normal storage disk again, it is enough to select "Non bootable" in the Boot selection field in Rufus and format it. This operation also removes the UEFI:NTFS partition.
I hope you find it useful...
Feel free to share your thoughts and questions about this article in the comments below. Every contribution helps the content reach more people and makes for a more useful discussion.