Creating tens or hundreds of user objects individually in Active Directory takes time, and filling in the same fields by hand for every user is work that is prone to typing errors. When I do the same work with a data file and a PowerShell script, I prepare the user information once, and the script runs the New-ADUser command with the same parameter set for each row. In this way, all accounts are created to the same standard and in the correct Organizational Unit (OU).
I carry out the process in 4 stages. First, I prepare the user information in Microsoft Excel under suitable headers, then I use PowerShell to find the Distinguished Name (DN) of the Organizational Units where the users will be created. After that, I convert the Excel file to CSV UTF-8 format, and finally I run the script and verify the result in Active Directory. The script only creates user objects and writes the information in the CSV file to these objects. Group membership assignment and mailbox creation are outside the scope of this script.
1- Preliminary Checklist
Before I run the script, I review the items below. Each of these checks lets me find in advance a situation that could otherwise appear after the script runs, either as an error line or as an incorrectly created account.
|
Check |
Expected State |
|
ActiveDirectory module and access |
The ActiveDirectory module must be installed on the machine where the script will run (it is already present on a domain controller, and on other machines it is installed with RSAT). This machine must be able to reach a writable domain controller in the target domain over Active Directory Web Services (TCP 9389). New-ADUser does not work with a Read-Only Domain Controller (RODC). |
|
Permissions |
The account that runs the script must be able to create user objects in the target Organizational Units, set the initial password, enable the account and apply the ChangePasswordAtLogon setting. If custom delegation is used, verify that, in addition to the Reset Password right, write permission on the pwdLastSet attribute of user objects is also in effect. Domain Admins membership is not required. It is enough to grant the permission only on the target OUs. |
|
Target Organizational Units |
Every Distinguished Name (DN) in the Path column must be written in full and must point to the OU where the user is really intended to be created. |
|
Uniqueness |
SamAccountName must be unique within the domain, UserPrincipalName within the forest, and Name within the same OU. |
|
Password |
The values in the Password column must comply with the password policy that applies to the user. If a Fine-Grained Password Policy applies to the user, that policy is used. Otherwise, the default domain password policy is used. |
|
Country value |
Write the 2-letter ISO 3166 country code, not the country name (TR for Turkey). |
|
CSV delimiter |
The delimiter used in the file must match the Import-Csv line in the script (see 4- Preparing the CSV File). |
|
Execution Policy |
PowerShell must allow scripts to run. Under RemoteSigned, which is the default policy on Windows Server, if an unsigned script is blocked because the file carries the Internet Zone mark, the block can be removed with Unblock-File after the content and the source have been verified. If the download method did not add this mark, there is no need to remove a block. If AllSigned is in effect, the script must be signed by a trusted publisher. |
2- Preparing the Data File with Excel
To create user objects in bulk, I prepare the data in Microsoft Excel. I prefer Excel because filling in, copying and checking a large number of rows column by column is much easier than in a plain text file, and the file can be converted to CSV format with a few clicks.
I write the information for the user objects that I will create under the headers below, in the Excel file that I named Import-Bulk-Users.xlsx. Each row corresponds to 1 user.
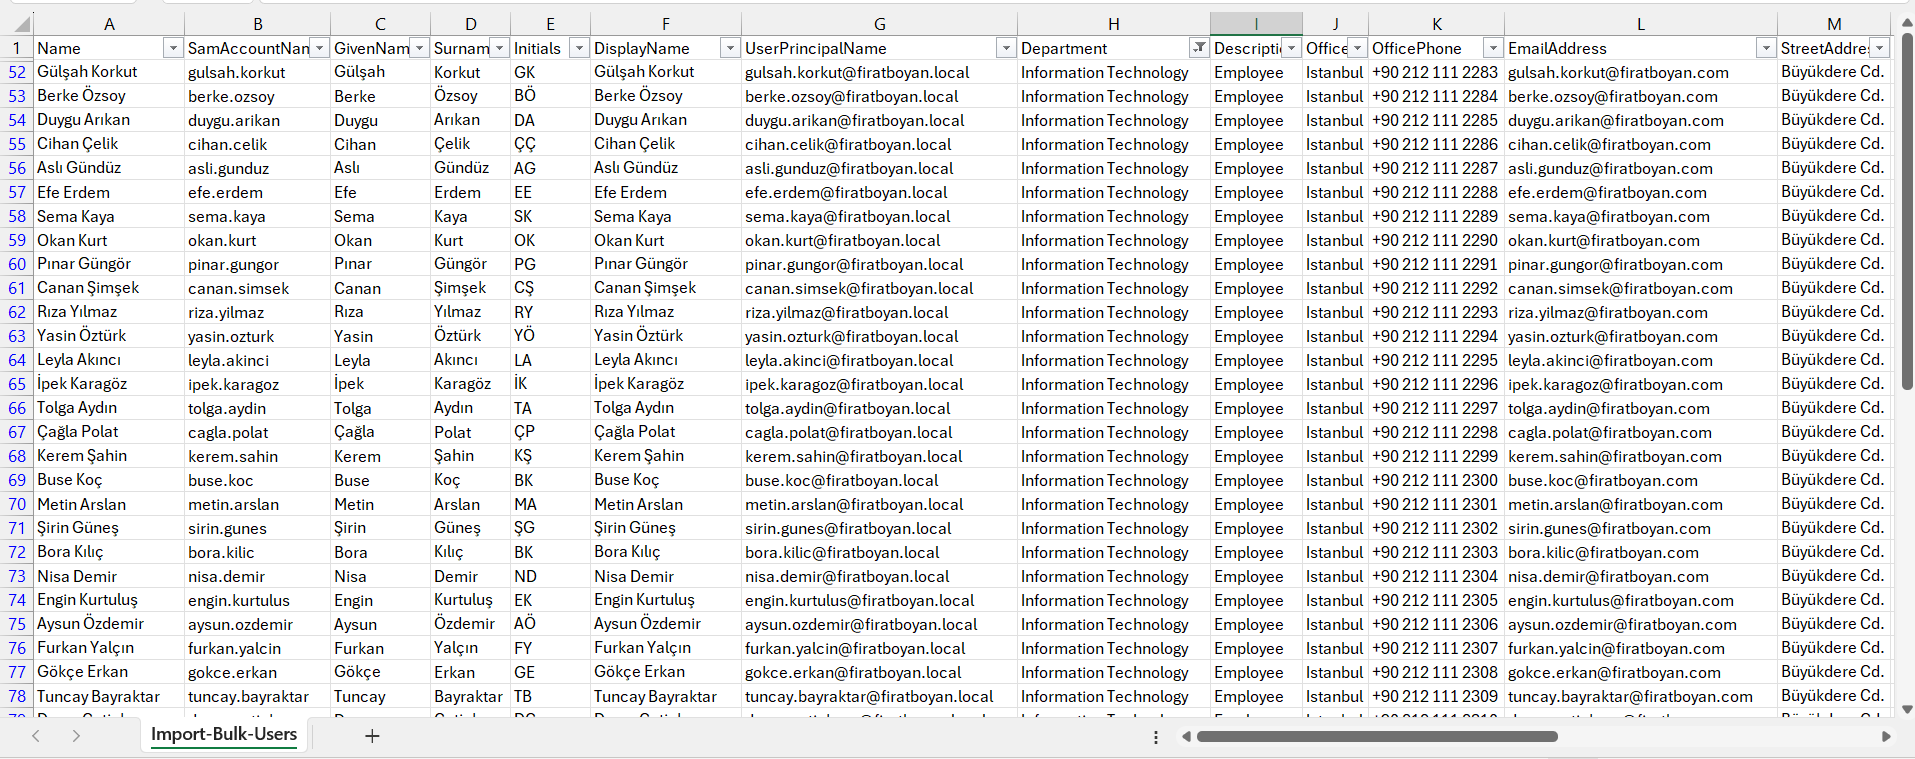
Excel Headers and Their Attribute Equivalents
The headers in Excel are not randomly chosen names. The mapping table (hashtable) in the script determines which column is passed to which New-ADUser parameter. Most of the headers are the same as the parameter name, but the Password column is passed to the AccountPassword parameter. The parameter names and the LDAP attribute names in Active Directory are also not always the same. For example, the Office parameter writes to the physicalDeliveryOfficeName attribute, and the City parameter writes to the l attribute. The equivalents in the table below help you when you look for these values on the Attribute Editor tab or in LDAP filters.
|
Header |
LDAP Attribute |
Description |
|
Name |
cn, name |
The name of the object in Active Directory. It forms the first part of the Distinguished Name (CN=...). It is a mandatory parameter for New-ADUser. |
|
SamAccountName |
sAMAccountName |
The logon name in DOMAIN\user format. It must be unique within the domain and is limited to 20 characters for user objects. |
|
GivenName |
givenName |
The user's first name. |
|
Surname |
sn |
The user's surname. |
|
Initials |
initials |
The initials used between the first name and the surname. It accepts a maximum of 6 characters. |
|
DisplayName |
displayName |
The name shown in the address book, in user lists and on contact cards. New-ADUser does not fill in this field automatically. The value comes from the CSV file. |
|
UserPrincipalName |
userPrincipalName |
The logon name in user@suffix format. It must be unique within the forest. |
|
Department |
department |
The department where the user works. |
|
Description |
description |
A free-text description field about the user. |
|
Office |
physicalDeliveryOfficeName |
The office or location where the user works. |
|
OfficePhone |
telephoneNumber |
The office telephone number. |
|
EmailAddress |
mail |
The email address. This field only fills in the mail attribute. It does not create a mailbox for the user. |
|
StreetAddress |
streetAddress |
The street address. |
|
POBox |
postOfficeBox |
The PO box number. |
|
City |
l |
The city. |
|
State |
st |
The state, region or province. |
|
Country |
c |
The 2-letter ISO 3166 country code (TR for Turkey). The full country name is not written in this field. |
|
PostalCode |
postalCode |
The postcode. |
|
Title |
title |
The job title. |
|
Company |
company |
The company that the user belongs to. |
|
Password |
Not an attribute |
The initial password of the account. The script converts this value to a SecureString and passes it to the AccountPassword parameter. |
|
Path |
Not an attribute |
The Distinguished Name (DN) of the Organizational Unit where the user object will be created. |
I write the UserPrincipalName value in email address format, as in the examples user@firatboyan.local and user@firatboyan.com. The User Principal Name (UPN) is the name that the user uses when signing in with Kerberos. In environments synchronised with Microsoft Entra Connect Sync, the cloud UPN also comes from the on-premises userPrincipalName value, unless a different attribute is selected as the Alternate Login ID.
The point that needs attention here is the choice of suffix. For the cloud UPN to be the same as the on-premises value, the suffix must be a verified domain in the tenant. A suffix that cannot be routed on the internet, such as firatboyan.local, cannot be verified. In this case, Microsoft Entra ID calculates the user's UPN from the MailNickName value and the tenant's initial domain, which has the onmicrosoft.com extension. If the users are planned to use Microsoft 365 services in the future, adding the tenant's verified domain to AD DS as an alternative UPN suffix and writing the UPN with this suffix from the start removes the need for a bulk UPN change later.
The Password column contains the passwords in plain text. Keep the Excel and CSV files in a location that only authorised people can access, and delete them after the operation is complete.
The Difference Between Name, DisplayName and GivenName
These 3 fields are often confused with each other because they usually hold the same or similar values, but their functions in Active Directory are different.
Name is the name of the object in the directory. The user's Distinguished Name starts with this value (CN=Fırat Boyan,OU=Users,...). It is not used for authentication, and the uniqueness requirement is limited to the same Organizational Unit. A second object with the same Name value cannot be created in the same OU, but the same Name can be used in different OUs.
GivenName is the information field that holds the user's first name. It has no effect on sign-in or on the location of the object. It is used in the address book, on the contact card and in searches by first name and surname.
DisplayName is the name of the user that other users and applications see. This value is displayed in the address book and in user lists. It is usually written the same as Name, but it does not have to be the same. For example, Name can contain an employee ID number for uniqueness, while DisplayName consists only of the first name and surname.
3- Finding the Organizational Unit Distinguished Name for the Path Value
The Path column in the Excel file determines the Organizational Unit in which each user object is created. This value must be written in Distinguished Name (DN) format, with the full path and without anything missing. An error here can have 2 different results. If the DN that was written cannot be resolved in Active Directory, the user cannot be created. If the incorrectly written DN points to another existing OU and the account that runs the script has permission there, the user is created in that OU without an error. The second case carries more risk because it is not noticed in the output. For example, the DN below states that the user will be created under the IT department, in the Organizational Unit named Users.
OU=Users,OU=IT,OU=Ist-All-Departments,OU=Istanbul,OU=Turkey,OU=Europe,DC=firatboyan,DC=local
A Distinguished Name is written from left to right, from the lowest object towards the domain root. In the example above, OU=Users is the innermost layer and DC=firatboyan,DC=local is the outermost layer. I use PowerShell to find the Distinguished Name (DN) of the Organizational Units. I wrote the commands below according to my own Active Directory Organizational Unit (OU) hierarchy. You should change the SearchBase and filter values to match your own structure.
Command 1 - Listing All Organizational Units
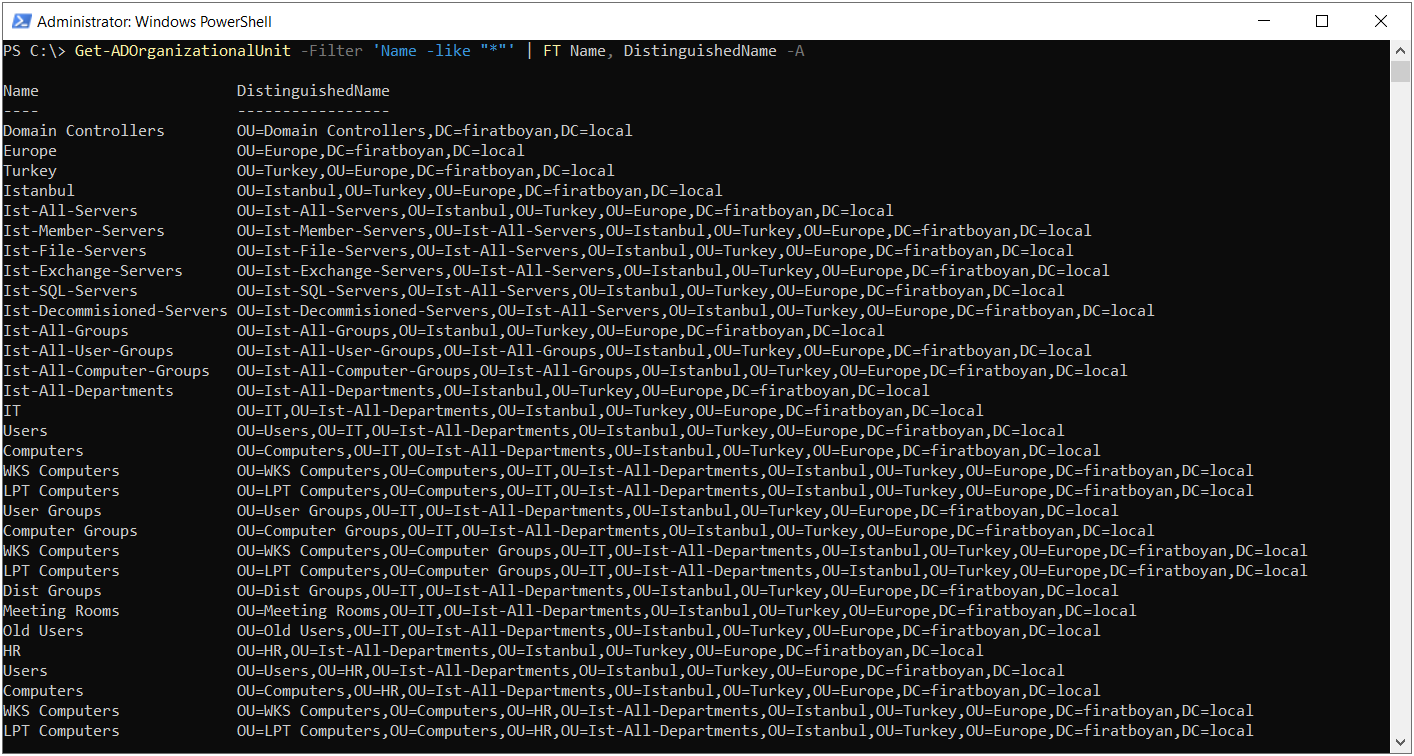
Get-ADOrganizationalUnit -Filter 'Name -like "*"' | FT Name, DistinguishedName -A
This command lists all Organizational Units in the domain with their names and DNs. The 'Name -like "*"' filter matches every name, so it gives the same result as writing -Filter *. I start with this command to get an overall view of the structure and to see which OUs exist.
Command 2 - Filtering by Name
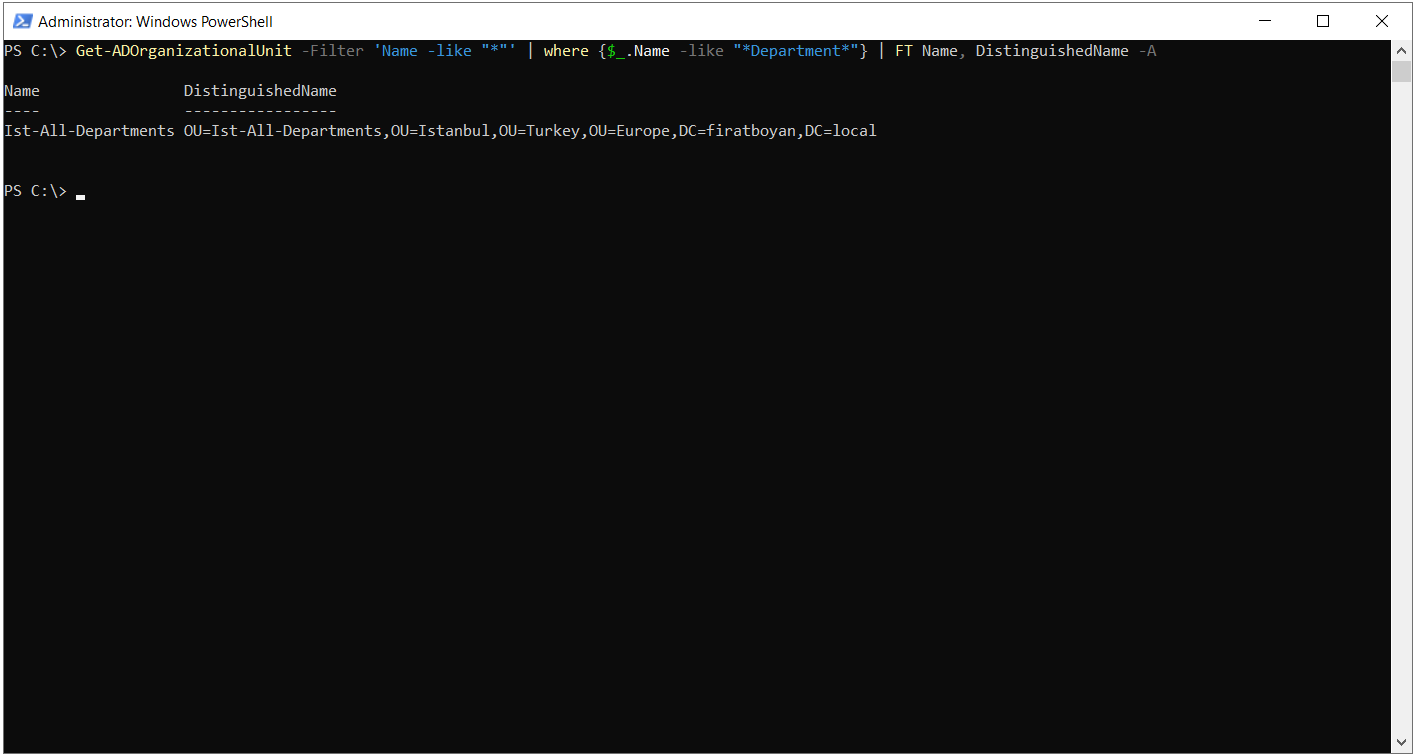
Get-ADOrganizationalUnit -Filter 'Name -like "*"' | where {$_.Name -like "*Department*"} | FT Name, DistinguishedName -A
This command first retrieves all OUs, and then the where {$_.Name -like "*Department*"} expression selects the ones that have the word Department in their name. Here, the filtering is done after the results reach the PowerShell session. In structures with a large number of OUs, writing the same condition directly as -Filter 'Name -like "*Department*"' returns the result faster because it leaves the filtering to the domain controller.
Command 3 - Listing the Level Directly Under a Specific Organizational Unit
Get-ADOrganizationalUnit -SearchBase 'OU=Ist-All-Departments,OU=Istanbul,OU=Turkey,OU=Europe,DC=firatboyan,DC=local' -SearchScope OneLevel -Filter * | FT Name, DistinguishedName -A
This command lists the Organizational Units located directly under OU=Ist-All-Departments. The -SearchScope OneLevel parameter limits the search to 1 level, so OUs at lower levels are not included in the result. This lets me see all the department OUs in a single view.
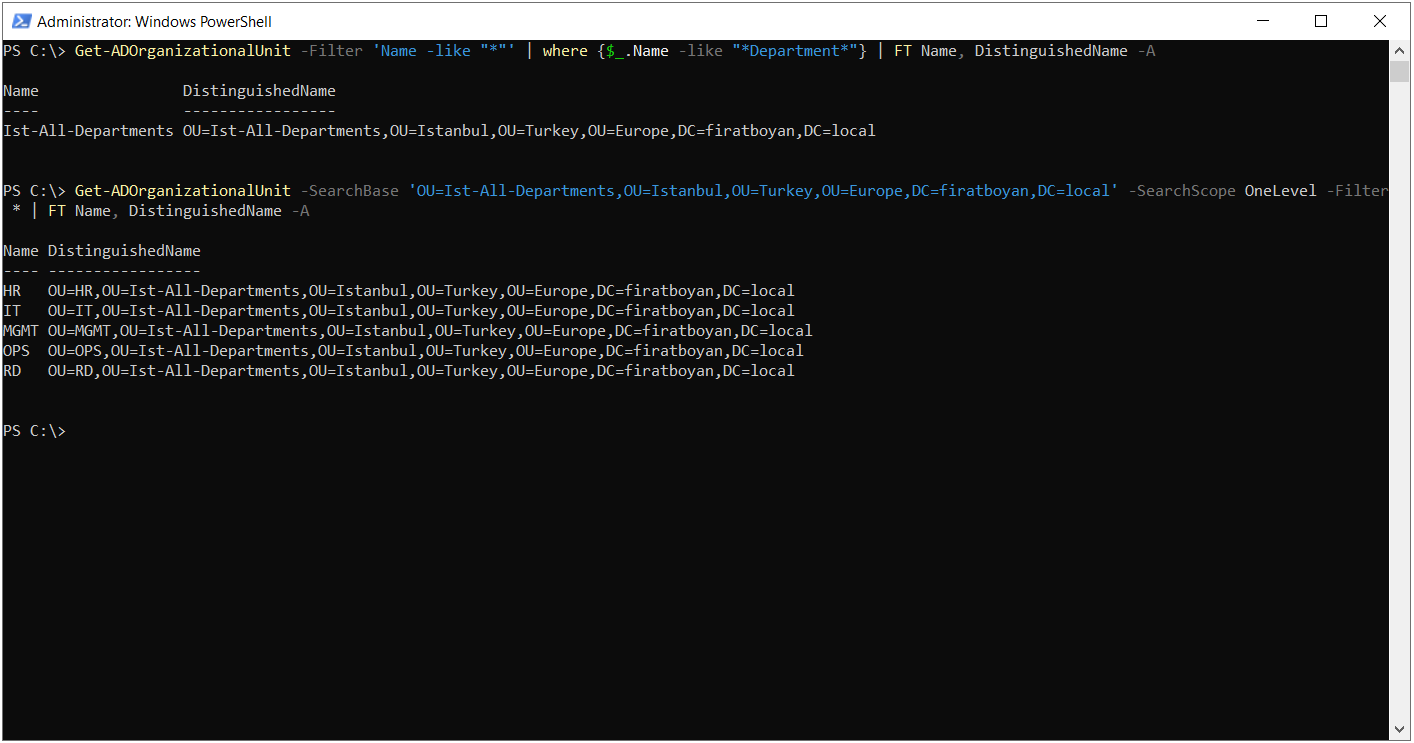
OU=HR,OU=Ist-All-Departments,OU=Istanbul,OU=Turkey,OU=Europe,DC=firatboyan,DC=local
OU=IT,OU=Ist-All-Departments,OU=Istanbul,OU=Turkey,OU=Europe,DC=firatboyan,DC=local
OU=MGMT,OU=Ist-All-Departments,OU=Istanbul,OU=Turkey,OU=Europe,DC=firatboyan,DC=local
OU=OPS,OU=Ist-All-Departments,OU=Istanbul,OU=Turkey,OU=Europe,DC=firatboyan,DC=local
OU=RD,OU=Ist-All-Departments,OU=Istanbul,OU=Turkey,OU=Europe,DC=firatboyan,DC=local
Command 4 - Listing the Users Organizational Units at Lower Levels
Get-ADOrganizationalUnit -SearchBase 'OU=Ist-All-Departments,OU=Istanbul,OU=Turkey,OU=Europe,DC=firatboyan,DC=local' -SearchScope Subtree -Filter "Name -like 'Users*'" | FT Name, DistinguishedName -A
I will create the users not in the department OUs themselves but in the Organizational Units named Users under each department. For this reason, I extend the search to all lower levels with -SearchScope Subtree and use -Filter "Name -like 'Users*'" to select the OUs whose name starts with Users. The 2 parameters work together. Subtree determines how deep the search goes, and Filter determines which objects are returned at that depth.
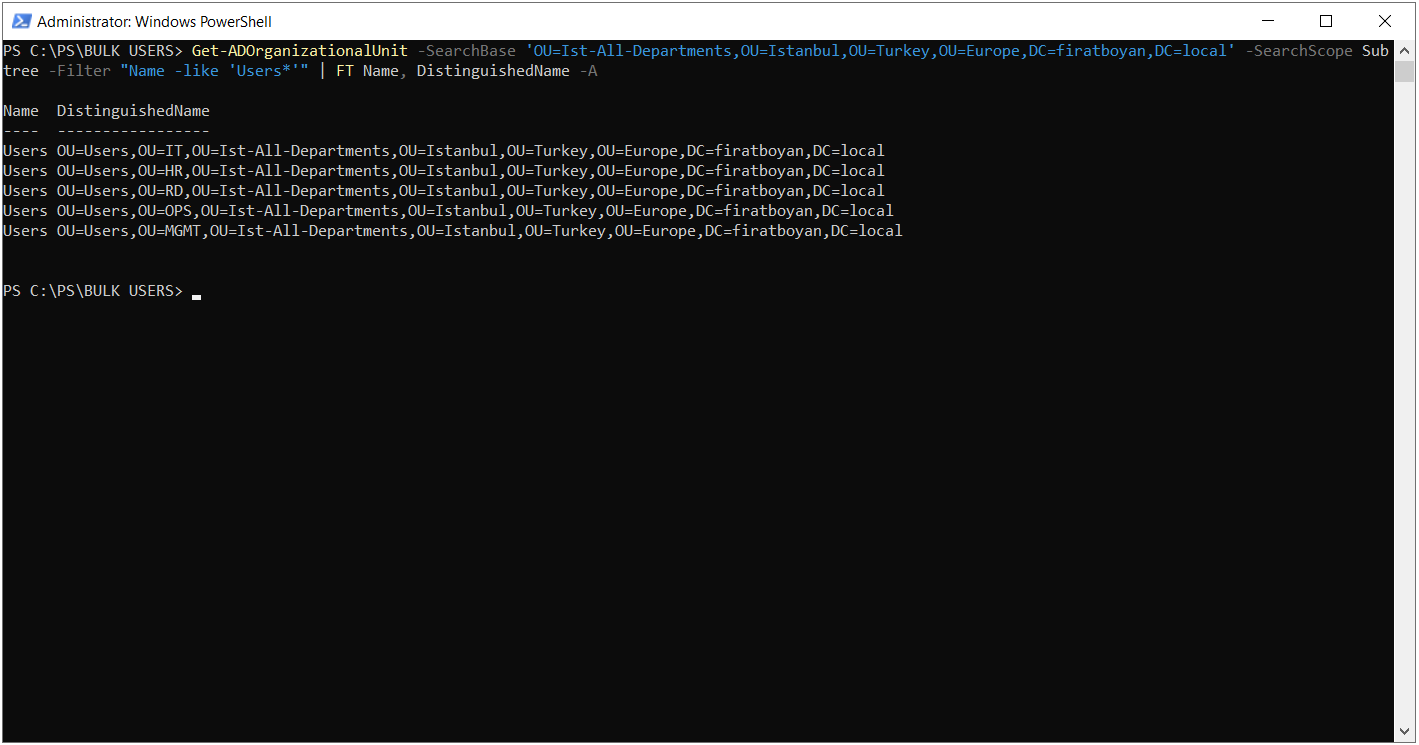
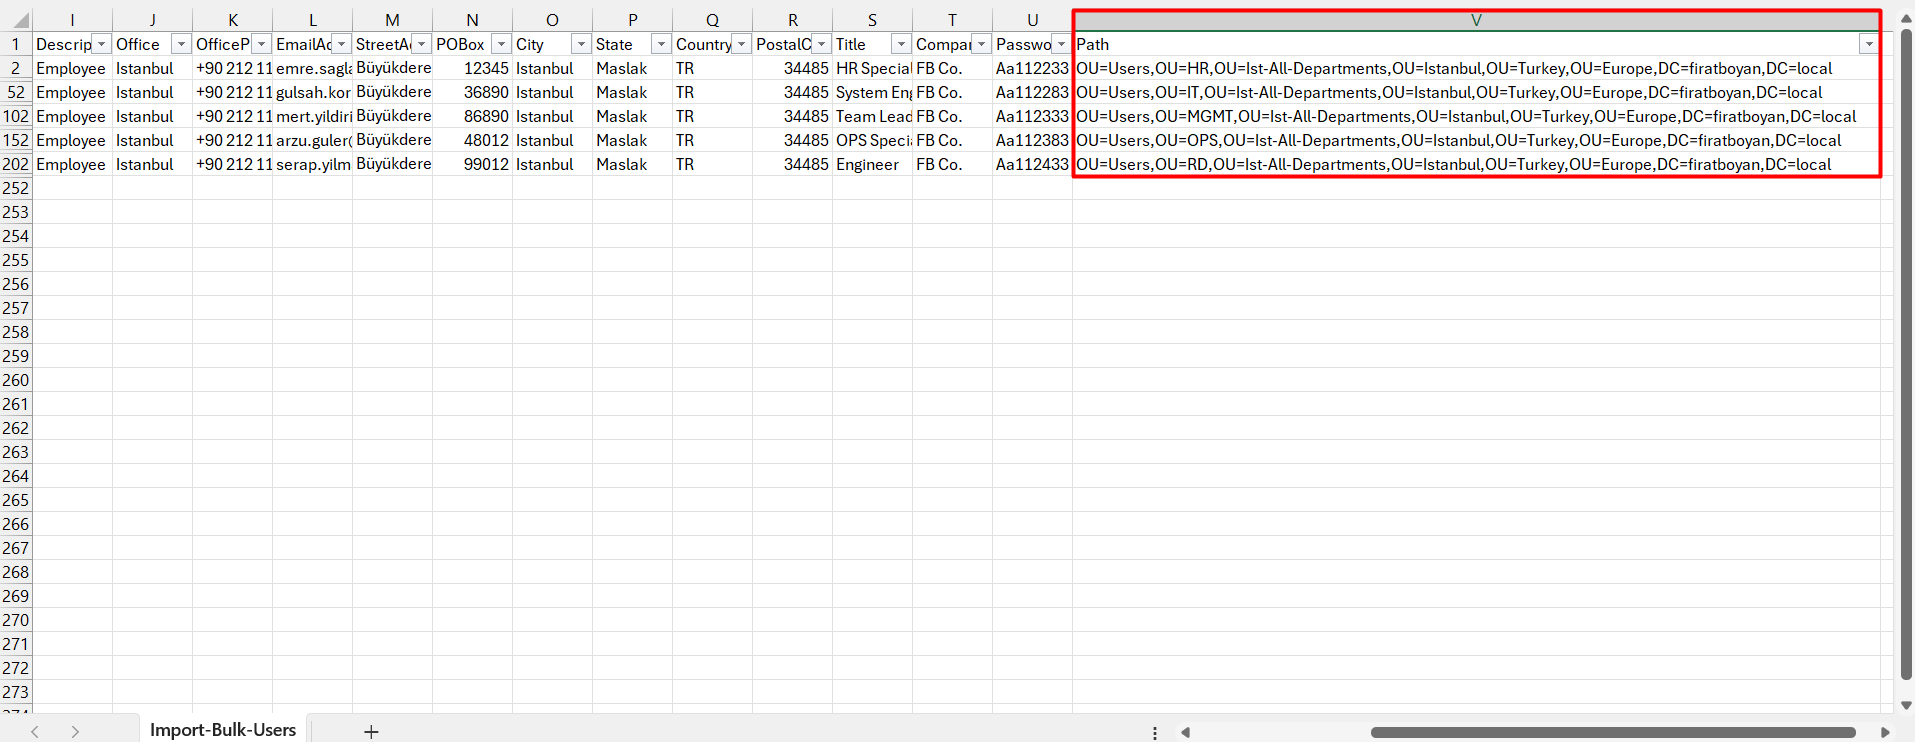
The DNs below, which the command returned, are the values that I will write in the Path column of my Excel file.
OU=Users,OU=IT,OU=Ist-All-Departments,OU=Istanbul,OU=Turkey,OU=Europe,DC=firatboyan,DC=local
OU=Users,OU=HR,OU=Ist-All-Departments,OU=Istanbul,OU=Turkey,OU=Europe,DC=firatboyan,DC=local
OU=Users,OU=RD,OU=Ist-All-Departments,OU=Istanbul,OU=Turkey,OU=Europe,DC=firatboyan,DC=local
OU=Users,OU=OPS,OU=Ist-All-Departments,OU=Istanbul,OU=Turkey,OU=Europe,DC=firatboyan,DC=local
OU=Users,OU=MGMT,OU=Ist-All-Departments,OU=Istanbul,OU=Turkey,OU=Europe,DC=firatboyan,DC=local
The functions of the parameters that I used in Command 3 and Command 4 are as follows.
|
Parameter |
Function |
Get-ADOrganizationalUnit |
The cmdlet that retrieves Organizational Unit objects in Active Directory. |
-SearchBase |
Sets the location where the search starts, in DN format. The search runs downwards from this location and does not go up to higher levels. |
-SearchScope OneLevel |
Returns only the objects directly under the SearchBase location. |
-SearchScope Subtree |
Scans the SearchBase location and all levels below it. This is the default value when SearchScope is not specified. |
-Filter * |
Applies no condition and returns all Organizational Units within the search scope. |
-Filter "Name -like 'Users*'" |
Returns only the Organizational Units within the search scope whose name starts with Users. |
| FT Name, DistinguishedName -A |
Shows the result as a table (Format-Table) with only the Name and DistinguishedName columns. -A is the short form of the -AutoSize parameter and adjusts the column widths to the content. |
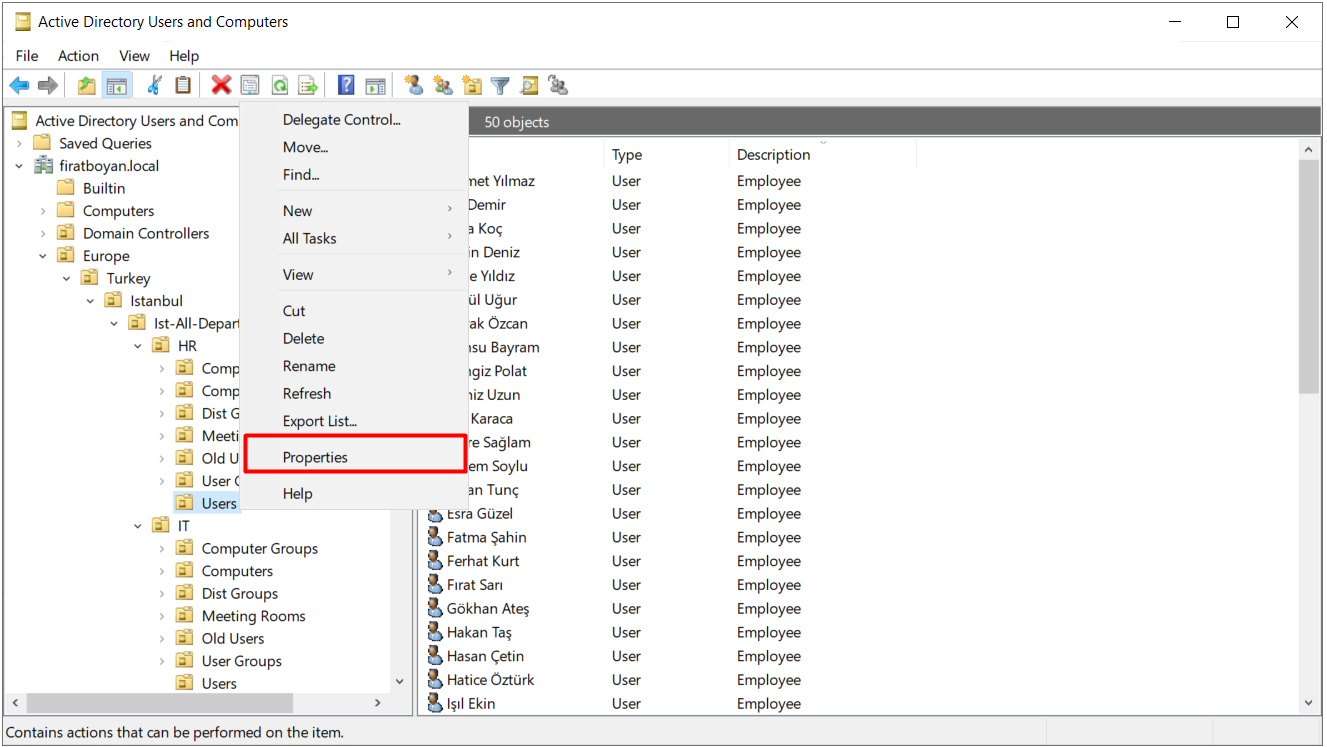
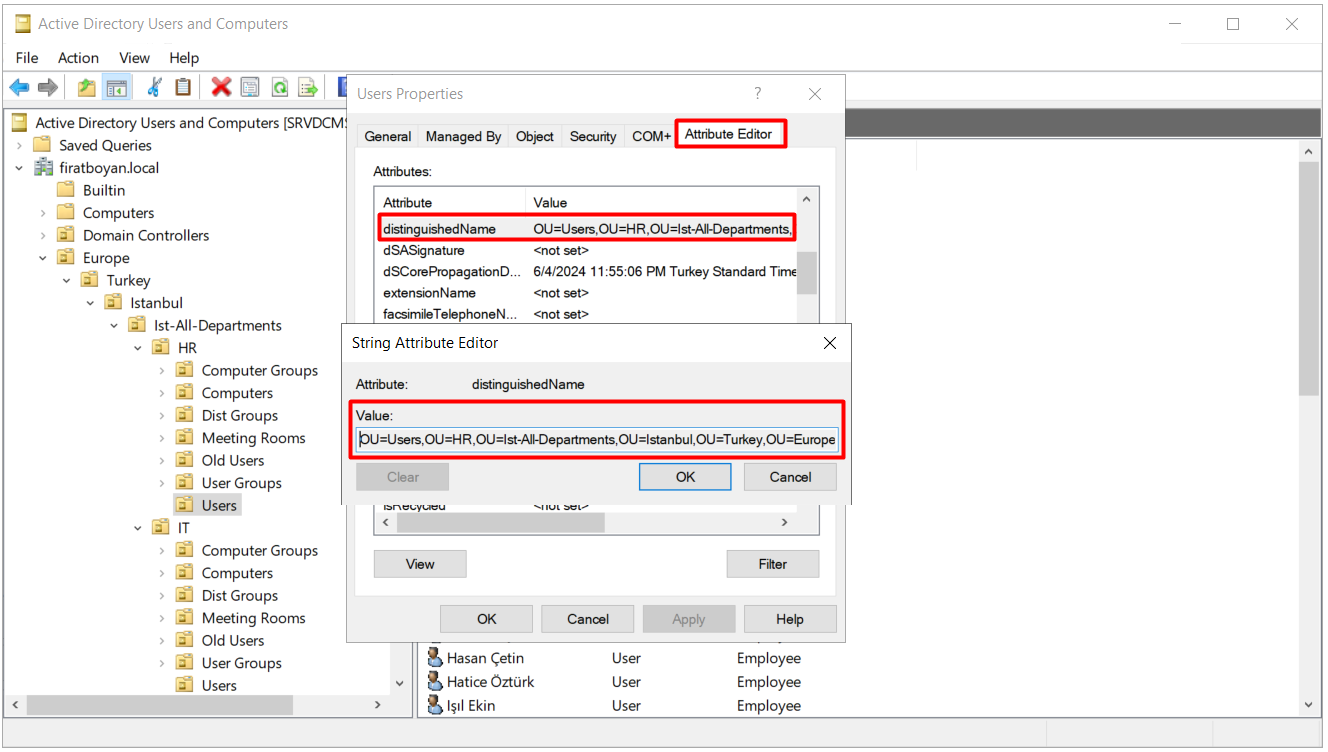
If you do not want to use PowerShell, you can get the same information from the graphical interface. Right-click the relevant Organizational Unit and select Properties. In the window that opens, the Attribute Editor tab contains the distinguishedName attribute, which shows the same value. For this tab to be visible, open the View menu in the Active Directory Users and Computers console and make sure that the Advanced Features option is enabled.
4- Preparing the CSV File
After I enter all the user information in the Import-Bulk-Users.xlsx file, I save the file in CSV UTF-8 format. The Import-Csv command that this script uses cannot read an XLSX workbook. It reads a plain-text CSV file and converts each row into an object whose property names are the headers.
I choose CSV UTF-8 specifically because of the Turkish characters. Import-Csv reads the file as UTF-8. When the file is saved as UTF-8, the letters ç, ğ, ı, İ, ö, ş, ü in user names are written to Active Directory correctly. If the file is saved with a different encoding, or if the code page it was saved with cannot represent these characters, a name such as "Şükrü Gökçe" can be written to the directory with corrupted characters.
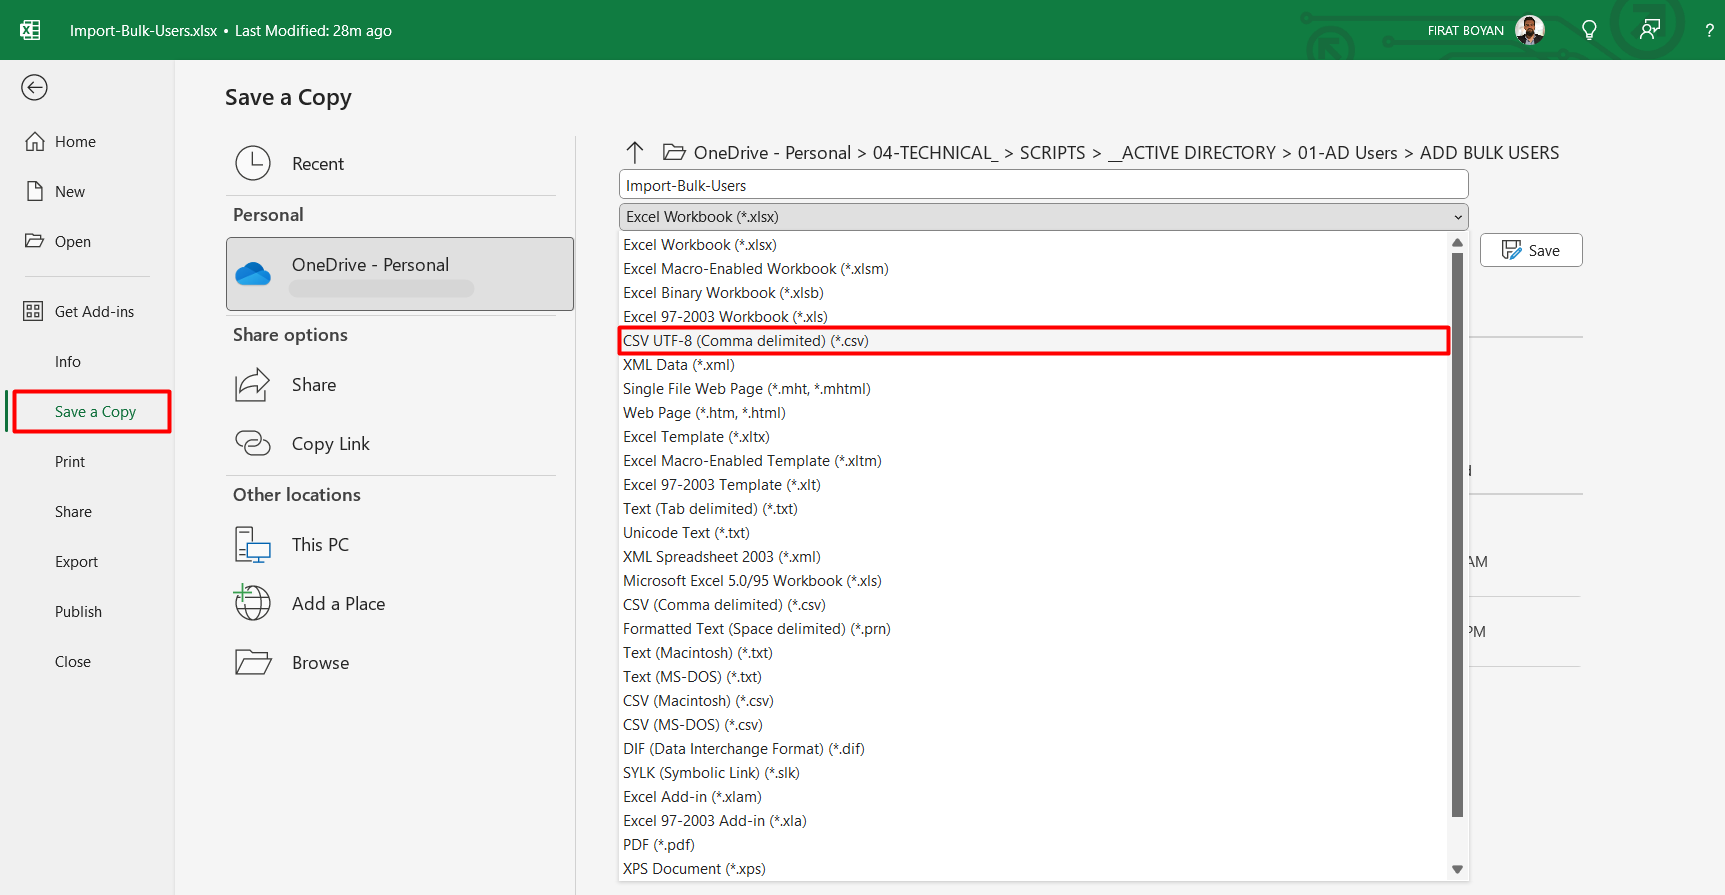
After saving, I recommend that you open the CSV file in Notepad and check which character separates the fields. The delimiter that Excel uses in a CSV file depends on the list separator in the Windows regional settings and on Excel's own separator options. With the default Turkish settings, a semicolon is usually seen instead of a comma. Import-Csv, however, expects a comma by default. If your file is separated with semicolons, the script reads the header row as a single column and cannot find any field. In this case, it is enough to edit the Import-Csv line in the script as shown below, so that it matches the actual delimiter in the file.
$Users = Import-Csv "C:\PS\BULK USERS\Import-Bulk-Users.csv" -Delimiter ';'
In the script file named Import-Bulk-Users.ps1, which reads the CSV file that I prepared, the headers in the CSV file are bound to the New-ADUser parameters through a mapping table. For each row, the script first checks whether a user with the same SamAccountName value exists. If not, it creates the user with the information in the CSV file. Apart from the headers, the script applies 2 settings to every user as fixed values. Enabled = $true requests that the account is created in the enabled state, and ChangePasswordAtLogon = $true forces the user to change the password at the next sign-in. When the user completes this change, the new password replaces the initial password in the CSV file.
If you change the name of a header that the script uses in the CSV file, you must also update its counterpart in the script. Otherwise, the related parameter stays empty. A column that you add to the CSV file and that has no counterpart in the script is ignored. For the new column to be written to the user, it must also be added to the mapping table.
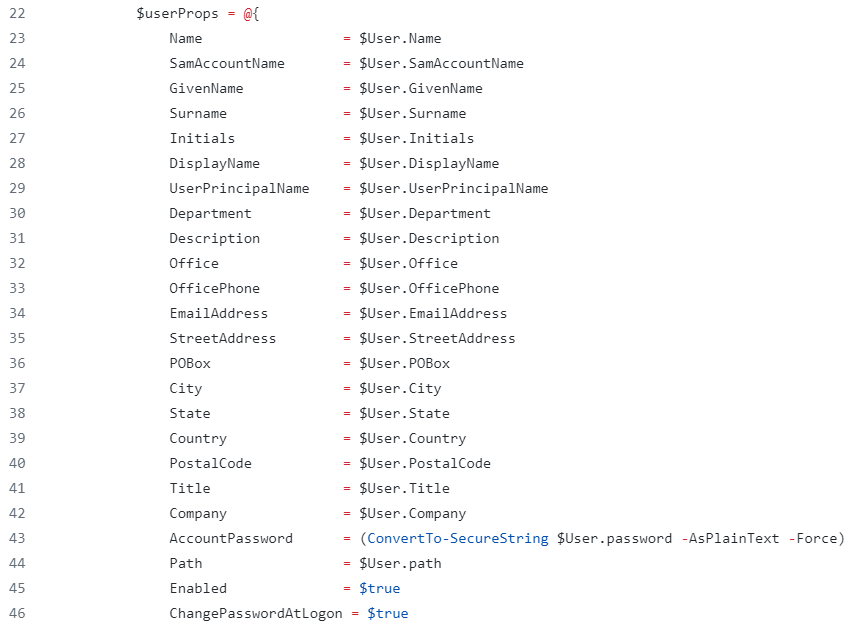
If the SamAccountName value contains a single quote ('), the existing user check in the script returns an error. For names of this kind, write the filter in the check line in the form -Filter {SamAccountName -eq $Username}.
5- Working with the Script File
Step 1 - Placing the Files
After the preparations are complete, I copy the files with the CSV and PS1 extensions to a suitable directory on the machine where I will run the script. I perform the operation on a domain controller and I saved the files under the C:\PS\BULK USERS directory. Working on a domain controller is not mandatory. The script can also be run from a management computer or a member server that has the ActiveDirectory module installed. In this case, the machine must be able to reach a writable domain controller in the target domain, and the account that runs the script must have the required directory permissions.
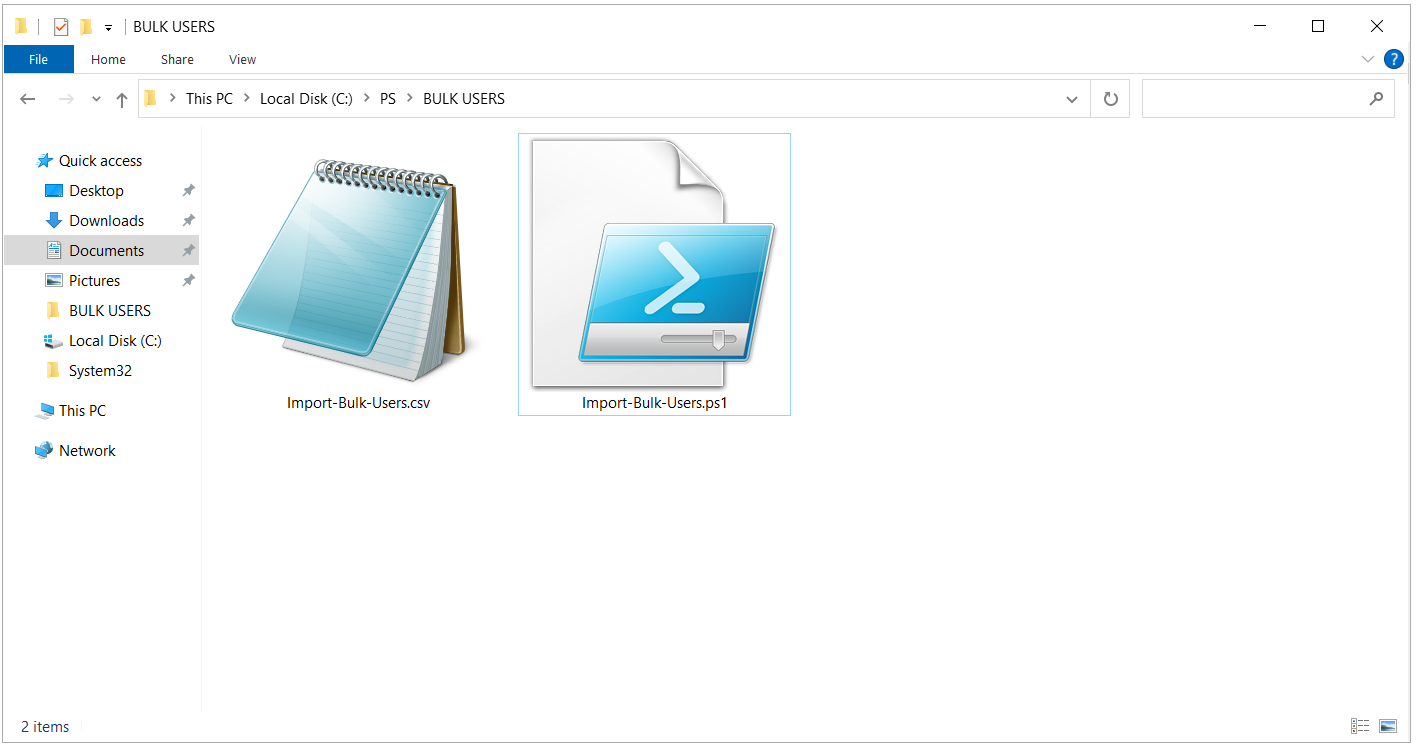
Step 2 - Editing the CSV Path in the Script
The script reads the CSV file from the path written in the Import-Csv line. If you copied the files to a different directory from mine, you must edit the path in this line to match your own directory exactly, including the name and extension of the CSV file. If the path is wrong, the script cannot find the file and no users are created.
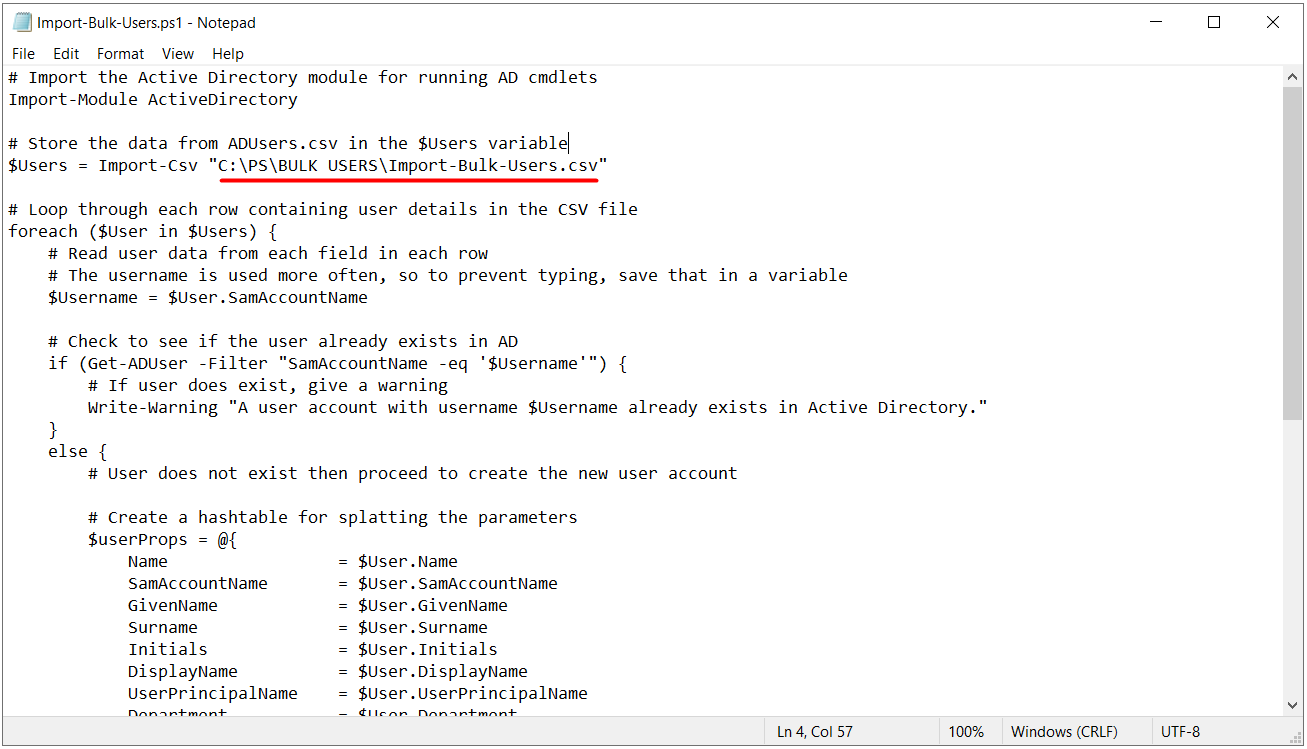
Step 3 - Running the Script
As the last step, I change to the directory that contains the files in the PowerShell console and call the script.
cd "C:\PS\BULK USERS"
.\Import-Bulk-Users.ps1
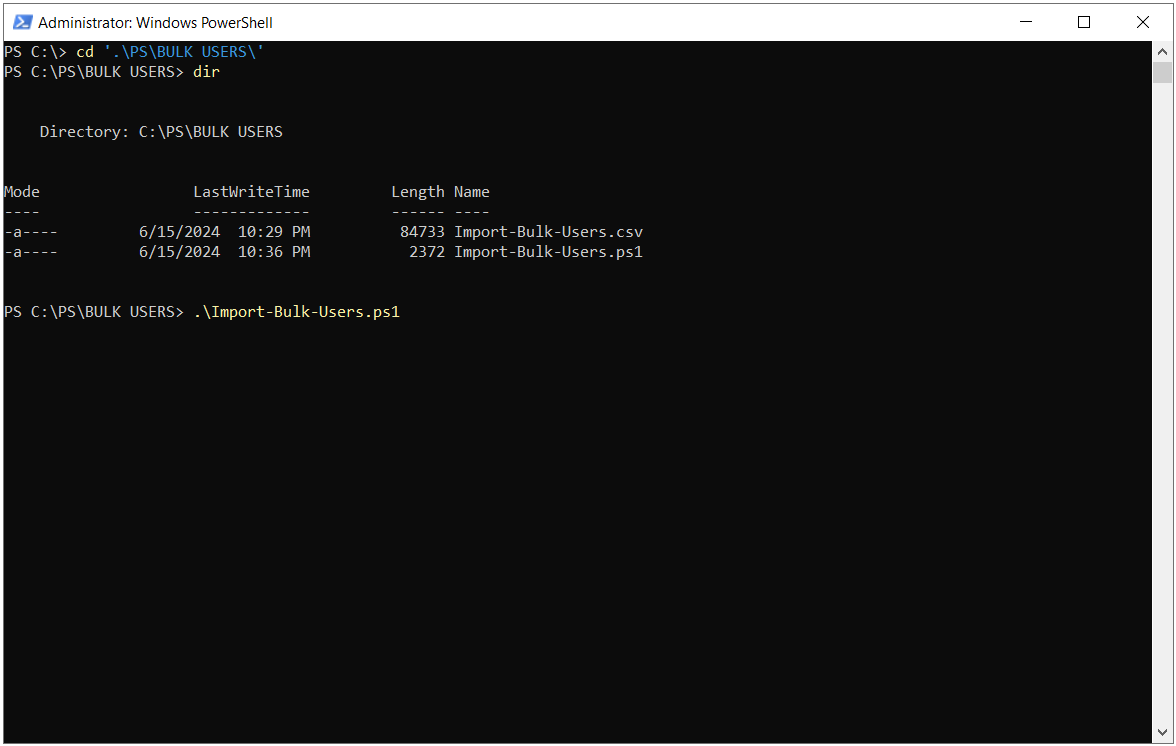
If the user objects in the CSV file are being created for the first time, the script writes an information message for each user, as in the example The user account firat.boyan is created.
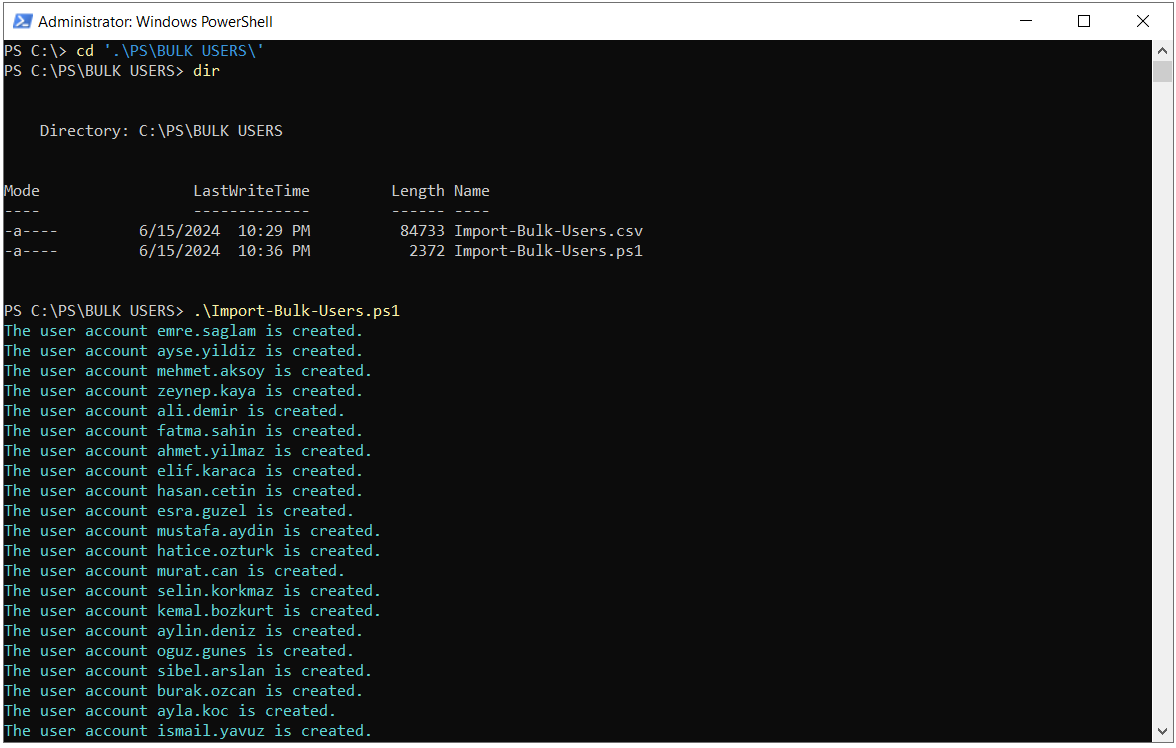
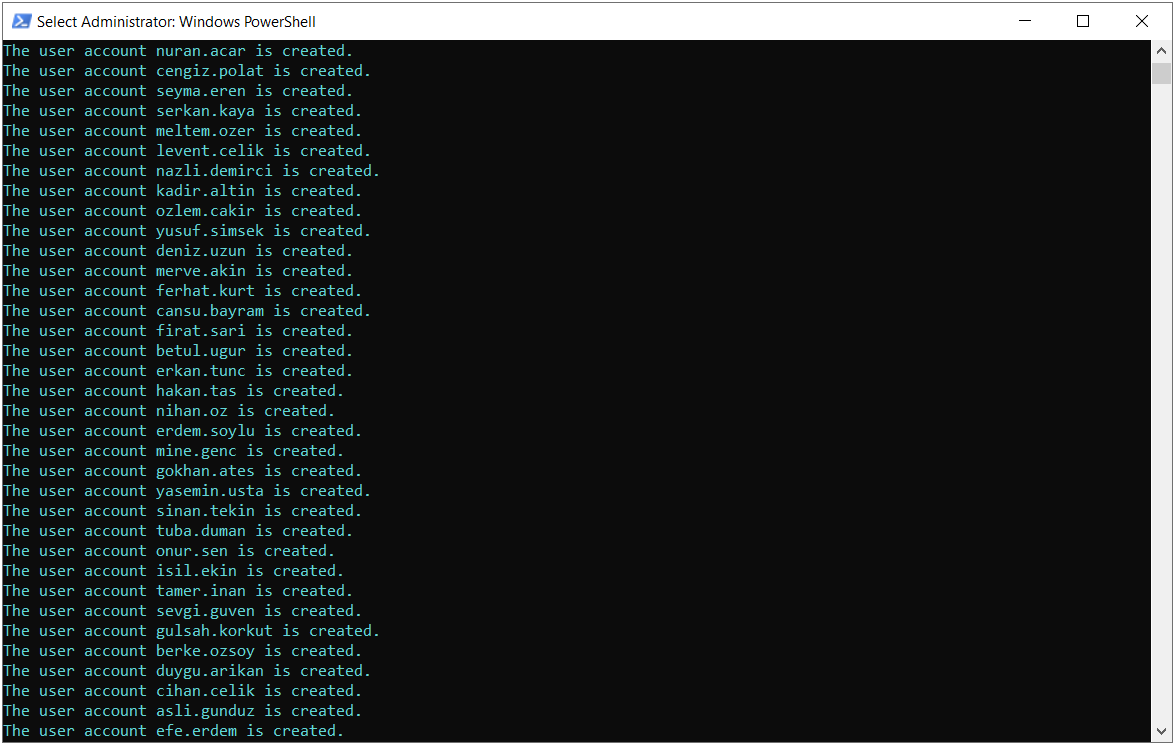
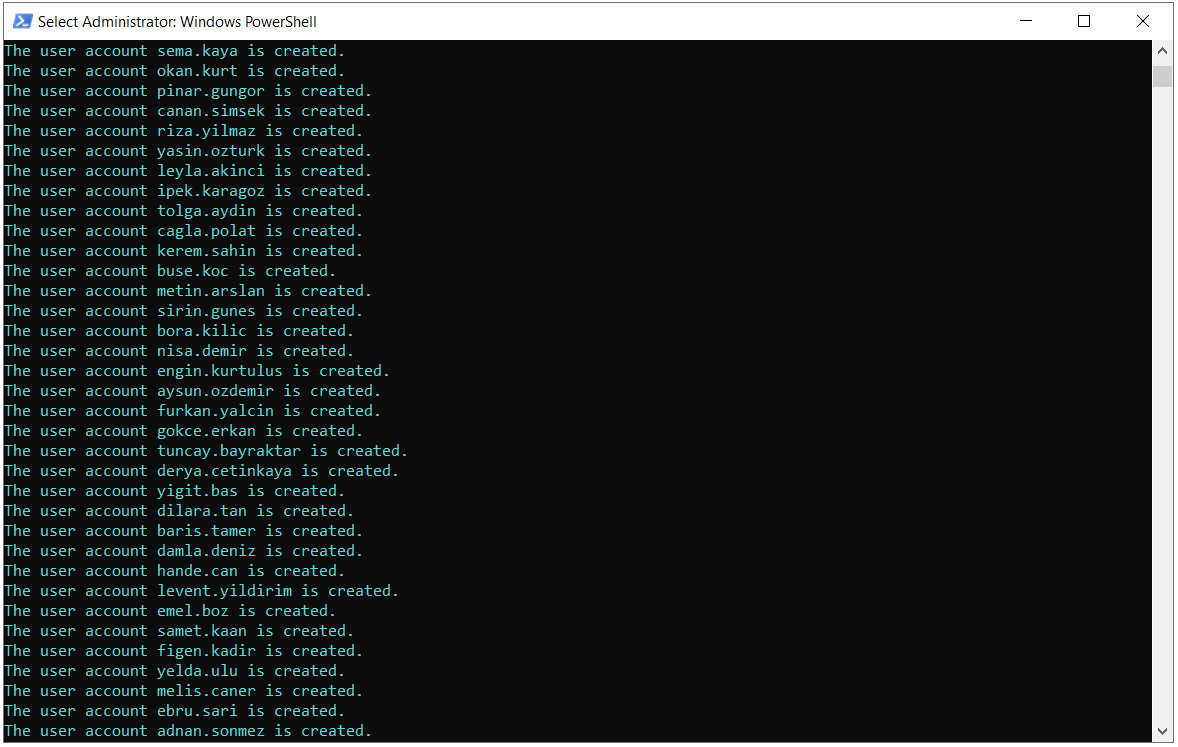
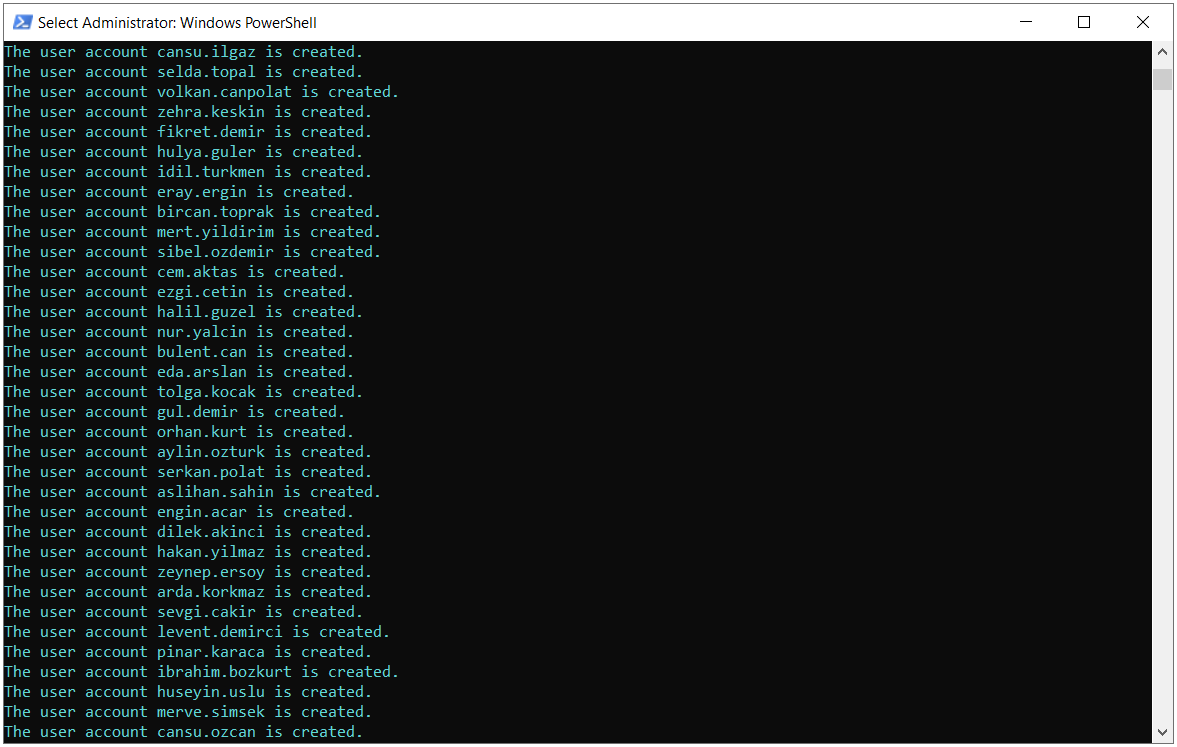
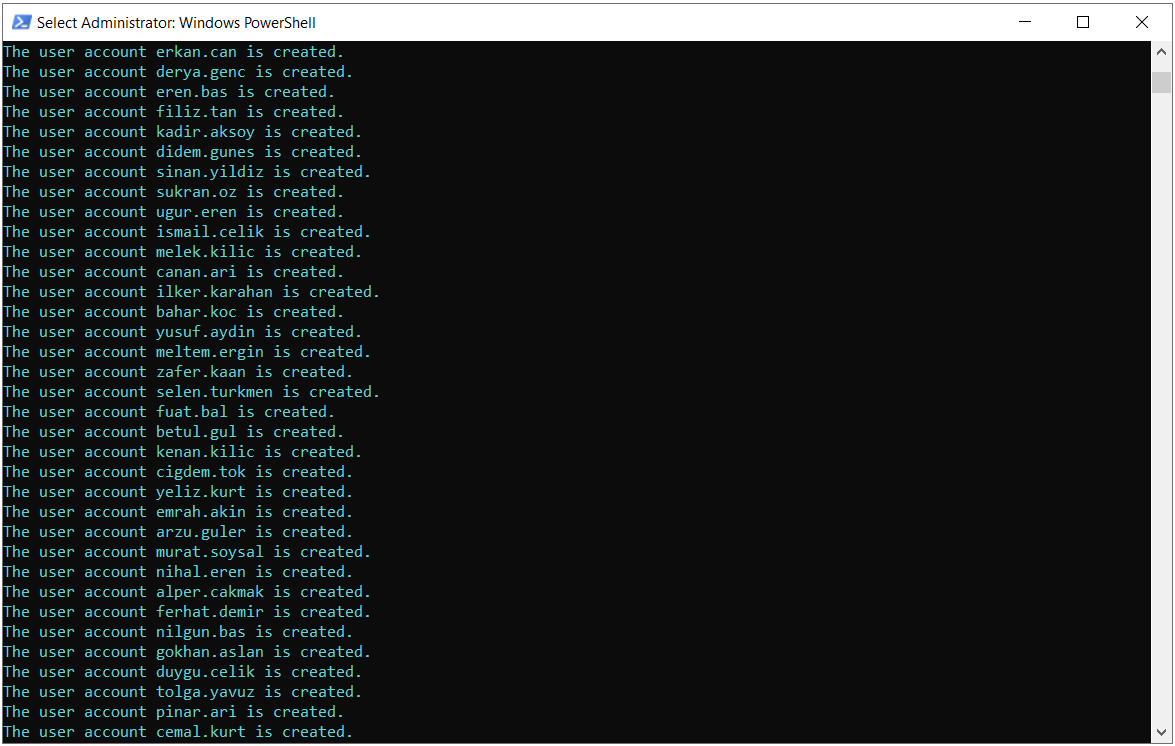
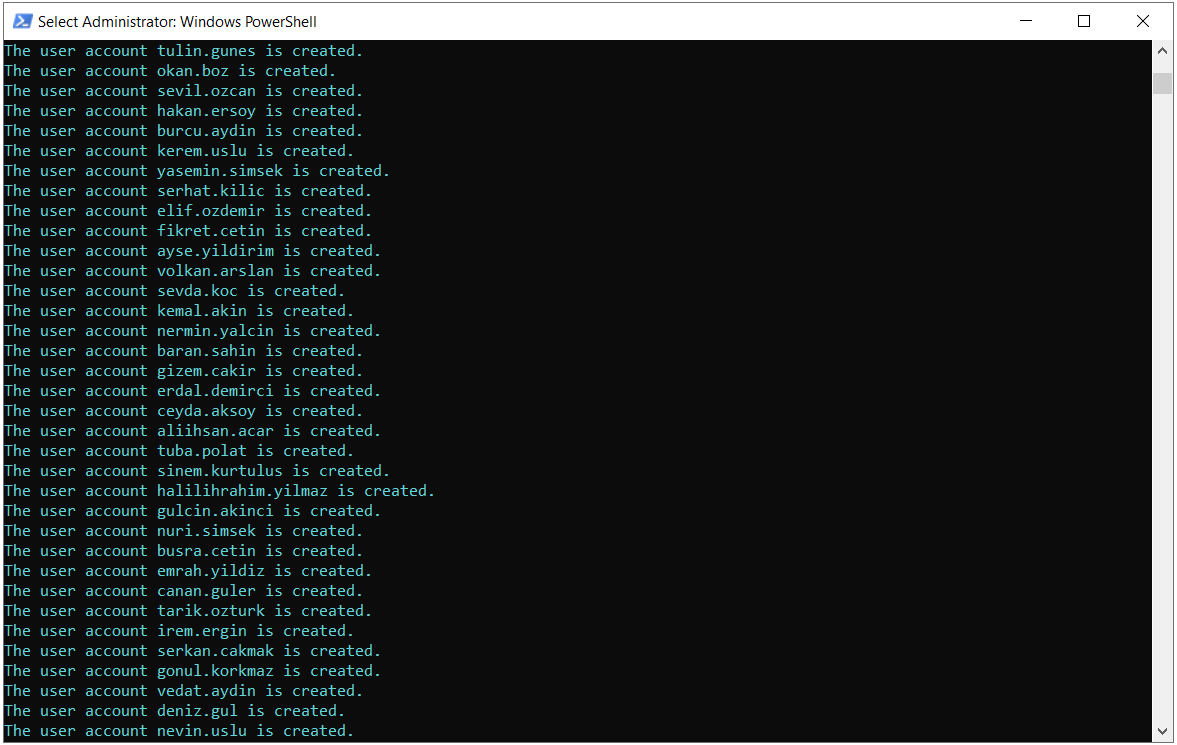
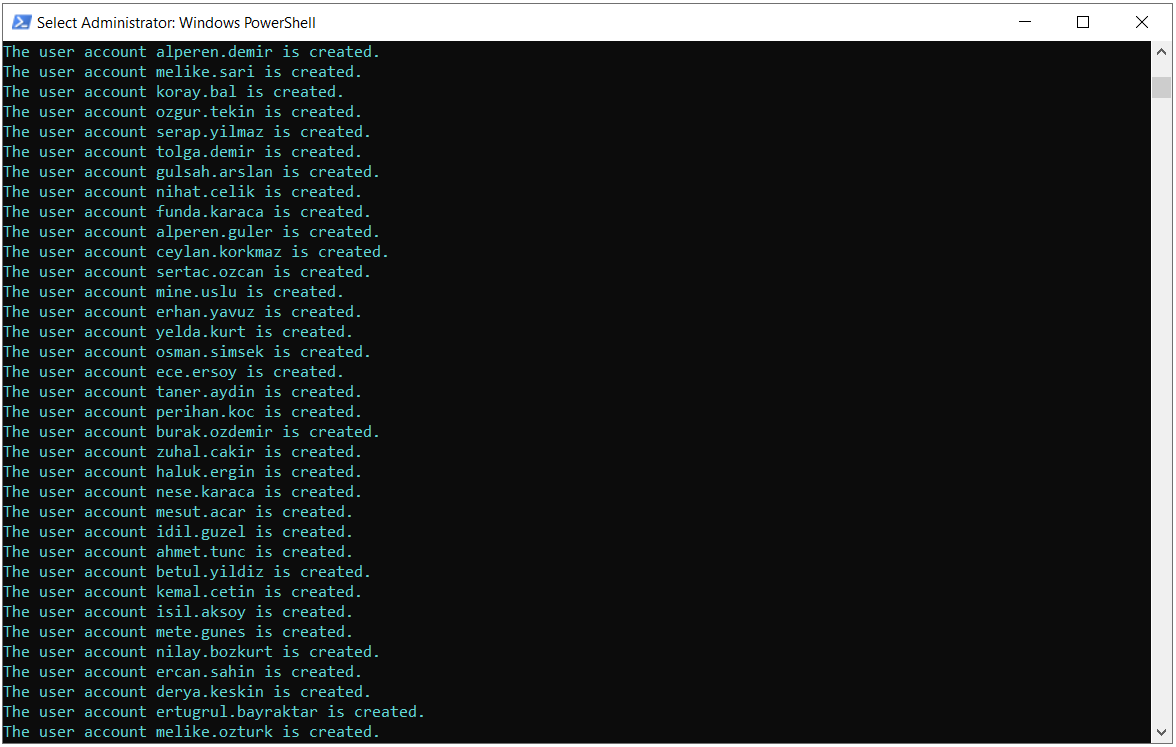
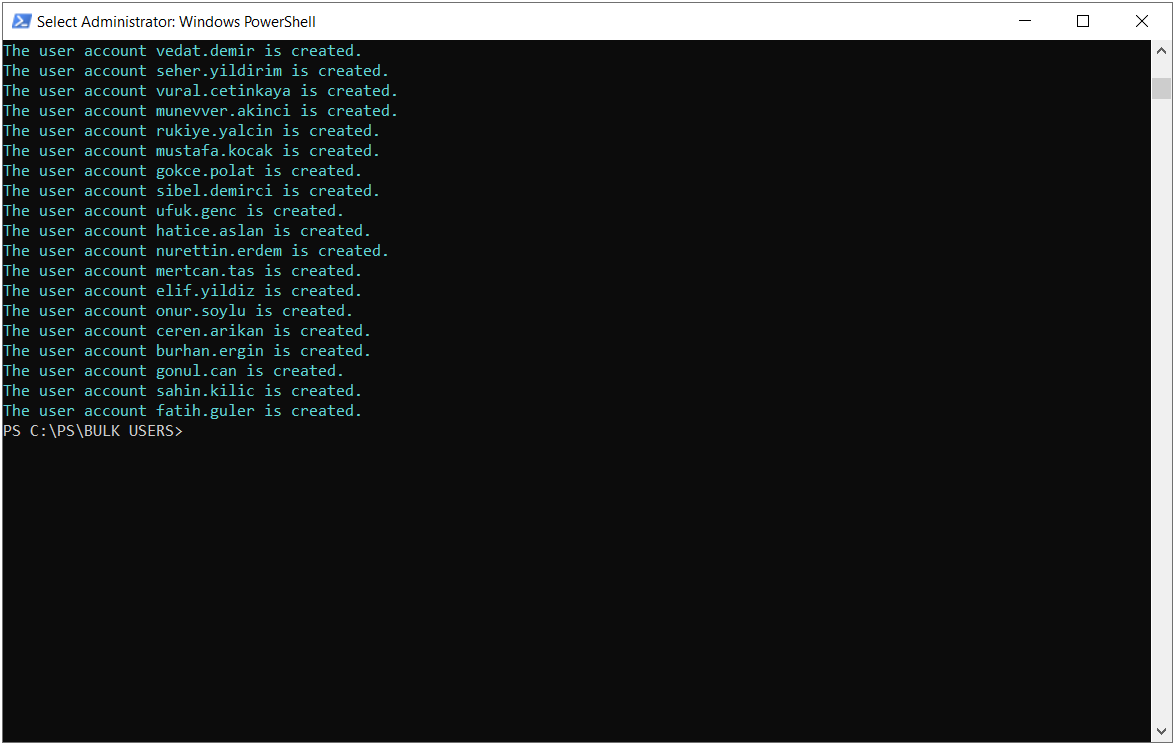
There is a behaviour that needs attention when reading the output. The script does not check the result of the New-ADUser command. Even if the command returns an error, the "is created" message is written when execution reaches the next line. The error lines in the console only show the problems reported during the operation, and the absence of an error line does not mean that the user was created correctly. To verify success, check the user's actual DN in the intended OU, the Enabled state and the properties that are expected to be written from the CSV file. The situations that can occur are as follows.
If the Path cannot be resolved, the user is not created and the error text is written. If the Path is valid but points to the wrong OU, no error occurs and the user is created in that OU.
If the Name is repeated in the same OU, the second object is not created.
If the UPN is already in use in the forest, on Windows Server 2012 R2 and later versions the domain controller that receives the write rejects the creation request if the UPN uniqueness check is enabled. Because this check can be disabled through dSHeuristics, UPN uniqueness must be ensured from the start instead of relying on the result. In addition to the duplicates in the CSV file, the UPNs that already exist in the forest must also be taken into account.
If the password does not comply with the password policy that applies to the user, the user is still created, but the account stays in the Disabled state because the password could not be set. For these accounts, I first verify that it is the correct account, set a valid password with Set-ADAccountPassword, enable the account with Enable-ADAccount and check that the setting to change the password at first sign-in is selected.
The "is created" message alone does not prove that the user was created correctly. Check the error lines in the output and verify the result in Active Directory.
Checkpoint
The "is created" message must be seen for new users and the WARNING message for existing users, and there must be no red error line in the output. The actual location and the Enabled state of the new accounts are verified in the next section.
6- Verification
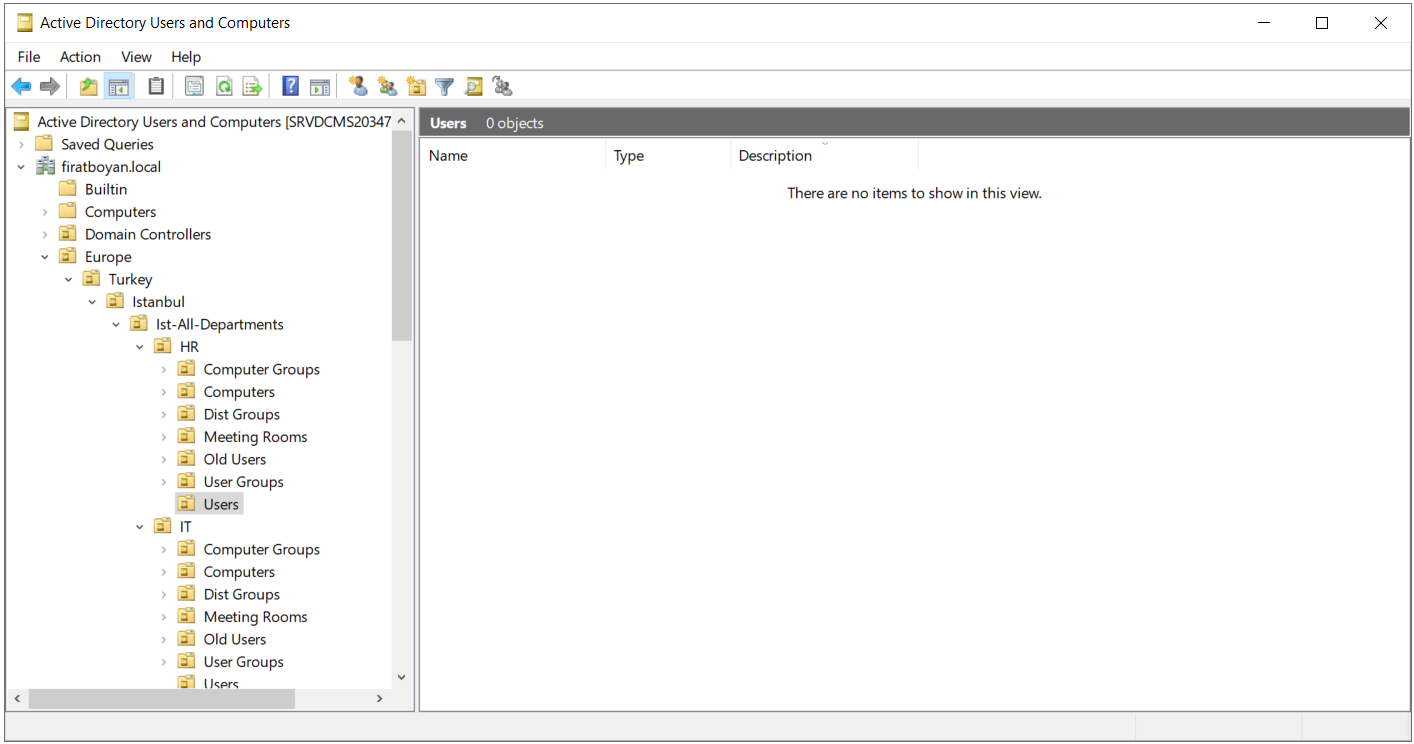
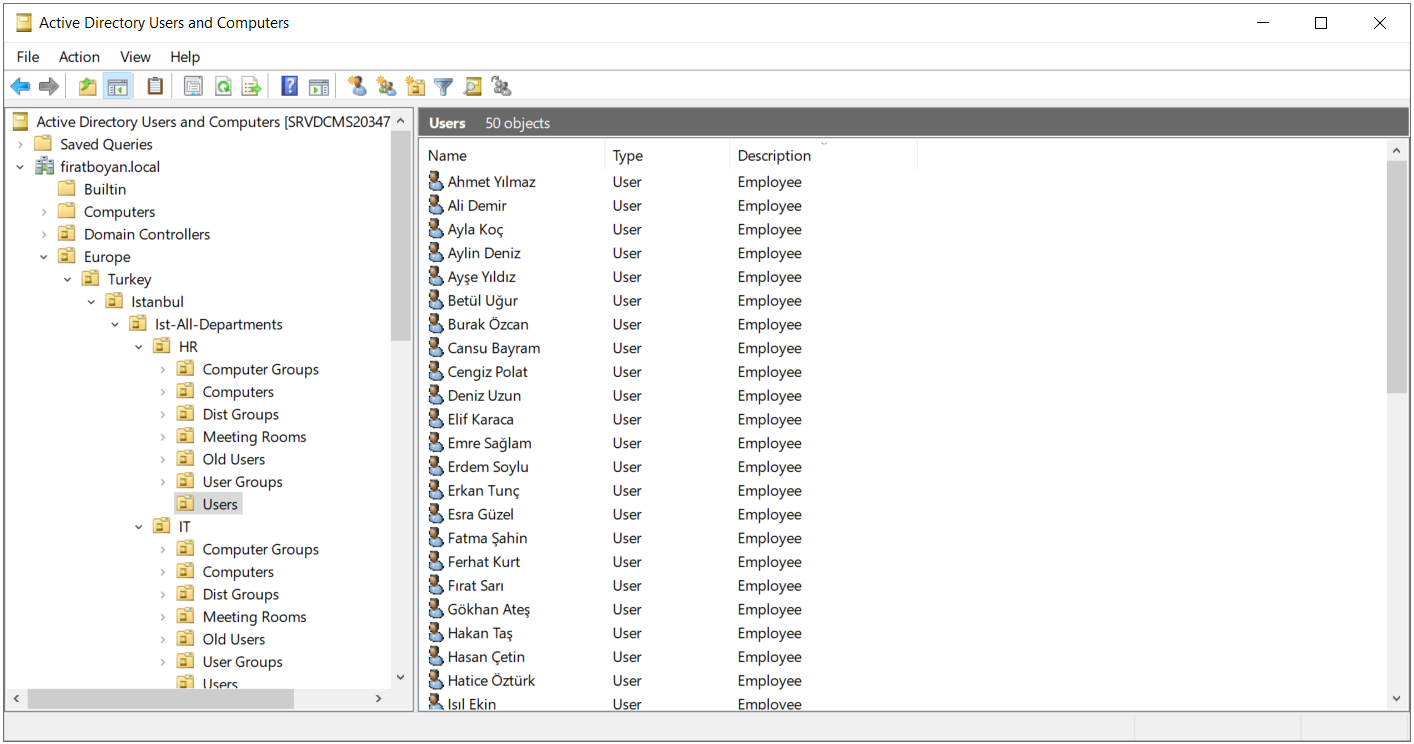
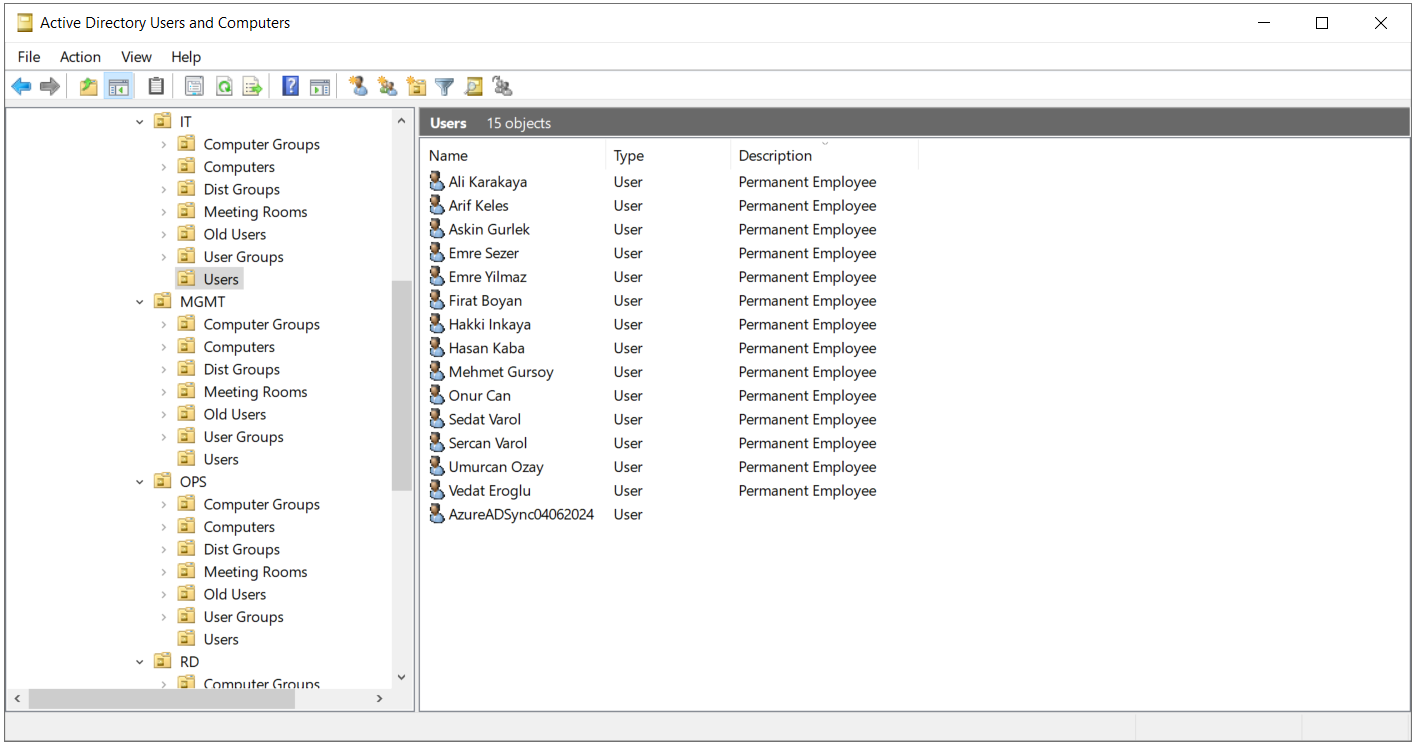
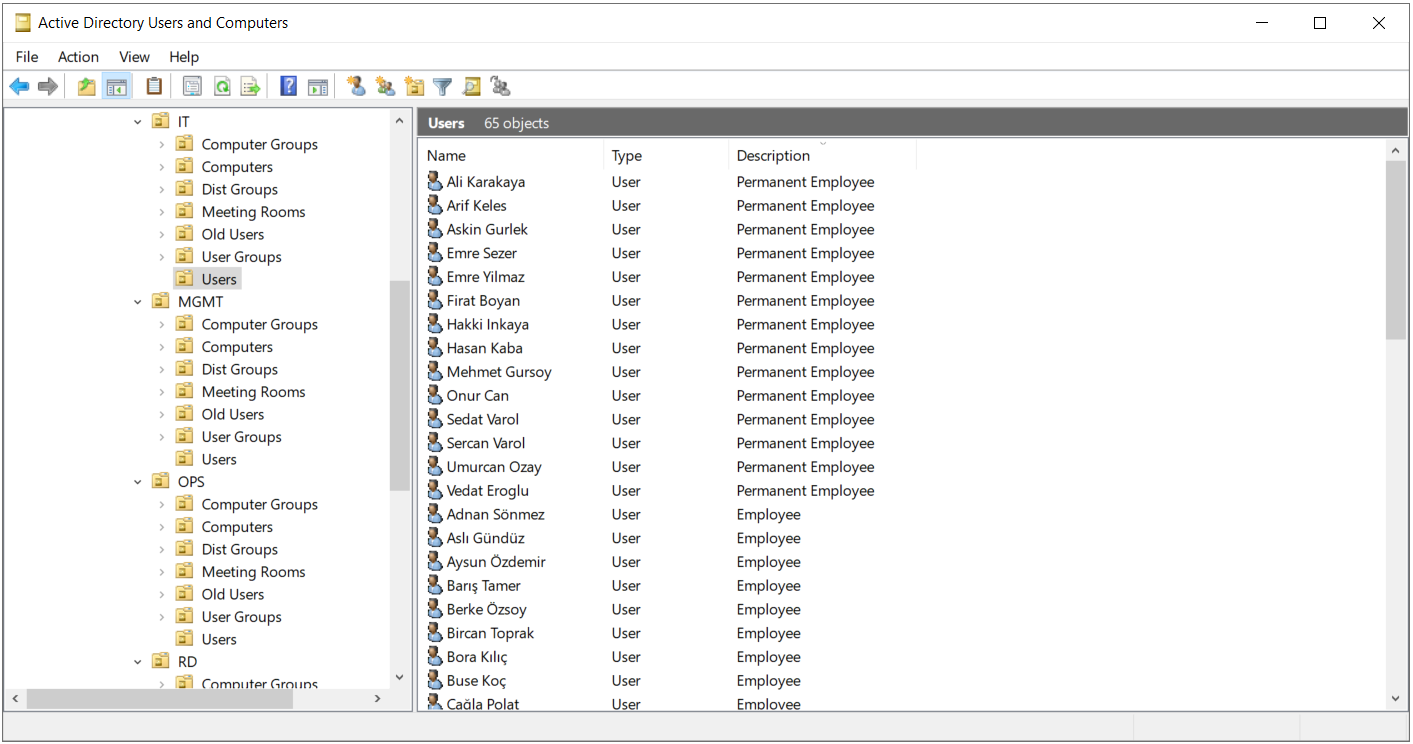
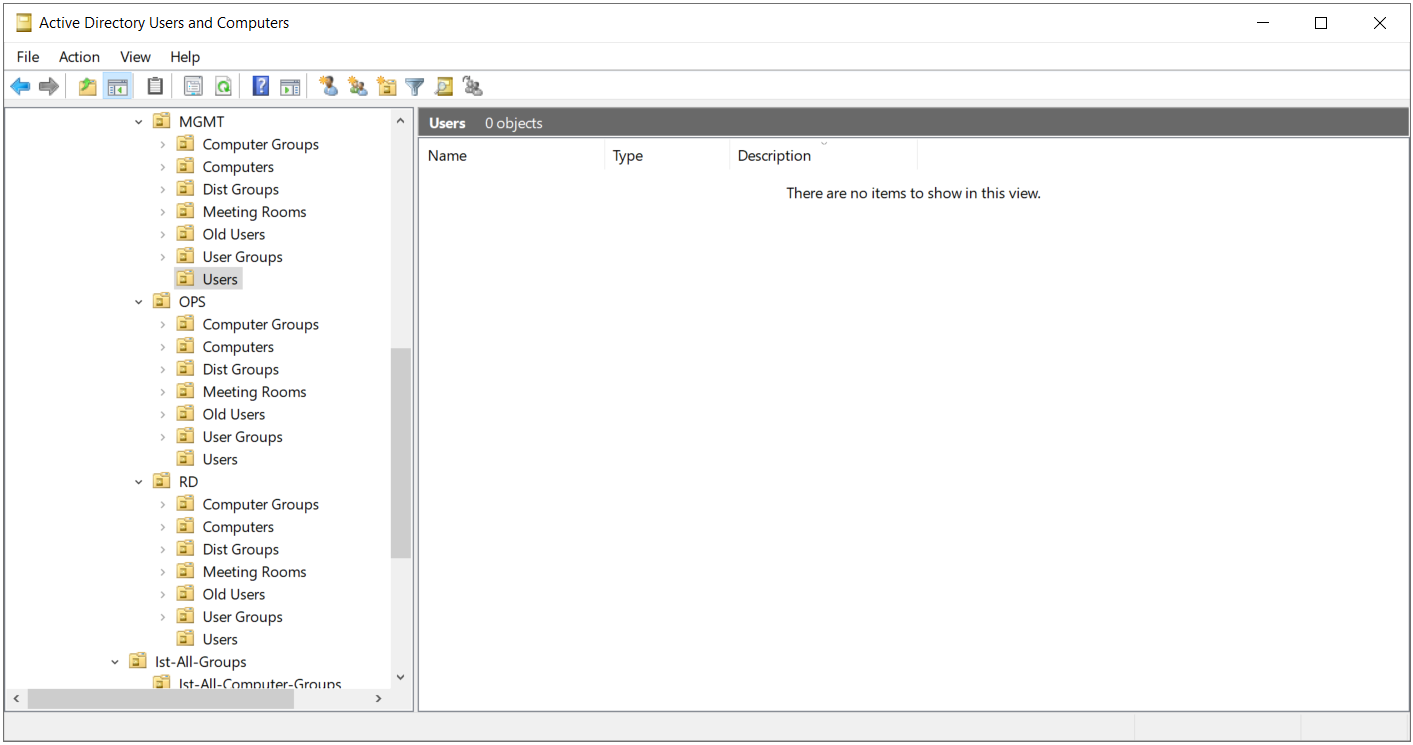
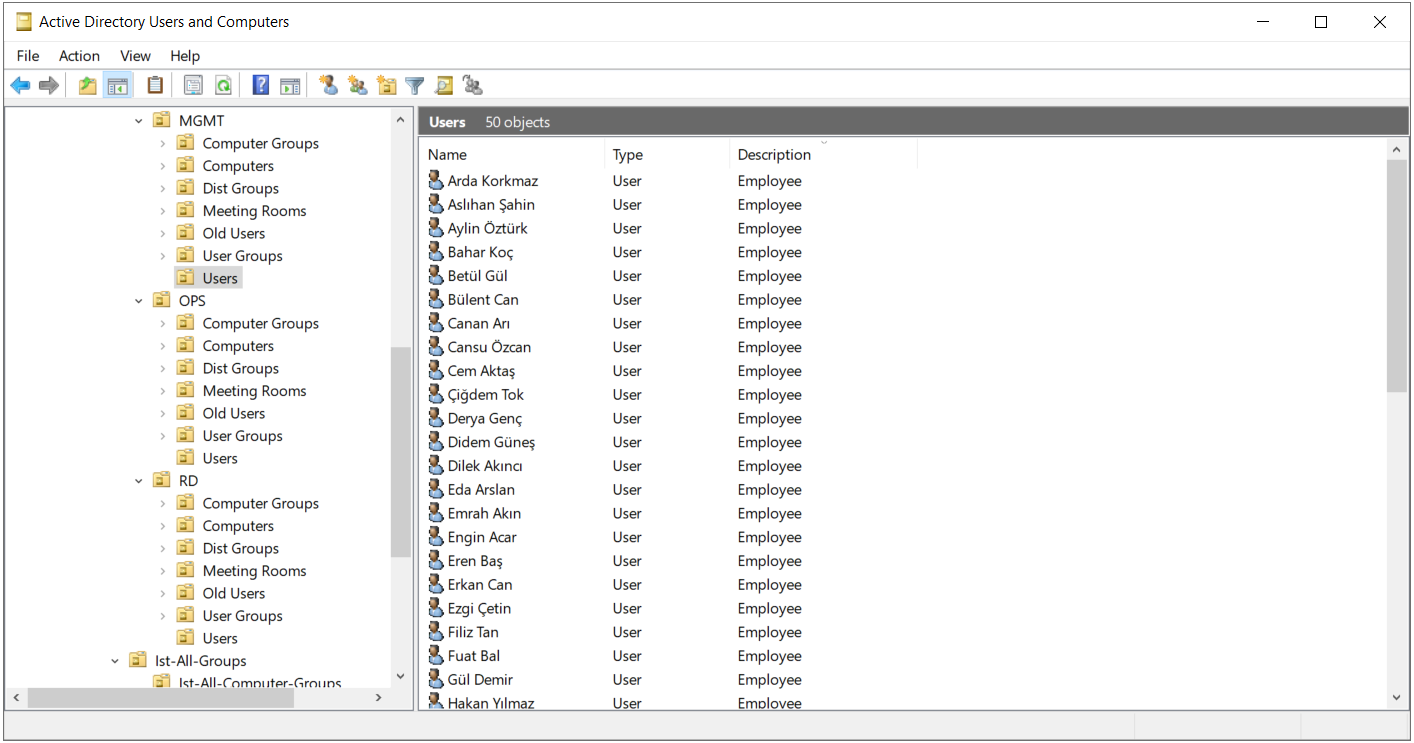
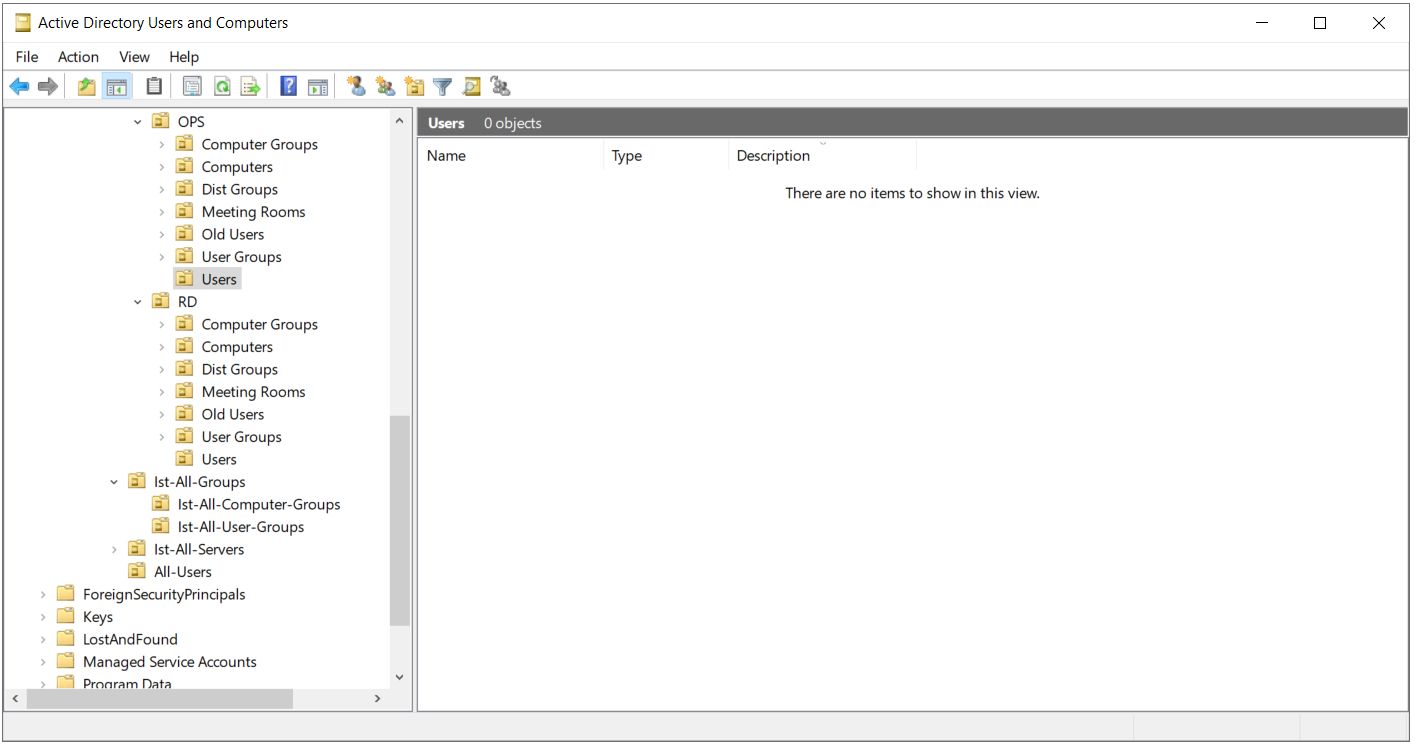
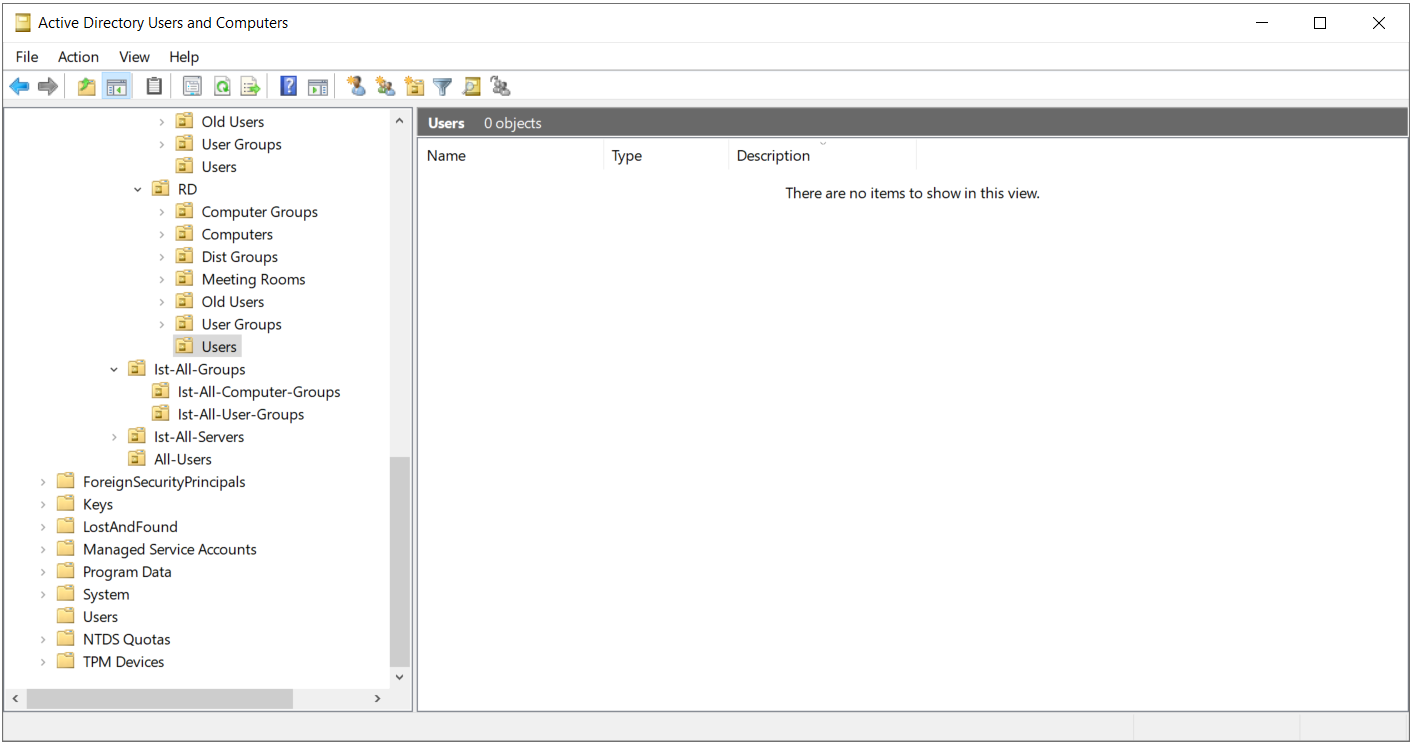
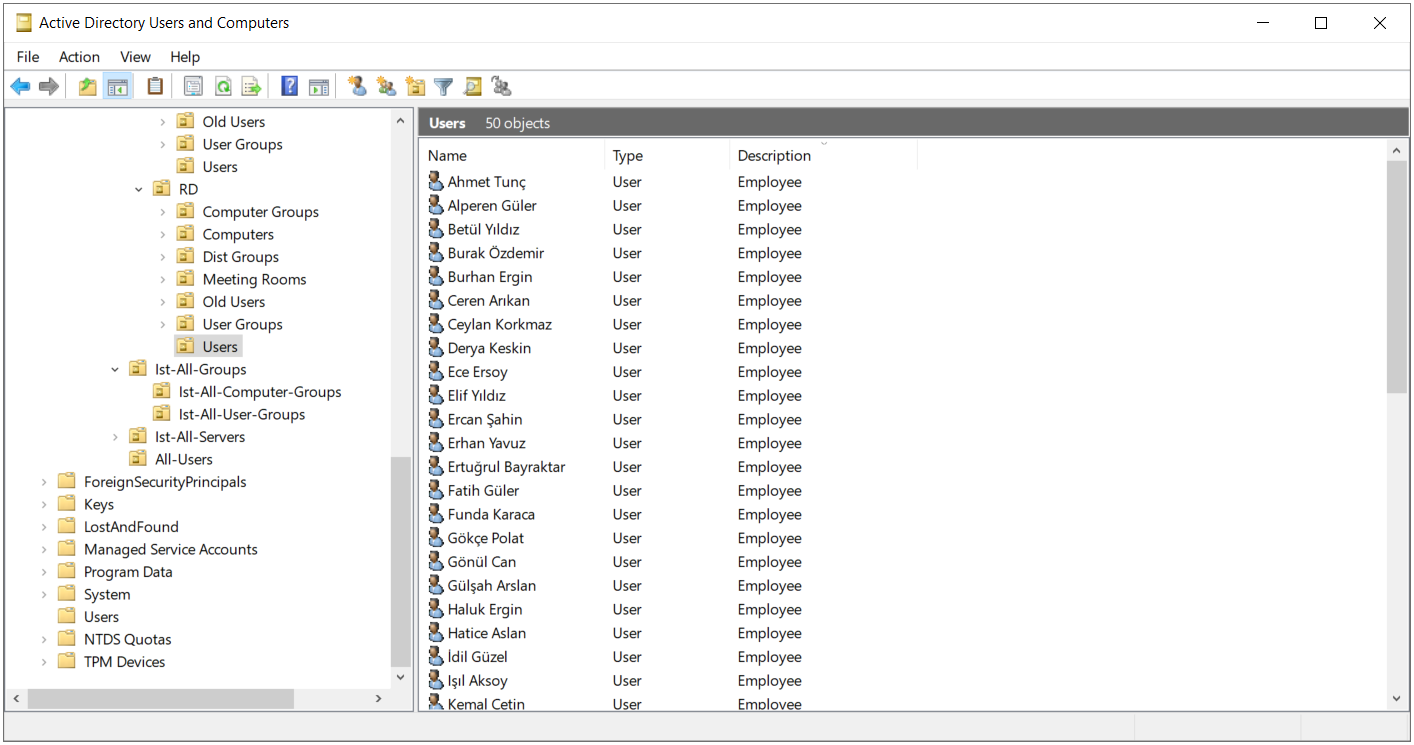
After the script completes, I open the relevant Organizational Units one after another in the Active Directory Users and Computers console and check that all the user objects in the CSV file were created. I look at 3 things here. Is each user in the OU of the department that I intended in the CSV file? Is the account enabled (Disabled accounts are identified by the down arrow on their icon)? When I open the user's properties, are the department, title, address and telephone details that I wrote in the CSV file shown on the relevant tabs?
HR department: OU=Users,OU=HR,OU=Ist-All-Departments,OU=Istanbul,OU=Turkey,OU=Europe,DC=firatboyan,DC=local
IT department: OU=Users,OU=IT,OU=Ist-All-Departments,OU=Istanbul,OU=Turkey,OU=Europe,DC=firatboyan,DC=local
MGMT department: OU=Users,OU=MGMT,OU=Ist-All-Departments,OU=Istanbul,OU=Turkey,OU=Europe,DC=firatboyan,DC=local
OPS department: OU=Users,OU=OPS,OU=Ist-All-Departments,OU=Istanbul,OU=Turkey,OU=Europe,DC=firatboyan,DC=local
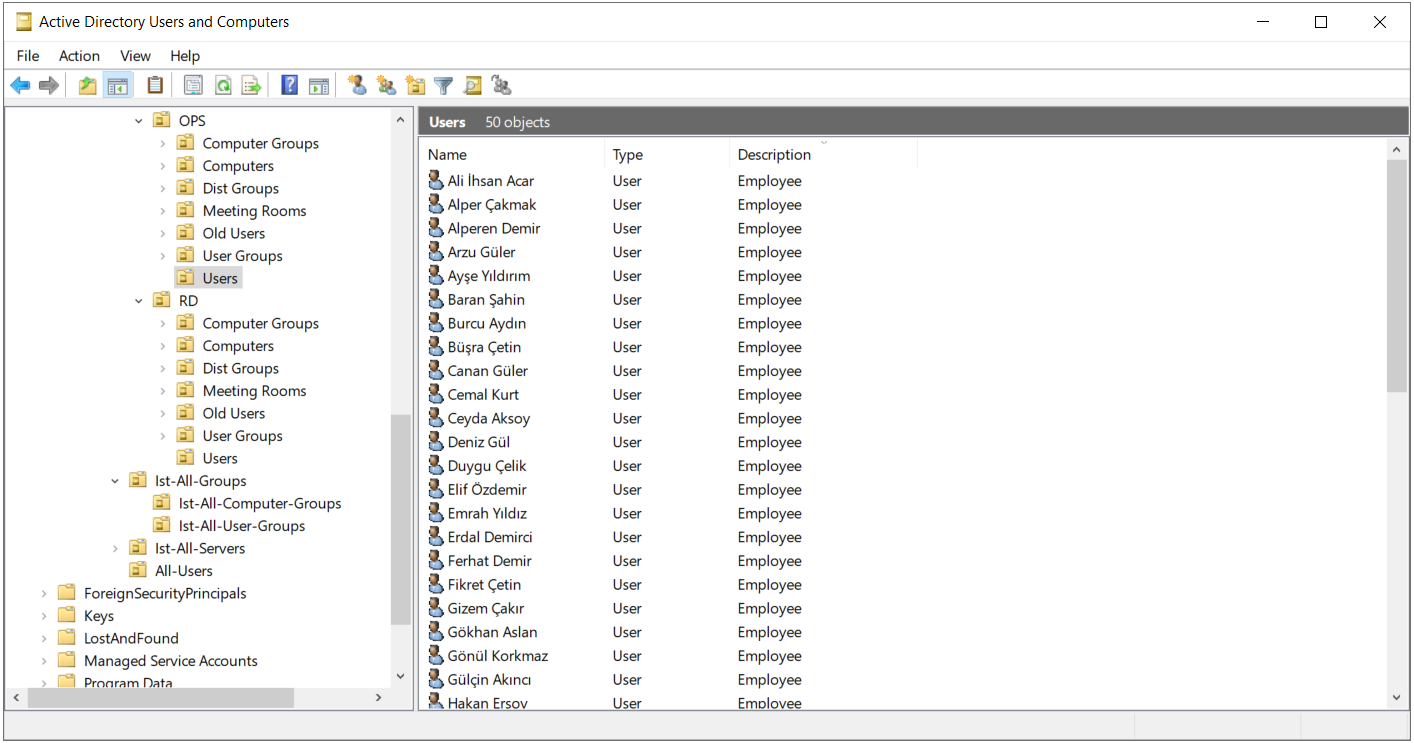
RD department: OU=Users,OU=RD,OU=Ist-All-Departments,OU=Istanbul,OU=Turkey,OU=Europe,DC=firatboyan,DC=local
7- Rerunning and Rolling Back
When I run the script a second time with the same CSV file, the existing users are not created again. For each row, the script first searches Active Directory for the SamAccountName value, and if the user already exists, it skips that row and writes a warning as in the example WARNING: A user account with username firat.boyan already exists in Active Directory. If you wish, you can change these notification texts in the script to Turkish.
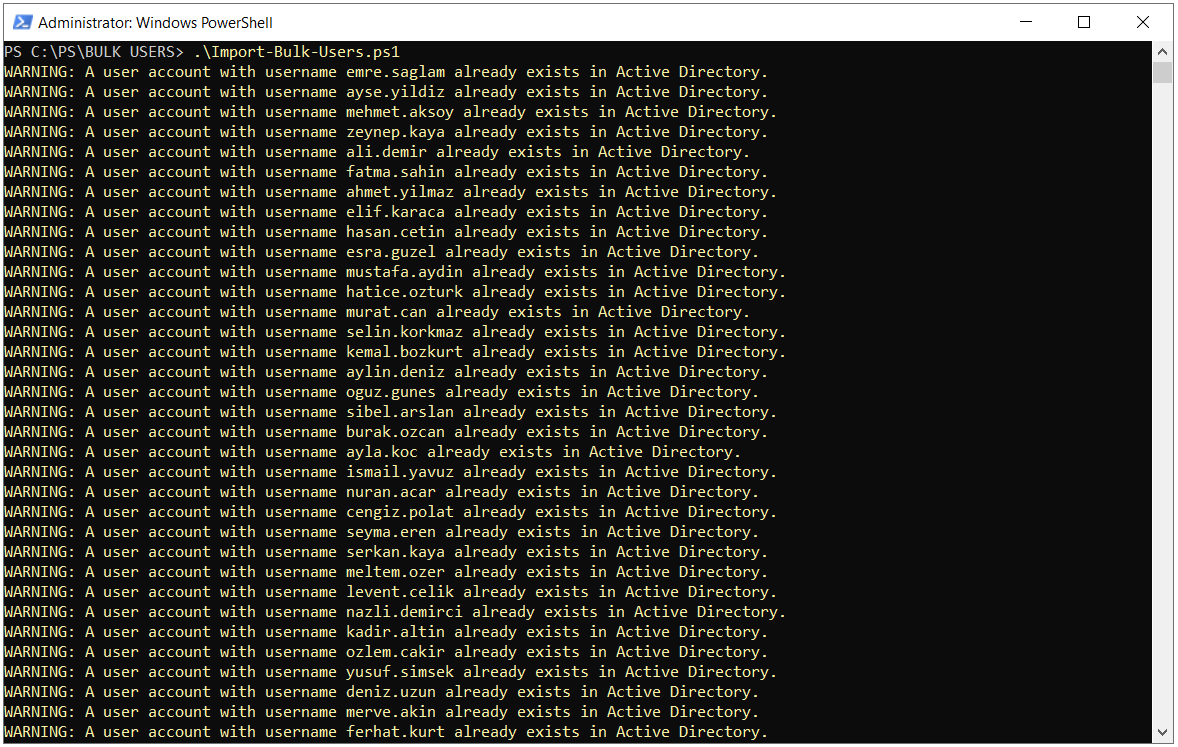
This behaviour has 3 practical consequences.
Adding new rows is safe. When I add new users to the CSV file and run the script again, only the new users are created.
For rows that return an error, the method depends on whether the user was created. If the user was not created at all, it is enough to correct the row in the CSV file and run the script again. For an account that was created as Disabled because its password was rejected, however, running the script again does not help. The script finds the same SamAccountName value and skips the row. These accounts must be corrected manually, as I described under the heading Step 3 - Running the Script.
The script does not update existing users. Changing the department or title of a previously created user in the CSV file and running the script again does not change the object in Active Directory. Changes to existing users must be made separately with Set-ADUser.
It is possible to delete users that were created in the wrong OU or with incorrect information, correct the CSV file and then run the script again. However, the following must be remembered. A user that is deleted and created again with the same name is a new object for Active Directory and receives a new SID. If the user was added to a group or granted permission to a resource in the meantime, these assignments are not carried over to the new object. For this reason, for errors noticed after the users have started to be used, moving the object to the correct OU or correcting the relevant attribute is a better method than deleting the object.
This article covered the process of creating users in bulk in Active Directory from end to end, from the data file prepared in Excel to running the script. It explained how the Excel headers map to the New-ADUser parameters and the LDAP attributes, and the scope within which the Name, SamAccountName and User Principal Name (UPN) values must be unique.
I showed how I use Get-ADOrganizationalUnit to list the Distinguished Name (DN) that is written in the Path column so that the users are created in the correct location, and why the Turkish characters and the delimiter must be checked when converting the data to CSV UTF-8 format. I then ran the PowerShell script and verified the accounts in the relevant Organizational Units.
In a bulk user creation operation, the script applies exactly what is written in the data file and does not check the result itself. A value that does not comply with the password policy leaves the account Disabled, a Path that cannot be resolved prevents the user from being created, and a Path that is valid but wrong creates the user in another OU without an error. For this reason, checking the data before running the script, and verifying the location and the Enabled state of the accounts after running it, removes the need to correct hundreds of accounts individually later.
I hope you find it useful...
Feel free to share your thoughts and questions about this article in the comments below. Every contribution helps the content reach more people and makes for a more useful discussion.